Vortex Optics RECON R/T 15X50 - WITH VMS MONOCULAR User Manual
Page 3
4
5
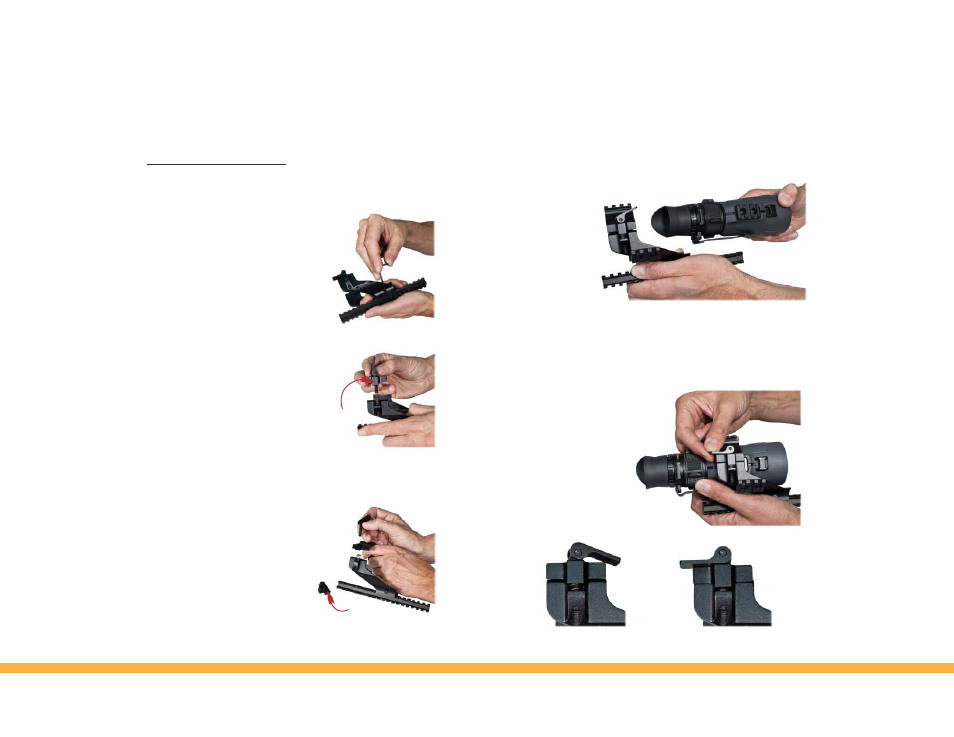
Bracket Clamp
Bracket
Clamp
Setting Up the VMS Kit
Install the VMS lower U-bracket onto the long Picatinny rail,
positioning as desired. To attach,
loosen the mounting screw and engage
the clamp on desired rail slot. Be
sure the clamp and crossbolt are fully
engaged and retighten screw.
U-bracket
If desired, upper U-bracket may be installed on top of lower
U-bracket. Upper U-bracket is only
necessary for top-mounted accessories.
To install, unscrew flip levers from
lower U-bracket (turn counter-
clockwise) until they can be
removed. Be careful to leave small
springs in place when removing screws.
Remove the bracket clamps from flip lever screws
(bracket clamps will not be used
with upper U-bracket).
Install flip lever screws through
holes in upper U-brackets. Install
screws through springs and down
into threads on lower U-bracket.
Tighten screws until finger tight,
and then back off approximately two turns.
Slide Recon R/T into bracket.
Release the flip levers on the lower VMS U-bracket and slide
the Recon into
bracket. The
Recon can be
positioned in
U-bracket in
either direction.
Be sure the rail
segments and
grooves are engaged and flip levers down to locked position,
clamping the Recon in place. To adjust clamping pressure, the
flip levers can be turned in or out.
Lever in released position.
Lever in locked position.
Flip levers to locked position.