Using the avidea remote – Boston Acoustics TSU501 User Manual
Page 29
SETUP AND USE GUIDE
27
3 Tap Label on the Mode screen.
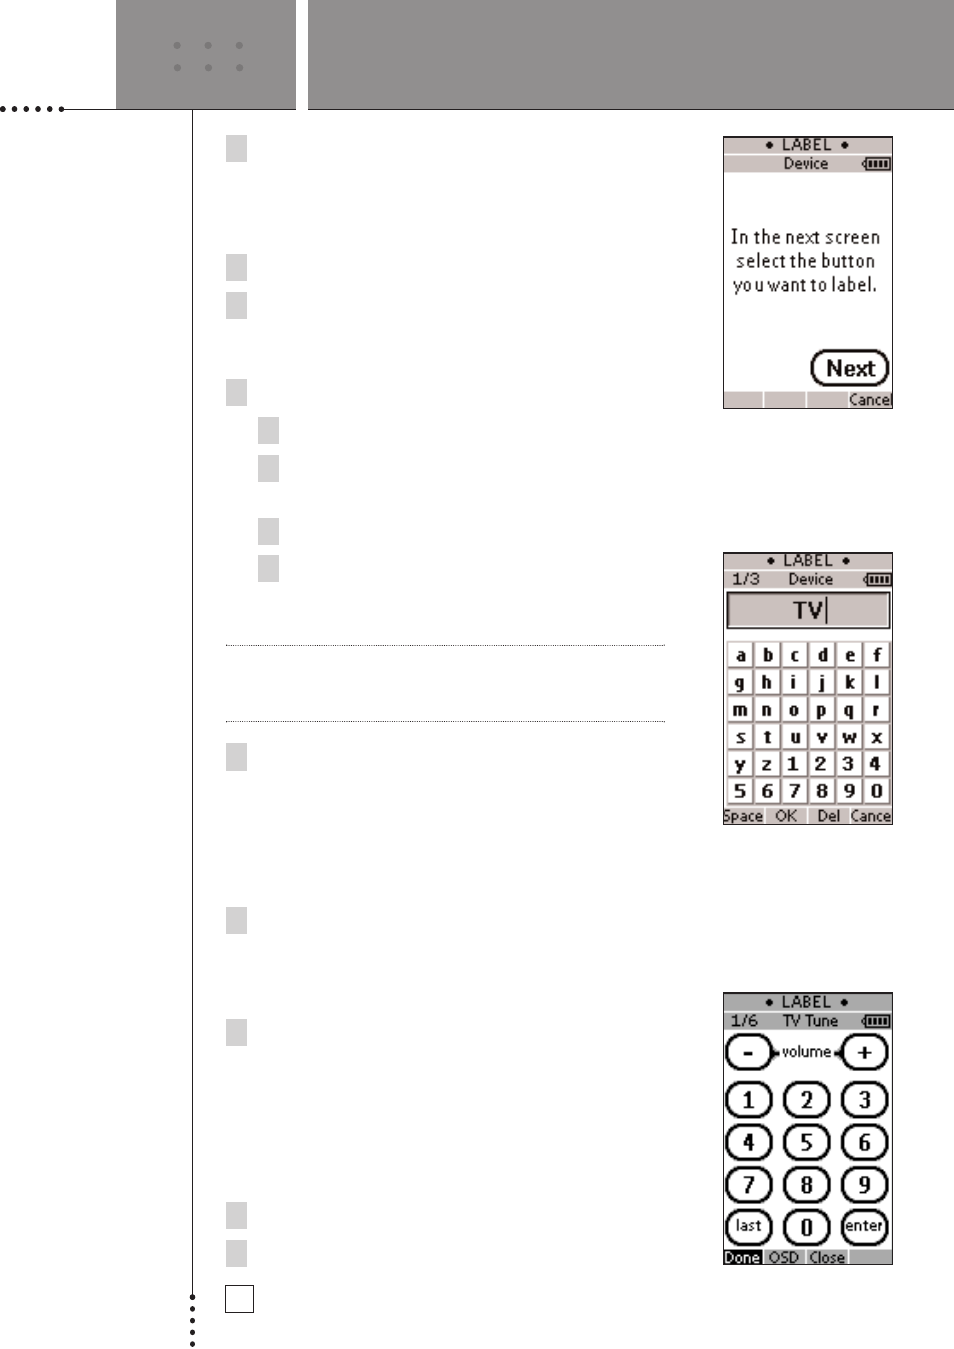
The Avidea Remote is now in Label Mode. ‘Label’
and the ‘Device’ appear at the top of the touch
screen with the following message on screen.
4 Tap Next
5 Tap the Device that you want to re-label. The Avidea
Remote shows a mini-keyboard. The text you
want to re-label is displayed above the keyboard.
6 Edit the label.
Press Del to delete the current text.
Tap the characters, numbers, and/or symbols you
want to use.
To enter a space, press Space.
To display other keyboards with capital letters
and symbols, press the Page Up or Page
Down button repeatedly.
Note
You will hear an error beep, when you selected
more characters than can be displayed on the
selected button.
6 Tap OK to save the changes and return to the
Device Page.
-or-
Tap Cancel to Return to the Device Page without
saving changes.
7 Label all other elements you want. You can navigate
to the different pages of the selected Device screens
or the Device Overview, using the Page Up and the
Page Down button.
8
Press Done when you have finished labeling the
buttons of your choice. The Avidea Remote returns
to Use Mode. You can see the label or select
another Device to label.
To label a button within a Device:
1 Go the Device Page.
2 Select the Device that contains the button you wish
USING THE AVIDEA REMOTE