Installation, Step-by-step installation of the fan/blower, Serial no – Regency Classic I2400 Medium Wood Insert User Manual
Page 11
Regency I2400M
11
installation
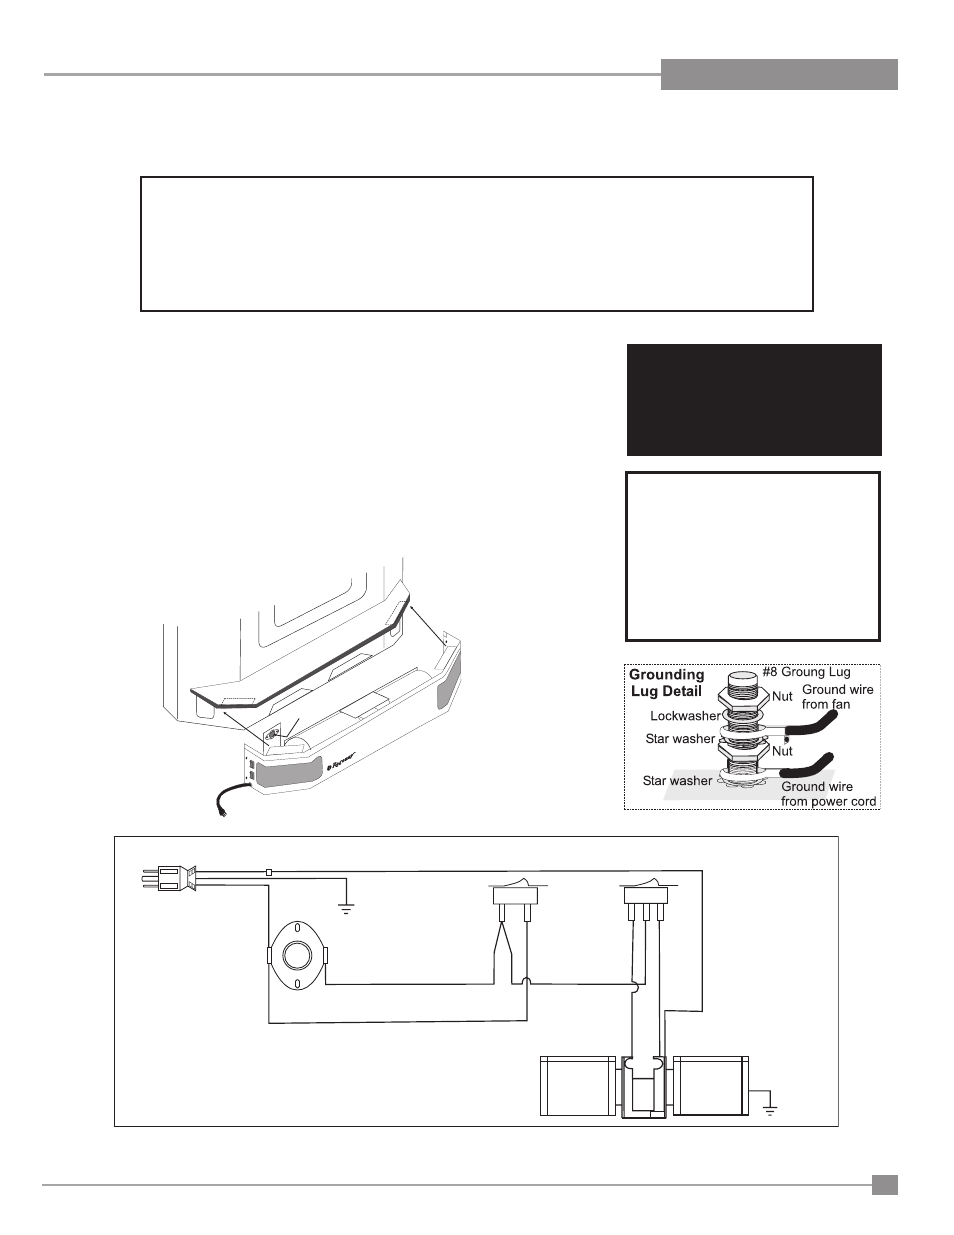
Ground
Fan
Fan
Ground
Green
Neutral
Live
Whit
e
Fan
Switch
Manual/
Auto
Switch
Black
Black
High
(Black)
Low
(Red)
Black
Fan Thermodisc
(normally open)
120V AC
60 Hz
The
rmo
Sw
itch
Se
nso
r
step-BY-step installation
of tHe fan/BloWer
Blower/Fan Wiring Diagram
3) ensure that the power cord is not in
contact with any hot stove surfaces.
note: do not route poWer cord
under or in front of unit.
4) Push the Regency logo plate into the two
holes in the front bottom left corner of the
fan.
do not turn fan on until your insert has
reached operating temperature or at least
30 minutes after starting fire.
Your fan should only be installed once the unit is
in place in order to prevent any damage to the
fan. To attach, follow the instructions provided
with the fan.
1) Align the fan support with the offset clip
on the bottom of the ashlip.
2) Slide the supports into the clips. The tension
holding the clips in place may be adjusted by
increasing or decreasing the offset spacing
of the clips.
caution: label all wires prior
to disconnection when servic-
ing controls. Wiring errors can
cause improper and dangerous
operation.
WarninG:
electrical Grounding instructions
this appliance is equipped with a
three pronged (grounding) plug for
your protection against shock hazard
and should be plugged directly into
a properly grounded three-prong
receptacle. do not cut or remove the
grounding prong from this plug.
installer: Please record unit serial number here before installing blower.
Serial No.______________________________