Schwank IEP-1520 User Manual
Page 11
11
IM110526
RD: JUNE 2011
RL; 1A
BA
InfraSave IEP-1520 Manual
an extension cord.
5.
Never allow the electrical cord to pass in front of the heater or to come into contact with
any hot surface of the heater.
6.
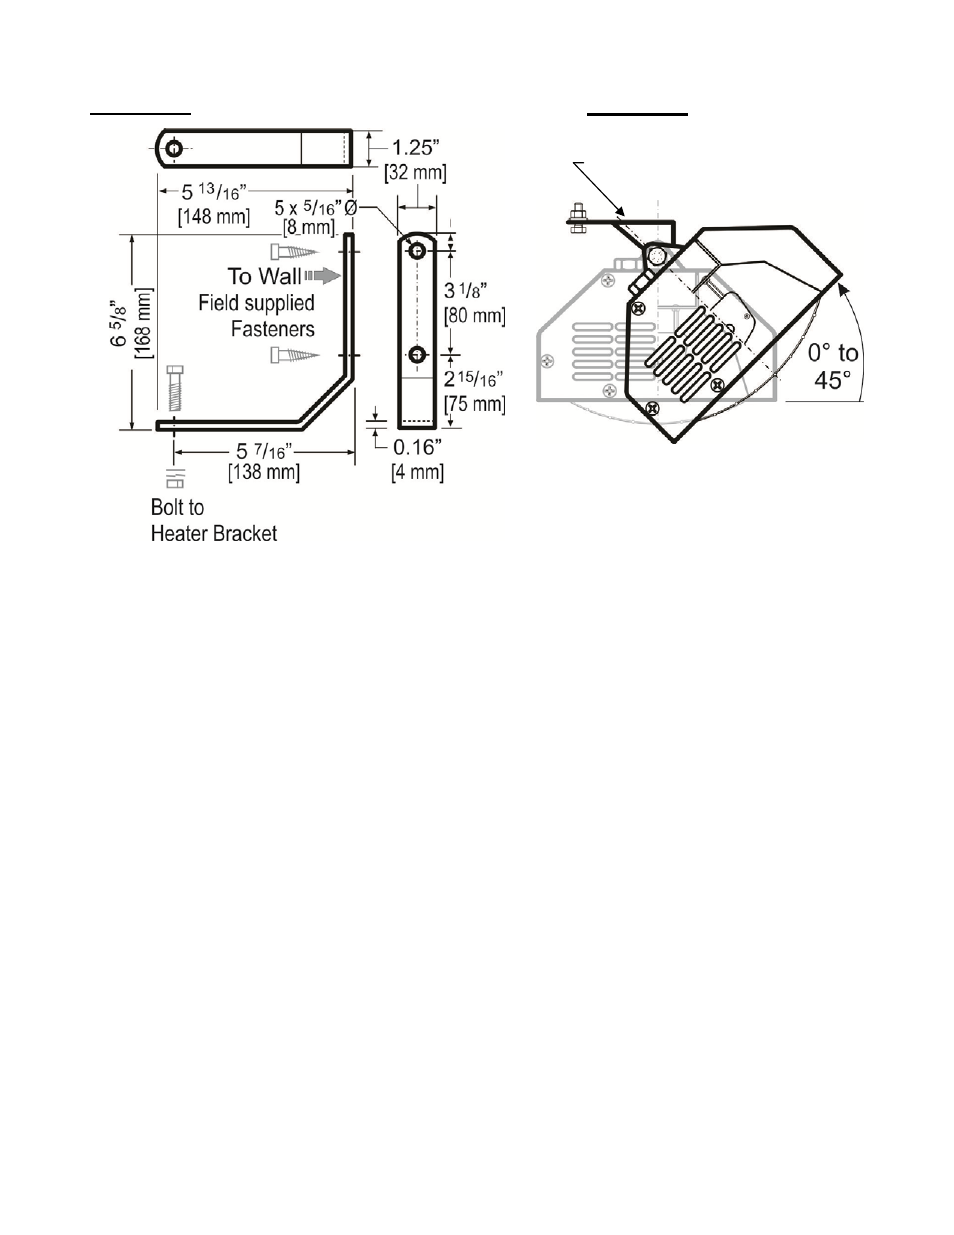
The Mounting Bracket fastens to the structure using field supplied bolts or lag screws
through two holes in one side of the bracket. The heater bracket fastens to the Mounting
Bracket through the outermost hole on the other leg of the Mounting Bracket, using the
bolt, lock washer and nut supplied.
7.
Fasten the Mounting Bracket ‘plumb’ and level so that the heater is oriented horizontally
on the long axis.
8.
Ensure that the mounting bracket is firmly fastened to the structure with bolts or lag
screws (field supplied) of sufficient strength and integrity to support the weight and pre-
vent movement of the heater. It is recommended to fasten the mounting bracket to a
structural member (wall stud, etc.).
9.
Attach the heater bracket to the Mounting Bracket (outermost hole), using the bolt, lock
washer and nut supplied - tighten securely.
10. The bracket attached to the top of the heater allows rotation up to 45° on the short axis
by loosening the attachment bolt.
11. Once heater position is established, tighten all nuts and bolts at mounting and heater
bracket connections to maintain the heater in a secure and stable position.
12. Read and follow all warnings, and the following section on Operation to enjoy safe op-
eration of the heater.
FIGURE 3: MOUNTING BRACKET
FIGURE 4:
END VIEW WITH
HEATER BRACKET