S&S Cycle Hydraulic Side Cover Kit PN 56-4060 User Manual
Page 5
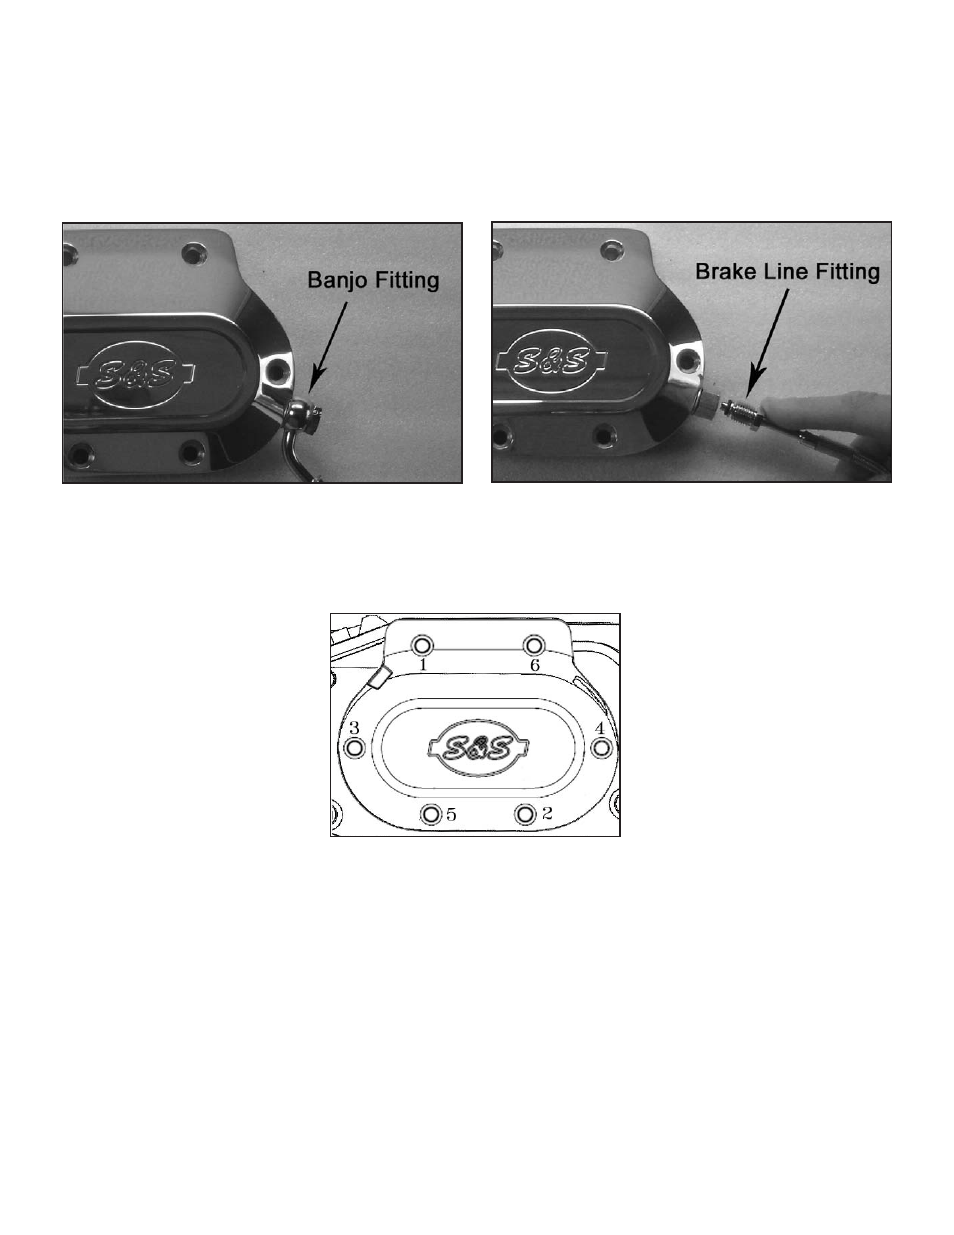
5- Installing hydraulic line
a- Install the crush washers and banjo bolt through banjo fitting with one washer on each side of the banjo fitting, then screw the banjo
bolt into the side cover until tight. See Picture 6a.
OR
b- If hydraulic line with the brake line fitting is used, screw the provided adapter with one crush washer into the side of the cover and tighten.
Thread the brake line fitting into the adapter and tighten. Ensure that there is a small o-ring on the end of the brake line fitting. Lubricate
with DOT 5 before installing. See Picture 6b.
Picture 6a
Picture 6b
6- Place the pushrod without the oil slinger into the mainshaft on the right side of the transmission.
7- Remove the two dowel pins from the transmission trapdoor if present.
8- Install the new gasket and socket-head screws provided in kit, apply blue threadlock to each fastener and torque in sequence to 10-12 ft-lbs.
See Figure 1.
Figure 1
NOTE: If installing on the S&S® 6 speed transmission place the two longer 2.75” screws provided in this kit into position 1 and 6. If installing on a H-D®
transmission, use two of the 2.25” screws from the old cover in position 1 and 6. Use the 1.75” screws provided in the kit in position 2, 3, 4, 5 for both
transmissions.
9- Ensure that the hydraulic clutch line is routed in same manner as the prior mechanical clutch line and tighten the banjo bolt. (See your service
manual for routing details)
10- On the primary side of the motorcycle, adjust the clutch adjuster screw by turning it all the way in until it stops to collapse the hydraulic piston
into the side cover.
11- Back the adjuster screw off ¼ - 3/8 turn and lock into place by tightening the nut. See Picture 3.
12- Stand the bike upright and ensure that the master cylinder is in a level position
13- Remove the master cylinder fluid reservoir cover and gasket.
14- Using D.O.T. 5 Silicone Hydraulic Brake fluid fill the reservoir and bleed the hydraulic system to remove air.