S&S Cycle Hydraulic Side Cover Kit PN 56-4060 User Manual
Page 2
General:
This kit is designed for installation on existing mechanical clutches to convert from the stock mechanical actuated clutch to a hydraulic actuated
clutch. It is designed to work with 11/16” master cylinders with either custom banjo hydraulic lines or Harley-Davidson® hydraulic brake lines. This
kit is NOT designed to work with hydraulic clutch pressure release plates. Conversion from mechanical to hydraulic side cover actuation will
require some components that already exist from a stock mechanical clutch. Required components, as listed below, will need to be purchased
separately to complete this kit.
Required Components:
1- 11/16” master cylinder and clutch lever assembly.
2- Hydraulic line with recommended banjo fitting for the master cylinder and one 90° 10mm banjo fitting for the side cover, or hydraulic line with
recommended banjo fitting for the master cylinder and H-D® brake line fitting.
3- *Three piece adjustable H-D® mechanical pushrod.
4- *Mechanical clutch pressure release plate.
*Existing if using a stock mechanical clutch.
WARNING
A service manual is necessary for the installation of this kit. The rider’s safety depends on the correct installation. Study the procedures
listed in these instructions and the appropriate service manual. This kit should be professionally installed by a certified mechanic. Failure
to install this kit properly could result in death or serious injury.
Hydraulic Side Cover Kit PN 50-4060
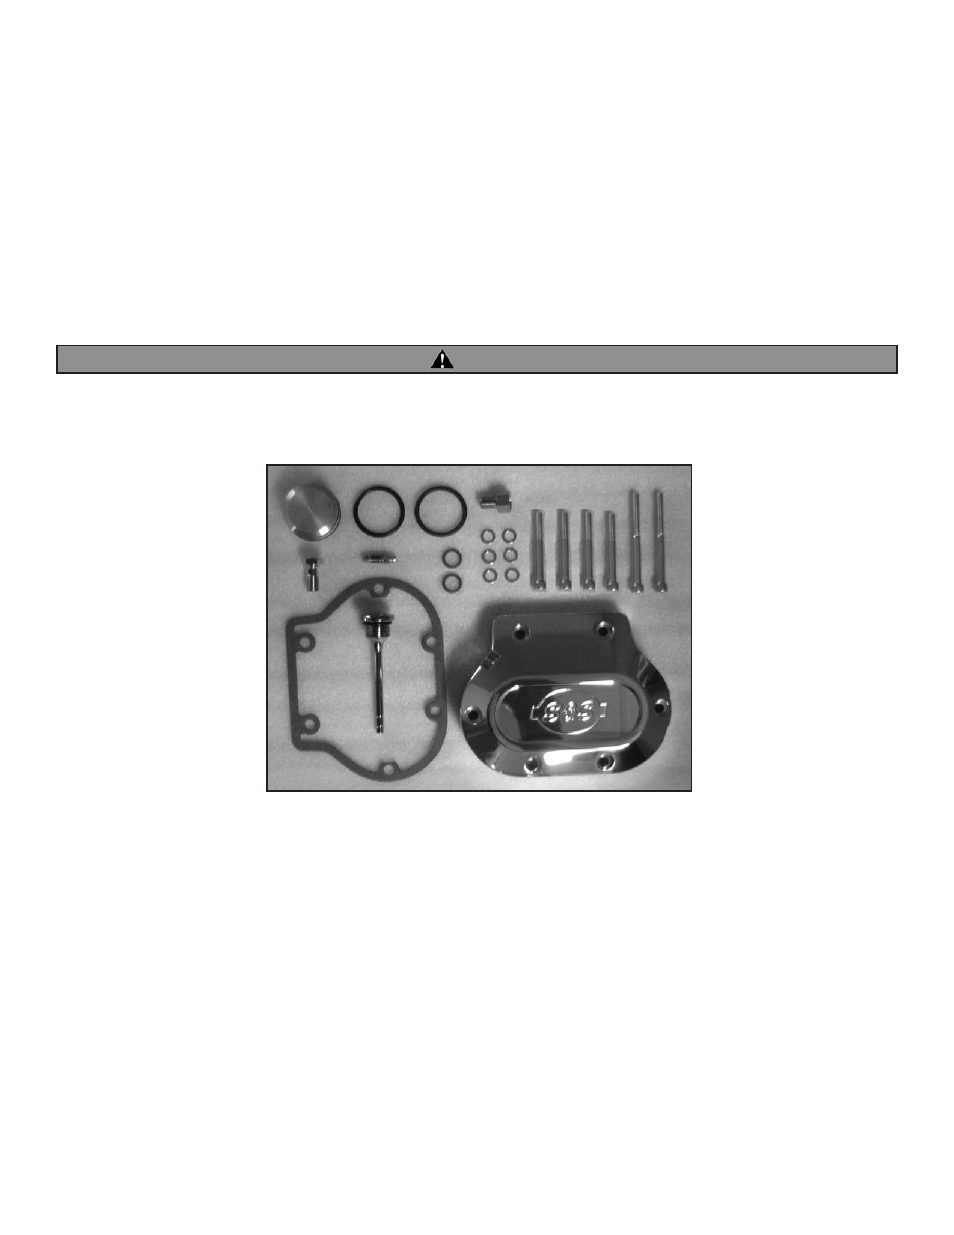
Kit Includes:
1- Hydraulic Side Cover
2- Hydraulic Piston
3- Dipstick Assembly
4- Viton o-ring, Brown
5- Buna o-ring, Black
6- HD Brake line adapter
7- Banjo Bolt
8- Copper Crush Washer (2)
9- Cap Screw 2.75” (2)
10- Cap Screw 1.75” (4)
11- ¼” Washer (6)
12- Bleed Fitting
13- Gasket
REMOVING THE ExISTING SIDE COVER
Ensure the motorcycle is secured on a level surface or placed on a motorcycle lift.
1- If equipped, remove left side saddlebag.
2- To access the transmission side cover, exhaust system removal may be needed, (See Service Manual). In most cases you will only need to
perform the following steps to gain access.
3- Loosen both front and rear header pipes at the heads.
4- Loosen the exhaust support bracket.
5- Loosen the exhaust system heat shields as needed.
6- Remove the exhaust system transmission clamp, if equipped.
7- Remove drain plug from transmission case and drain transmission fluid.
8- Remove the six socket-head screws with washers to free the side cover from the transmission case. (Save two socket-head screws for the new
side cover installation if installing on a stock H-D® transmission)
9- Actuate the mechanical clutch lever to break the cover seal.