Starting up the beacon 200 rig monitor – RKI Instruments Beacon 200 Rig Monitor, LEL/H2S User Manual
Page 25
Beacon 200 Rig Monitor Operator’s Manual • 20
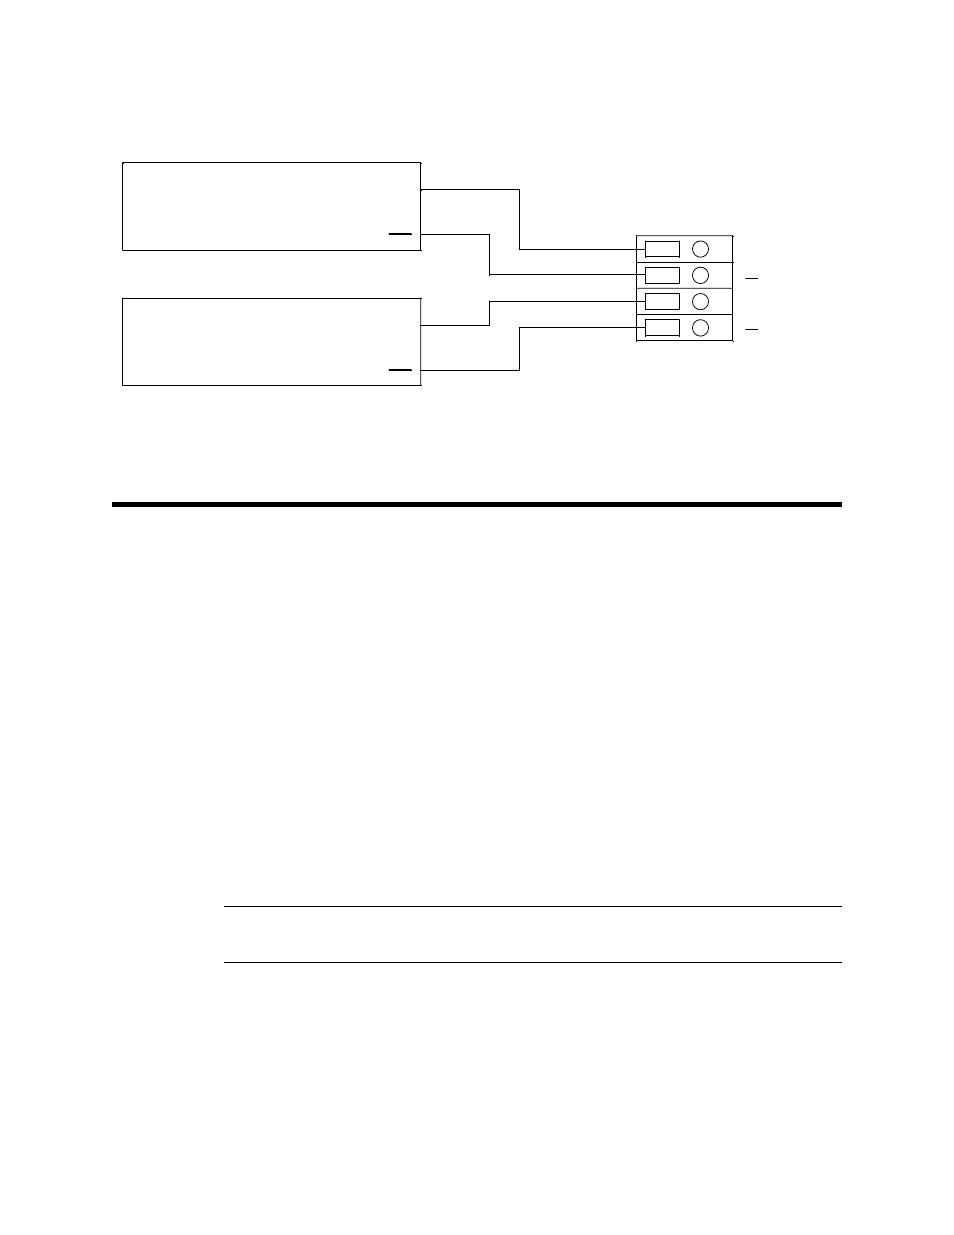
5. Connect the wires form the recording device to the recorder output
terminals as shown in Figure 11.
Starting Up the Beacon 200 Rig
Monitor
Perform the following procedure to place the Beacon 200 Rig Monitor into
normal operation.
1. Complete the mounting and wiring procedures described earlier in this
chapter.
2. Verify that all wiring connections are correct and secure and that the Rig
Monitor’s power switch is in the OFF position.
3. If not already connected, connect the battery clamps to the + and -
terminals of the 12 VDC battery.
4. Place the Rig Monitor’s power switch in the ON position. RKI
INSTRUMENTS BEACON 200 appears on the display for a few
seconds, then WARMING UP appears for each active channel. The
warm-up period will last for one minute.
NOTE: To prevent unwanted alarms during warm up, the alarm circuits
are not active while the WARMING UP message is displayed.
5. Verify that the PILOT light is on. If the PILOT light is not on, see
“Troubleshooting” on page 46.
6. The LEL and H
2
S detectors will begin operating once power is
introduced to the Rig Monitor.
+
+
CH2
OUT
CH1
OUT
+
Recording Device #2,
1Kohm Max
Impedance
Recording Device #1,
1Kohm Max
Impedance
+
Figure 11. Recorder Output Wiring