Transport, scope of delivery, installation – Retsch SM 300 User Manual
Page 12
Transport, scope of delivery, installation
12
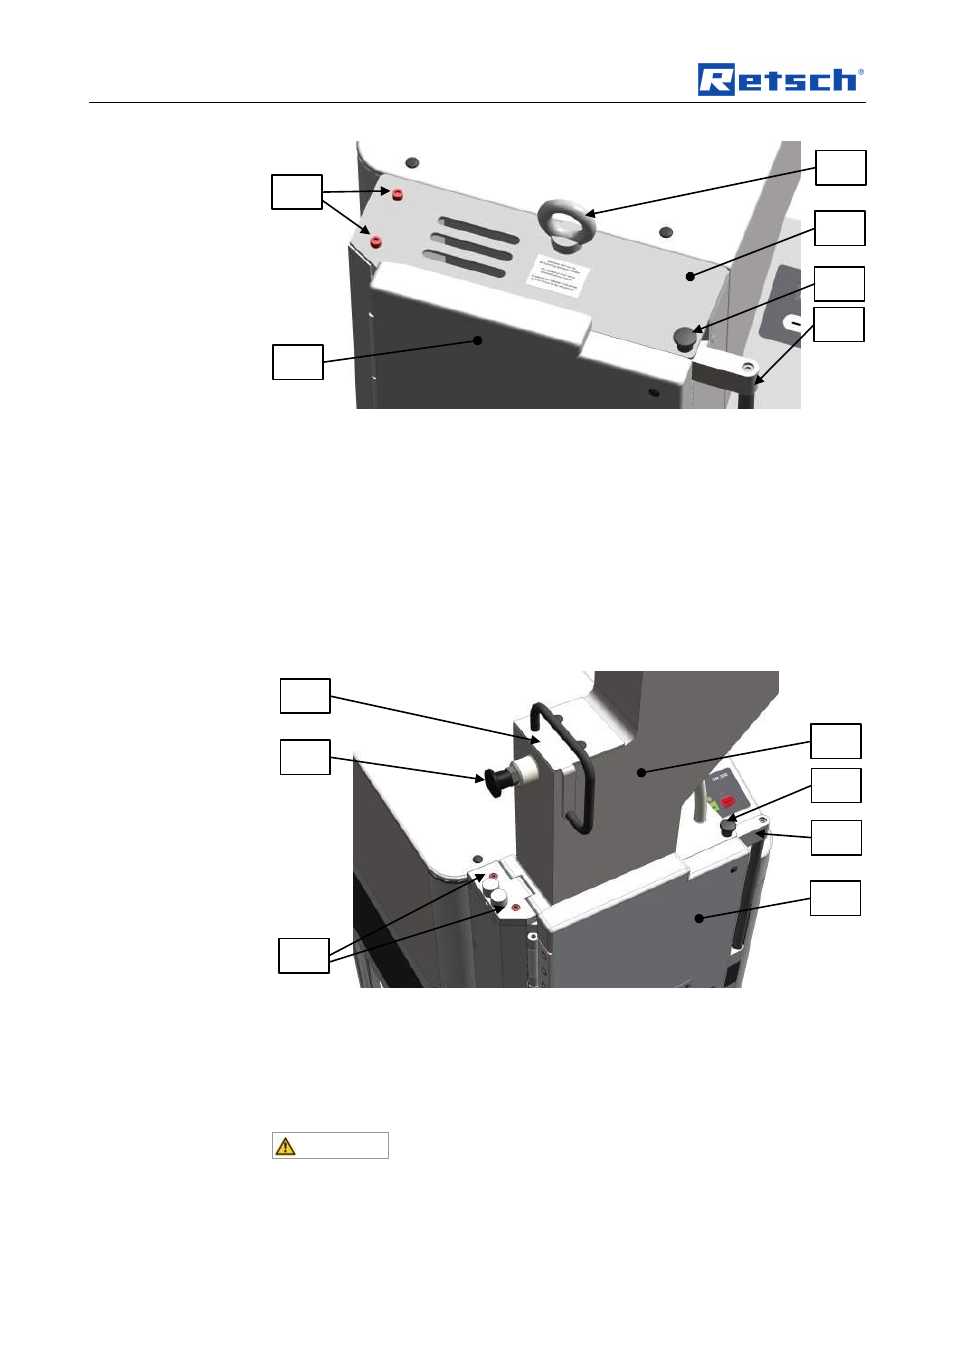
Fig. 2: Removing the Transport Safeguard
•
Remove the transport aid (TH).
•
Unlock the grinding chamber door by pulling the mini detent pin (E) upwards
and pressing the handle of the door latch (F) backwards.
•
Open the grinding chamber door (T).
•
Remove the two locking screws (S).
NOTE
Keep the transport safeguard (TS) for transport at a later date.
3.6.2
Mounting the Feed Hopper
Fig. 3: Mounting the Feed Hopper
•
Push the handle on the door latch (F) backwards.
•
Open the grinding chamber door (T).
•
Pull the plunger (B) into the upper latching position.
•
Place the feed hopper (R) on the device. (see diagram)
CAUTION
Until the feed hopper (R) is secured by the two socket-head screws, there is a risk
of it falling out of the device.
•
Release the detent pin bolt (D) on the plunger (B).
E
F
S
T
B
R
D
TH
E
F
TS
S
T
- BB 50 (41 pages)
- BB 100 (24 pages)
- BB 200 (24 pages)
- BB 300 (24 pages)
- Cryomill (68 pages)
- CryoMill Autofill 50l (28 pages)
- DM 200 (20 pages)
- DM 400 (60 pages)
- Emax (67 pages)
- GM 200 (44 pages)
- GM 300 (44 pages)
- MM 200 (32 pages)
- MM 400 (32 pages)
- PM 100 (44 pages)
- PM 400 (36 pages)
- PM GrindControl (48 pages)
- RM 200 (36 pages)
- RS 200 (32 pages)
- SK 100 (24 pages)
- SM 100 (48 pages)
- SM 200 (48 pages)
- Cyclone - SM 300 (20 pages)
- SR 200 (24 pages)
- SR 300 (24 pages)
- TWISTER (44 pages)
- ZM 200 (32 pages)
- AS 200 jet - Automatic Vacuum Regulation (6 pages)
- AS 200 control - natural frequency (32 pages)
- AS 200 (36 pages)
- AS 200 jet (56 pages)
- AS 200 jet (48 pages)
- AS 200 tap 30.025.0001 (28 pages)
- AS 200 tap 30.025.1001 (28 pages)
- AS 300 (32 pages)
- AS 400 (32 pages)
- AS 400 (28 pages)
- AS 450 basic (40 pages)
- AS 450 basic (44 pages)
- AS 450 control (52 pages)
- DR 100 (40 pages)
- DR 100 (28 pages)
- PP 25 (32 pages)
- PP 40 (28 pages)
- PT 100 (36 pages)