Noctua Xeon Mounting-Kit User Manual
Nh-u12f-xeon | installation manual, Noctua xeon mounting-kit installation manual, Attaching the backplate
Thank you very much for choosing Noctua coolers for your
Intel Xeon platform. This manual will guide you through the
installation process step by step.
Noctua Xeon Mounting-Kit
Installation Manual
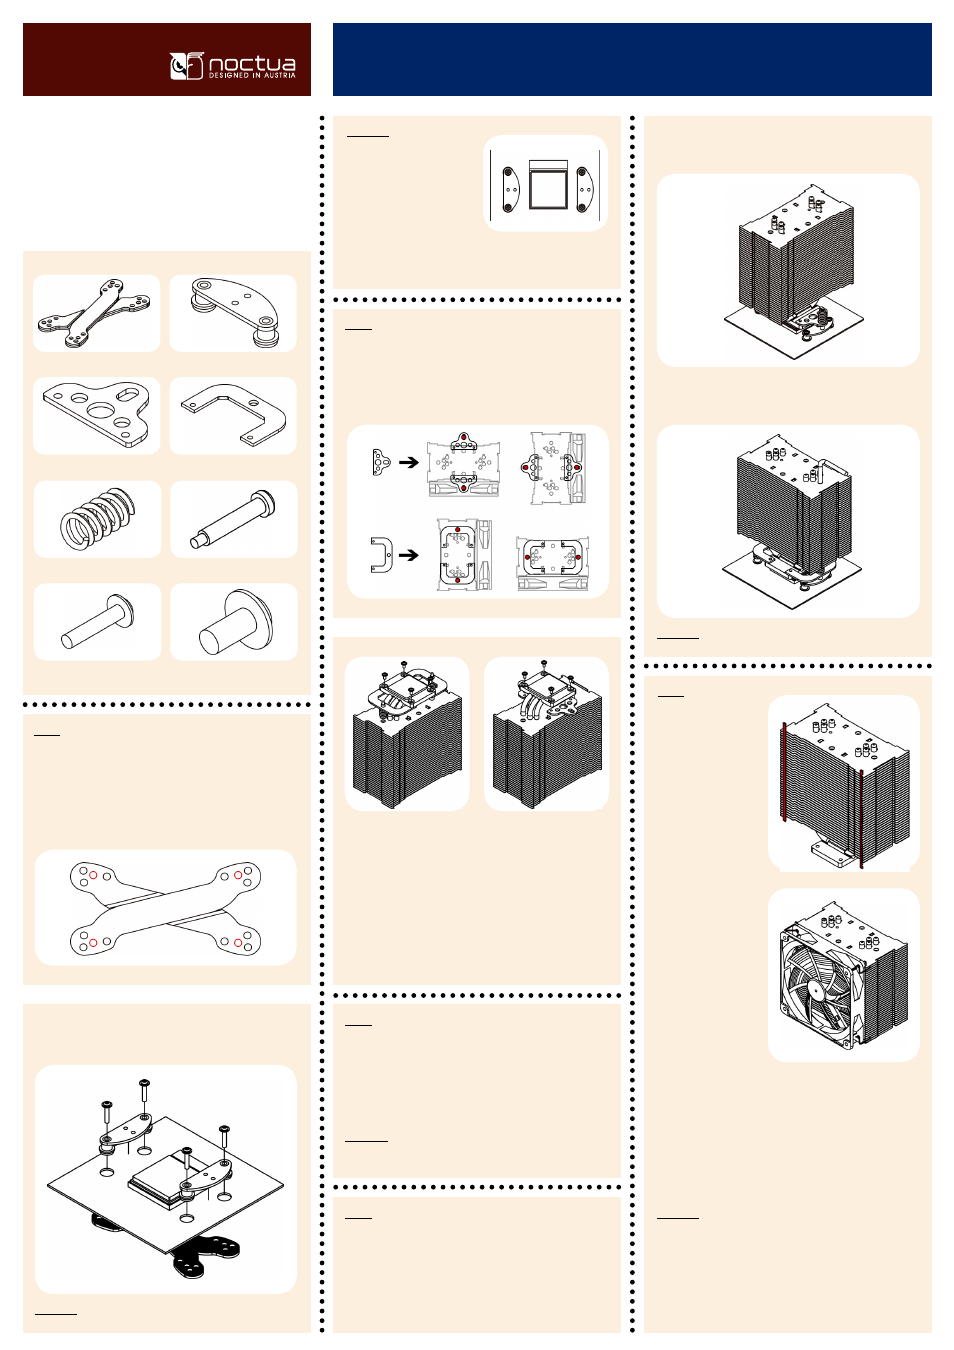
Step 1:
NH-U12F-Xeon | Installation Manual
Box contents:
Attaching the backplate
Place the backplate on the back side of the mainboard and
align the mainboard’s screwholes with those of the back-
plate highlighted in the illustration below:
Now screw the mounting bars to the backplate using the
black screws:
Caution: If you experience
clearance issues, you can
turn one of the mounting
bars so that the bulging
points towards the socket,
but at least one of the two
mounting bars has to face the socket with its straight side
and have the bulging pointing outwards!
1x Xeon Backplate
2x mounting bars
2x standard fastening brackets
2x 90° fastening brackets
Step 2:
Attaching the fastening brackets to the heatsink
Choose the fastening brackets according to the desired ori-
entation of the cooler:
When using the 90° fasten-
ing brackets, first stick the
spring screws and springs
into the fastening brackets.
Then screw them to the
copper base of the heat-
sink tightly using 4 short
screws.
When using the standard
fastening brackets, tightly
screw them to the copper
base of the heatsink using 4
short screws.
Step 3:
Applying thermal paste
If there are traces of thermal paste or thermal pads on your
CPU, please clean them off first. Spread a thin coating of
thermal paste on the CPU.
Caution: Applying too much thermal paste will lower the
heat conductivity and cooling performance!
Now screw the fastening brackets to the mounting bars em-
ploying the pressure springs and the respective screws.
When employing the 90° fastening brackets, please use the
supplied mounting-tool to tighten the springscrews.
Caution: Tighten the screws until they stop.
Attaching the fan
Step 5:
First stick the 2 anti-
vibration strips onto
the cooling fins in or-
der to dampen minor
vibrations emitted by
the fan.
Then attach the fan
to the heatsink using
the 2 steel clips, plac-
ing it so that it blows
onto the heatsink
(You can optionally
use the second pair
of clips to install a
second fan).
Connect the fan to the mainboard, power supply or fan
controller. Depending on your CPU and the temperature
inside the case, you may interconnect the supplied Ultra-
Low-Noise Adapter (U.L.N.A.) in order to further reduce the
fan’s operating noise.
Caution: When using the U.L.N.A., check the temperature
of your CPU using appropriate software (e.g. the respective
applications of your mainboard manufacturer), in order to
evade automatic throttling of the CPU due to the increased
temperature. If the cooling performance is insufficient,
please increase case ventilation or remove the U.L.N.A.
Place the heatsink on the CPU, so that the mounting holes
of the fastening brackets screwed to the base of the cooler
align with those of the mounting bars.
Step 4:
Attaching the heatsink to the CPU
2x pressure springs
2x stepped spring screws
4x black screws for mounting bars
4x short silver screws for
fastening brackets
Caution: The protection-foam has to face the mainboard!