Noctua nh-d15 | installation manual | amd – Noctua NH-D15 User Manual
Page 6
Even with high-grade products and strict quality control, the pos-
sibility of defects cannot be eliminated entirely. Therefore, we aim
at providing the highest possible level of reliability and conveni-
ence by offering a warranty period of 6 years and direct, fast and
straightforward RMA service.
Should you encounter any problems with your NH-D15, please
don’t hesitate to contact our support team ([email protected]).
Please also consult the FAQ section on our website:
www.noctua.at/faqs.
Warranty, Support and FAQs
Use the heatsink with the centre fan only in order to guarantee
best compatibility with tall RAM modules. Add the second fan to
the front fin-stack for further improved cooling performance.
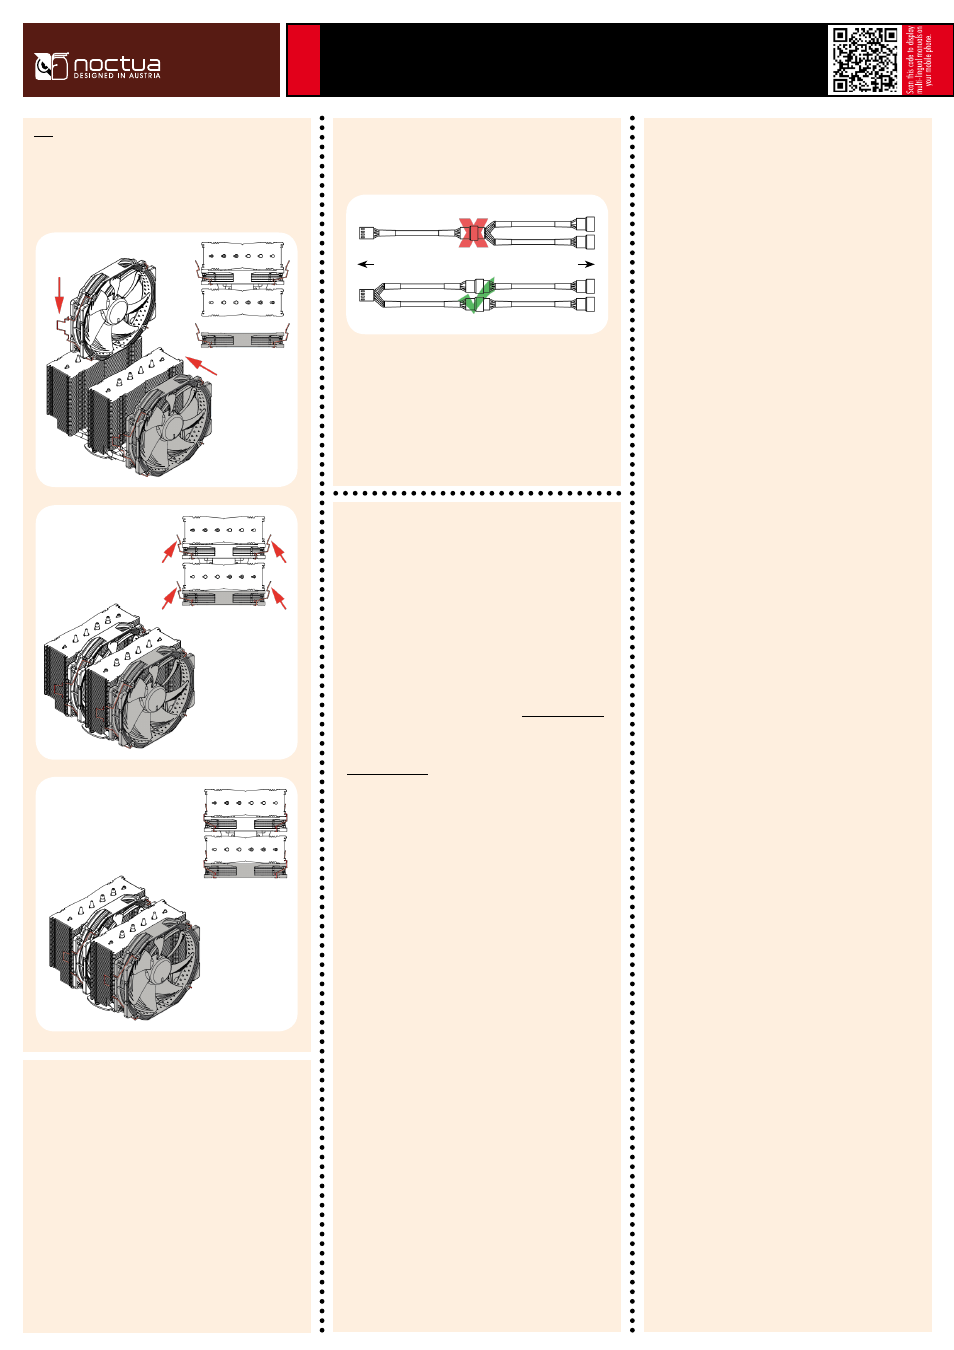
Connect the fan(s) to the mainboard’s CPU fan header(s). If
necessary, use the supplied NA-YC1 y-split cable to connect both
fans to one fan header.
Depending on your CPU and the temperature inside the case,
you may interconnect the supplied NA-RC7 Low-Noise Adaptors
(L.N.A.) in order to further reduce the fans’ operating noise.
Fan Setup
Step 5
Caution: Never use one adaptor for both fans by putting it before
the y-split cable.
Caution: When using the L.N.A.s, check the temperature of your
CPU using appropriate software (e.g. the respective applications
of your mainboard manufacturer), in order to evade automatic
throttling of the CPU due to the increased temperature. If the cool-
ing performance is insufficient, please increase case ventilation or
remove the L.N.A.s.
Noctua NH-D15 | Installation Manual | AMD
AM2
Reattach the centre fan and, optionally, install the second fan
(in grey) using the supplied steel clips:
2.
3.
1.
Mainboard
Fans
Low-Noise Adaptor
Y-Split Cable
Y-Split Cable
Low-Noise Adaptors