Dm15a9c/cdm2csa — pre-setup – Multiquip CDM2CSA User Manual
Page 17
DM15A9C/CDM2CSA — OPERATION AND PARTS MANUAL — REV. #1 (11/09/05) — PAGE 17
DM15A9C/CDM2CSA — PRE-SETUP
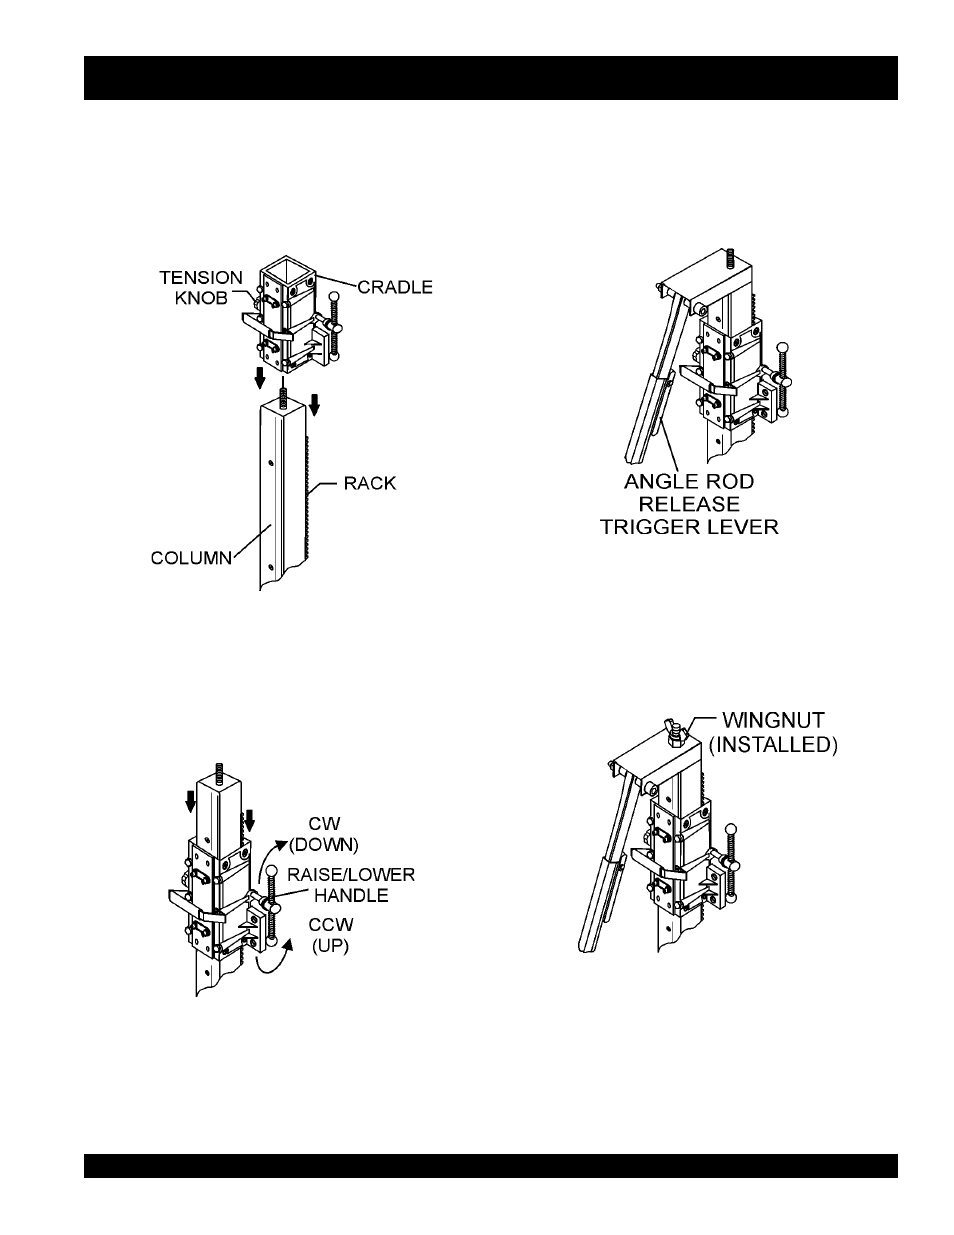
7. Once the cradle has been mounted onto the column
rack, align the top plate (Figure 9) on the adjustment bar
with the stud on the top of the column. It may be
necessary to squeeze the trigger release (Figure 8)
mechanism on the adjustment bar to to raise or lower the
adjustment bar.
5. Locate the cradle assembly (Figure 7) and place it
directly over the column. Make sure the cradle handle is
located on the right side of the column if you are standing
at the back (wheels) of the drilling rig. It may be necessay
to loosen the cradle tension knob slightly to allow the
cradle to slip onto the column rack.
6. Once the cradle assembly makes contact with the rack,
turn the cradle raise/lower handle (Figure 8) clockwise
so that the cradle moves in a downward position. Con-
tinue turning handle until the desired position has been
reached.
Figure 7. Cradle Assembly
Figure 8. Cradle Raise/Lower Handle
8. Re-install the wingnut that was removed in step 4.
Figure 10. Securing the Adjustment Bar
Figure 9. Adjustment Bar Placement
9. The unit is now ready to be secured to the work surface.