Ride on, Iso grips, Installation – Kuryakyn 6183 ISO GRIPS/06-UP GL 1800 with OEM HEATED GRIPS User Manual
Page 3
PAGE
3
Left Side Procedure
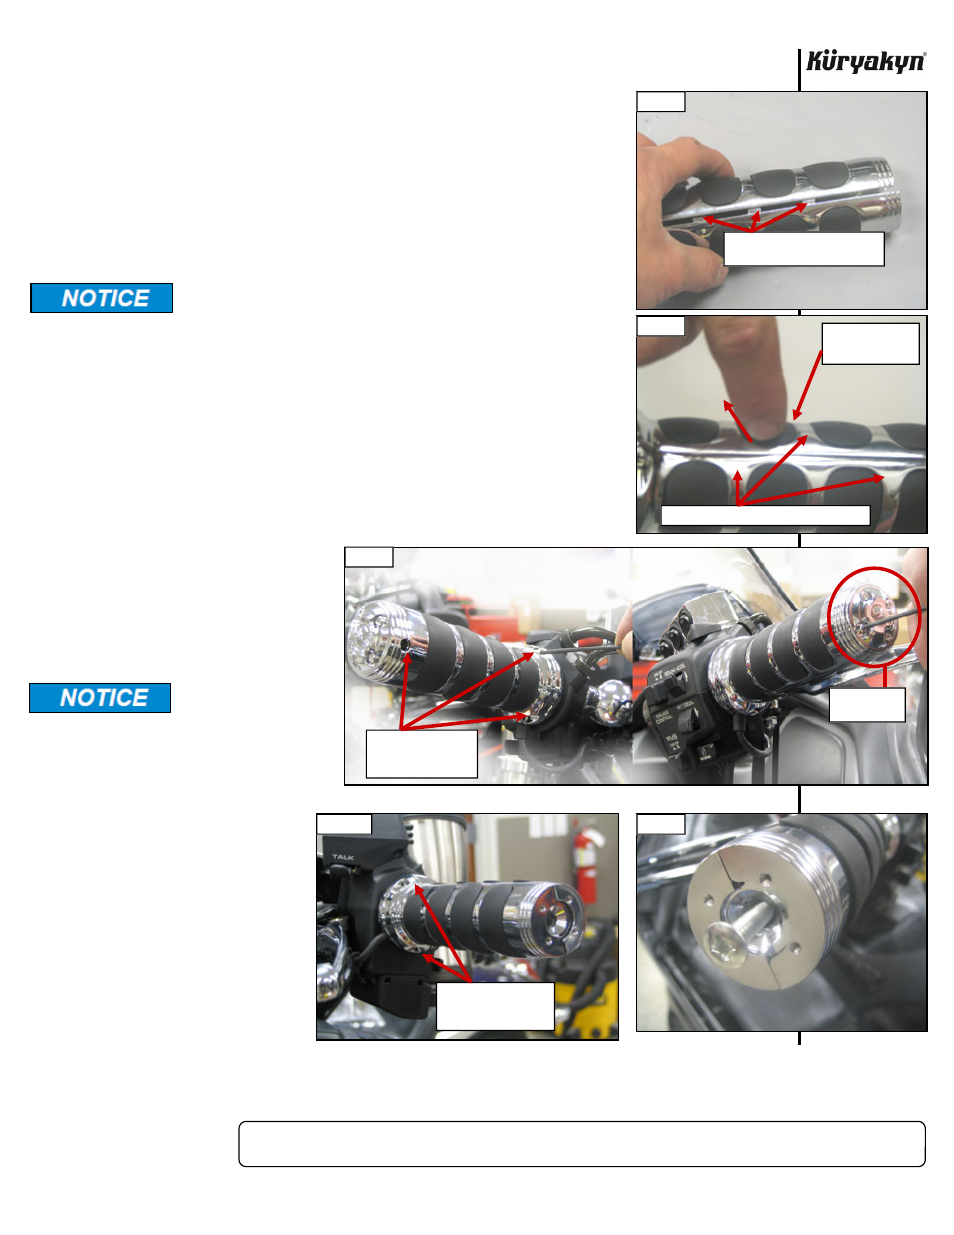
STEP 13
Repeat STEP 4 through STEP 8 using the left side covers instead of right.
STEP 14
Insert the M6-1 x 40mm Phillips Pan Head Screw (PPHS) in the end of the
grips, leaving loose for now, PIC 9
STEP 15
Insert the two #4-40 x 3/8” SHCS screws from the front side, ensure that
the grip heater wire is not pinched and fully tighten the fasteners, PIC 10
Secure all wiring away from any moving parts, pinch points or
extreme heat. Küryakyn WILL NOT issue a warranty on any
electrical component that fails due to pinched, crimped, broken,
abraded, melted or frayed wires.
STEP 16
Tighten the M6-1 x 40mm PPHS screw from STEP 14.
STEP 17
Position the end cap so that the four holes in the end cap align with the
holes in the covers and secure with the four #4-40 x 3/8” SHCS screws, fully
tightening them. PIC 8
STEP 18
Ensure that all the fasteners
have been tightened and that
the ISO grips do not interfere
with the functions of the
controls
before
riding
the
motorcycle.
It is the installer’s
responsibility to
ensure that all of the
fasteners (including
pre-assembled) are
tightened before
operation of the
motorcycle. Küryakyn
will not provide
warranty coverage
on products or
components lost
due to improper
installation or lack
of maintenance.
Periodic inspection
and maintenance
are required on all
fasteners.
Ride On!
ISO GRIPS
INSTALLATION
PIC 6
PIC 9
PIC 7
PIC 8
PIC 10
TABS NEED TO BE ENGAGED
GRIP OFF BIKE FOR CLARITY
PULL BACK ON
RUBBER TABS
CABLE TIES AROUND RIBS IF NEEDED
END CAP AND
SCREWS
SCREW LOCATION
TOWARDS FRONT OF
BIKE
SCREW LOCATION
TOWARDS FRONT OF
BIKE