Ride on, Custom tie-down brackets for victory, Installation – Kuryakyn 938 CUSTOM TIE-DOWN BRACKETS FOR VICTORY User Manual
Page 3
PAGE
3
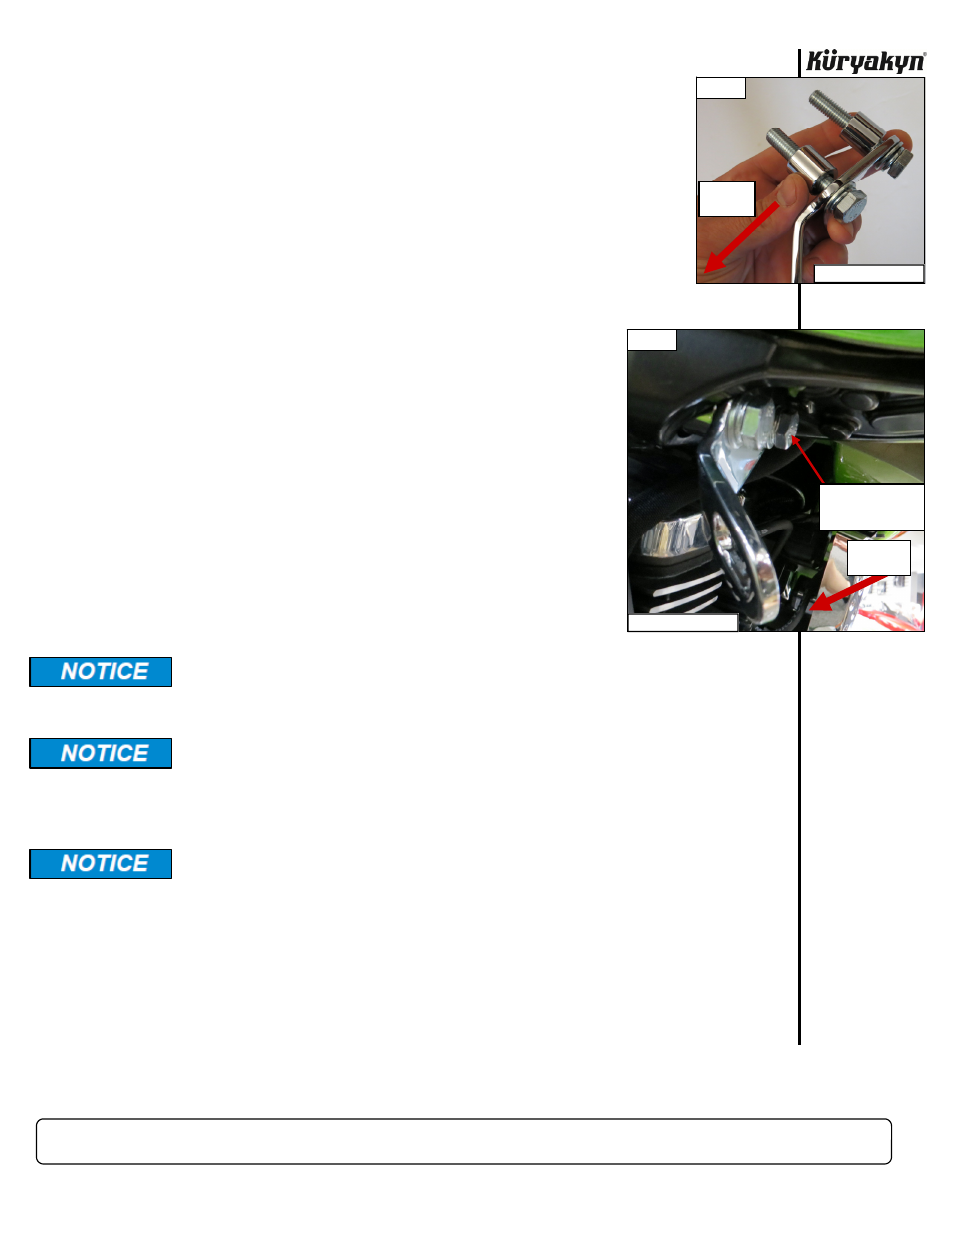
STEP 13
Insert the included M10 Bolts through the Split Lock Washers, Washers, and Left Tie-Down
Bracket. Place the included Spacers over the threaded ends of the bolts. PIC 6
STEP 14
Thread the front bolt into the front hole in the frame. Leave the bolt loose for now.
STEP 15
Thread the rear bolt into the rear hole in the frame.
TIP:
Use an open end wrench to start the rear bolt.
STEP 16
Fully tighten both bolts and
torque them to 52 FT/LBS.
STEP 17
Torque the lower mounting bolt (from STEP 12) to 52 FT/LBS.
STEP 18
Repeat STEPS 11 through 17 for the brake-side (right).
Ride On!
If installing this product for another party, please make sure they receive
this copy of the installation instructions so they are aware of the important
information contained in them.
It is the end user’s responsibility to ensure that all of the fasteners
(including pre-assembled) are tightened before operation of the motorcy-
cle. Küryakyn will not provide warranty coverage on products or compo-
nents lost due to improper installation or lack of maintenance. Periodic in-
spection and maintenance are required on all fasteners.
Use only good quality RATCHET-type tie-down straps to secure you motor-
cycle. Ensure the straps have a weight rating sufficient to support your
motorcycle.
DO NOT USE straps that have tears, worn seams, cuts, abrasions, bent
hooks, faulty ratchets, or unknown weight ratings to secure a motorcycle.
Use only good quality wheel chocks designed for your type of motorcycle.
Follow wheel chock manufacturer’s recommendations for securing your
motorcycle to the trailer or motorcycle lift.
Condor brand wheel chocks (Kuryakyn Part Number 920 or 922) are sold
separately through Kuryakyn.com or your Kuryakyn dealer.
CUSTOM TIE-DOWN BRACKETS FOR VICTORY
INSTALLATION
CLUTCH-SIDE (LEFT)
PIC 6
FRONT
OF BIKE
CLUTCH-SIDE (LEFT)
PIC 7
USE A COMBINA-
TION WRENCH TO
START THIS BOLT
FRONT OF
BIKE