Ride on, Tech-connect, Installation – Kuryakyn 1788 TECH-CONNECT with CHROME PERCH MOUNT User Manual
Page 3
PAGE
3
TO PREVENT POSSIBLE LOSS OF CONTROL, WHICH COULD RESULT IN
POSSIBLE INJURY OR DEATH, WE DO NOT RECOMMEND REMOVING,
REPLACING OR ADJUSTING THE DEVICE ON THE ACCESSORY
MOUNT PLATE WHILE RIDING THE MOTORCYCLE.
It is the installer’s responsibility to ensure that all of the
fasteners (including pre-assembled) are tightened before
operation of the motorcycle. Küryakyn will not provide
warranty coverage on products or components lost due to
improper installation or lack of maintenance. Periodic
inspection and maintenance are required on all fasteners.
USING THE TECH-CONNECT HOLDER
STEP 1
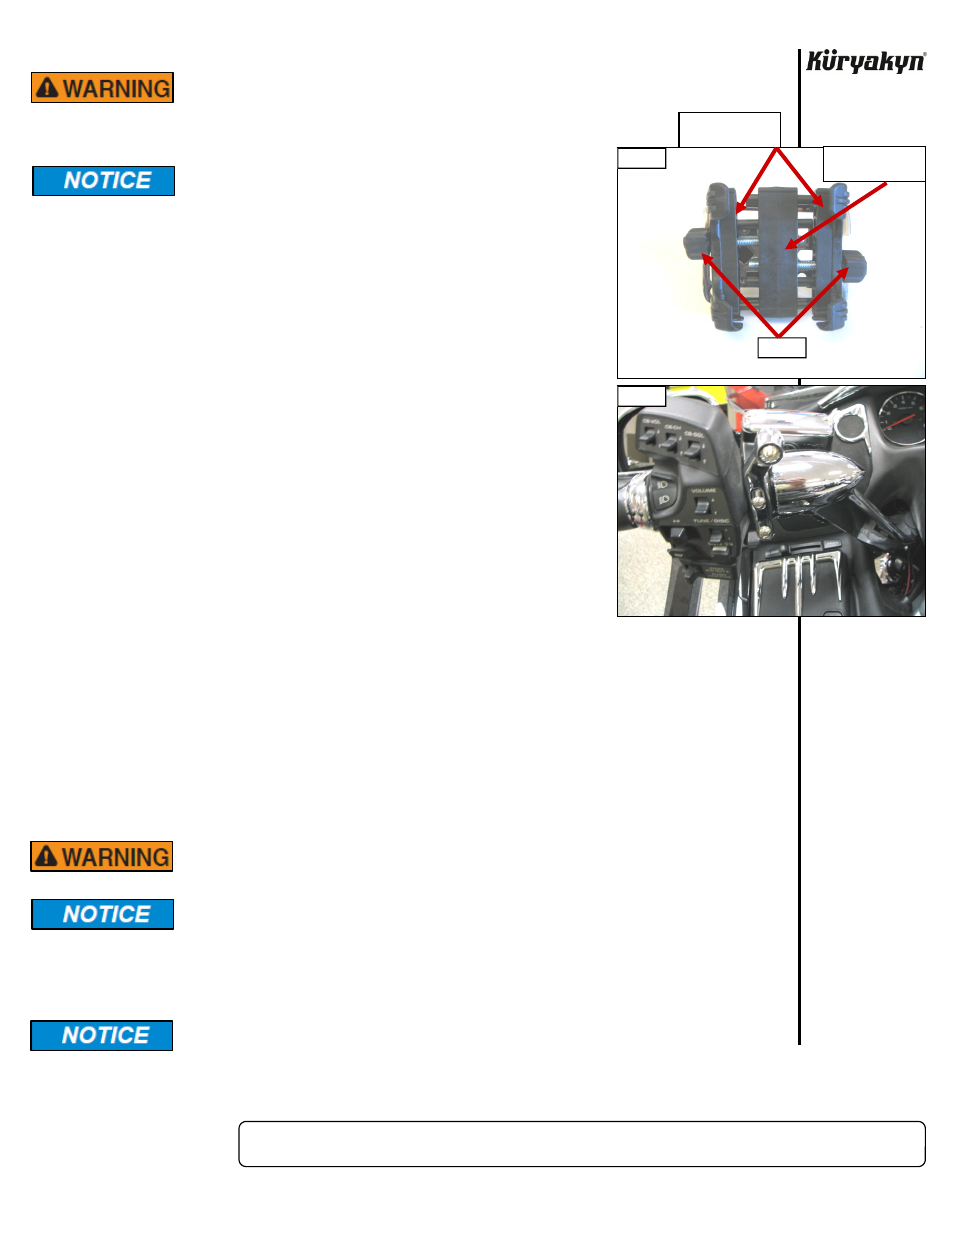
Turn the knobs counter-clockwise until the sides are separated from the
center section. PIC 5. Peel the narrow pieces of foam off the backing pa-
per,
center
them in the inset portion of the sides and apply them to the
sides of the holder. Peel the wide piece of foam from the backing paper,
center it in the inset portion in the center and apply it to the center of the
holder. PIC 5
STEP 2
Turn the knobs on the outside of the Tech-Connect (PIC 5) counter clock-
wise until your device will fit in between the arms. Turn the knobs clock-
wise to close the arms around the device. There is a locking detent under
the knobs to hold them in place once they come in contact with the de-
vice. DO NOT over-tighten the knobs. Tightening them too tight
will not allow you to loosen them with your fingers. Periodically
check the tightness of the mobile device in the Tech-Connect.
NOTE:
For best results keep “L” shaped foot portion of the Tech-Connect
Holder on the bottom of the device. Keep the device holding
support arms centered on the mounting plate.
STEP 3
To remove the Tech-Connect Holder from the bike for storage, simply
remove the Thumb Nut and washers from the Tech-Connect Holder and remove the plate from the
mount. PIC 6
STEP 4
To replace the Tech-Connect Holder on the Perch Mount, insert the metal shaft through the hole in
the perch mount. The hex flats on the metal shaft will line up with the hex flats in the hole. Secure
the Tech-Connect Holder with the included 1/4” flat washer, then the 1/4” lock washer, then the
Thumb nut. PIC 4 Tighten securely.
STEP 5
To adjust the angle of the Tech-Connect Holder, loosen the tensioning nut, adjust the
Tech-Connect Holder to the desired position and tighten the tension nut. PIC 4 The tension nut will
allow you to keep the Tech-Connect Holder in the same position or, with a little less tension, allow
you to move the Accessory Mount Plate on the swivel ball.
DO NOT ATTEMPT TO OPERATE OR REMOVE THE MOBILE DEVICE FROM
THE HOLDER WHILE OPERATING THE MOTORCYCLE.
Ensure that the Mobile Device is secure in the Tech-Connect Holder. Küryakyn is
not responsible for any Device that is stolen or damaged from use in this Holder or
from the Holder not being properly secured to the motorcycle. It is the installer’s
responsibility to ensure that all of the fasteners (including pre-assembled) are
tightened before operation of the motorcycle. Küryakyn will not issue a warranty
on components lost due to improper installation. Periodic inspection and
maintenance are required on all fasteners.
Motorcycling can be done in a harsh environment. Make sure your Mobile Device is
appropriate for this application.
Ride On!
TECH-CONNECT
INSTALLATION
KNOBS
NARROW PIECES
OF FOAM GO HERE
WIDE PIECE OF
FOAM GOES HERE
PIC 5
PIC 6