Usb power port, Installation – Kuryakyn 1688 USB POWER PORT—UNIVERSAL User Manual
Page 2
PAGE
2
The Power Port is weather resistant, not water proof! Do Not use the Power Port in
rain or inclement weather. Use the attached rubber plugs to keep
water out of the ports when riding in rain or inclement weather.
To prevent damage to, or dislodging the Power Port, always use both
hands to connect or disconnect the mobile device. Hold the Power
Port in place and use your other hand to connect or disconnect the
mobile device.
NOTE:
Mount in a protected area of the motorcycle, with the ports
facing
down or
to the side and slightly down, to help prevent water from entering the
Power Port. If you think that you could have water in the Power Port, lift
the back flap and lightly blow into the front.
NOTE:
The top port on the Power point is approximately 2.0 amp capable. The
bottom port is approximately 1.0 amp capable.
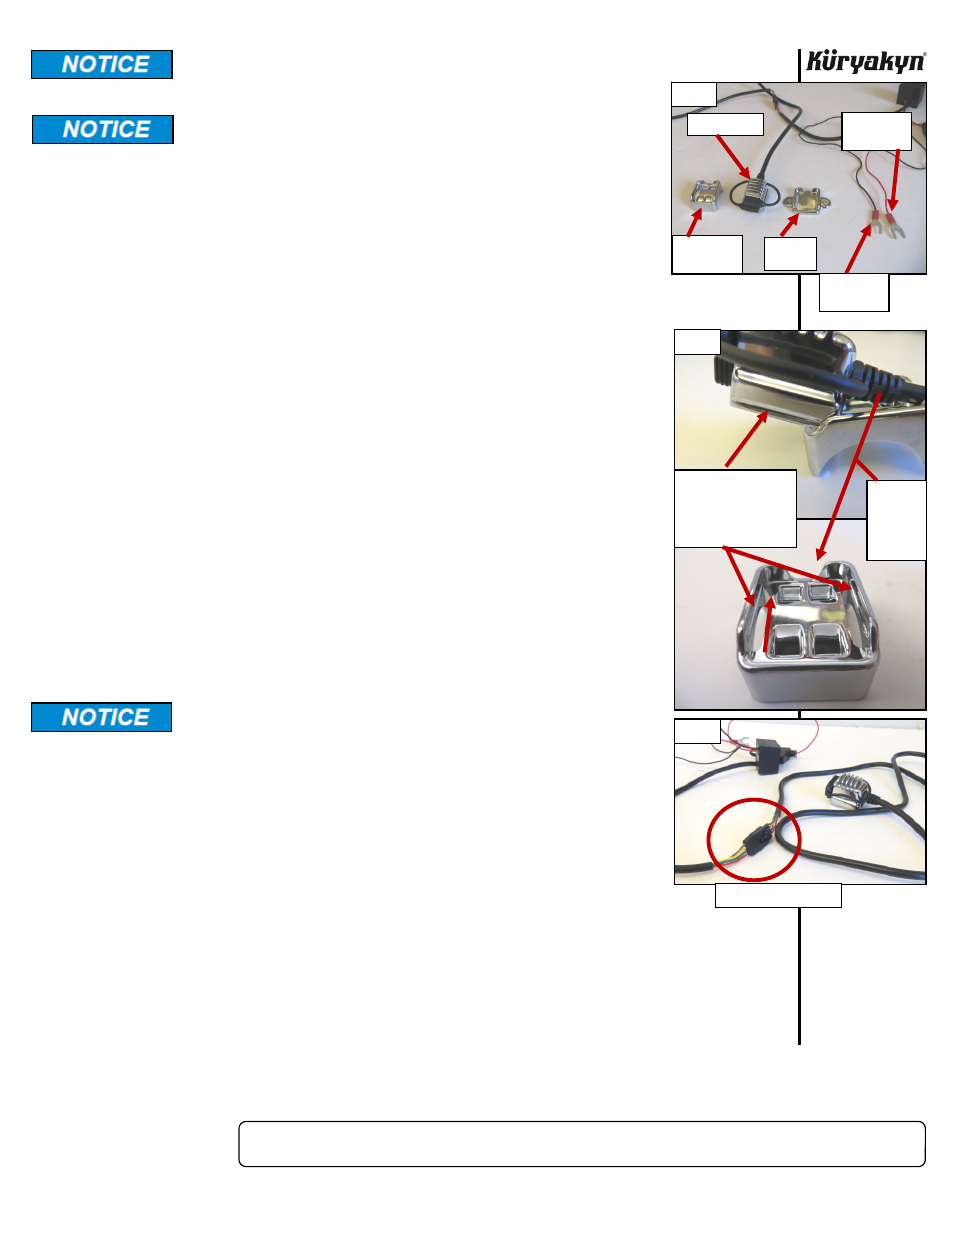
STEP 2
Decide on a mounting area for the Power Point and which mounting base (if
needed) will work the best for the chosen location. With the wire harness of the
Power Point facing the notch in the base, tip the Power Point down into the mount.
PIC 2 Line up the grooves on the sides of the Power Point with the ridges in the
base. PIC 2 Slide the Power Point onto the ridges on the mount until it snaps into
place.
NOTE:
This is a tight fit. It will take some pressure to slide the Power Point into
the base. Make sure both grooves of the Power Point are secured on the
ridges
of
the
mount.
STEP 3
Remove the seat or side cover (depending on model) to gain access to the battery.
STEP 4
Temporarily position the Power Point in the desired location and route the wire
harness of the Power Point to the battery to ensure there is enough harness to
reach to the battery. If satisfied with the routing, use the included cable ties to
secure the wire harness out of harms way.
NOTE:
There is a black four pin connector located in the middle of the Power
Point harness. PIC 3 This may be disconnected to ease routing of the
harness. If it is disconnected, use a dab of the supplied dielectric grease
on each connector before plugging it together.
Secure all wiring away from any moving parts, pinch points or
extreme heat. Küryakyn WILL NOT issue a warranty on any
electrical component that fails due to pinched, crimped, broken,
abraded, melted or frayed wires.
STEP 5
Disconnect the negative wire from the battery first, then loosen the fastener on
the positive wire. Slide the terminal on the RED wire from the Power Point under
the fastener on the positive wire and tighten the fastener securely. Attach the
terminal
on
the
BLACK ground wire from the Power Point and the negative wire to
the negative post on the battery. Tighten securely
STEP 6
Plug a mobile device into the Power point and check to see if it is charging
correctly. If the mobile device does not show charging, check the 5 amp fuse in
the RED power wire and check that all battery connections are tight.
MOUNTING WITH ADHESIVE TAPE—WITH OR WITHOUT HANDLEBAR MOUNT
STEP 7
Determine the mounting area for the Power Port. If mounting without the
handlebar mount, you will need a 1” X 1” flat area. Thoroughly clean the
installation area with soapy water and a clean rag. Rinse and dry the area
completely.
Wipe
the installation area with the included alcohol pad to remove any
residue and dry completely.
USB POWER PORT
INSTALLATION
-cont.-
PIC 1
HANDLEBAR
MOUNT
POWER PORT
SCREW
PLATE
TO BATTERY
NEGATIVE
TO BATTERY
POSITIVE
PIC 2
TIP POWER POINT
DOWN AND SLIDE
GROOVES ON POWER
POINT ONTO RIDGES
ON MOUNT
WIRE
HARNESS
GOES
TOWARDS
THIS
NOTCH
PIC 3
FOUR PIN CONNECTOR