Ride on, Fused terminal block, Installation – Kuryakyn 2208 UNIVERSAL ACCESSORY FUSED TERMINAL BLOCK User Manual
Page 3
PAGE
3
IT IS THE INSTALLERS RESPONSIBILITY TO ENSURE THAT THE
INSTALLATION OF AN ACCESSORY TO THE FUSED TERMINAL BLOCK
DOES NOT EXCEED THE AMPERAGE FOR THAT FUSE. PIC 4
EXCEEDING THE MAXIMUM ALLOWABLE AMPERAGE MAY LEAD TO
CIRCUIT FAILURE WHICH COULD RESULT IN SERIOUS INJURY OR DEATH.
NOTE:
If the wires that you are attaching do not have a forked terminal, cut any excess length
from the end of the wire harness. Remove approximately wire 1/4” of insulation from
the end of each wire. The insulator on the forked terminal should cover all exposed wire
when installed to avoid a potential short. Attach one of the included forked terminals to
each wire.
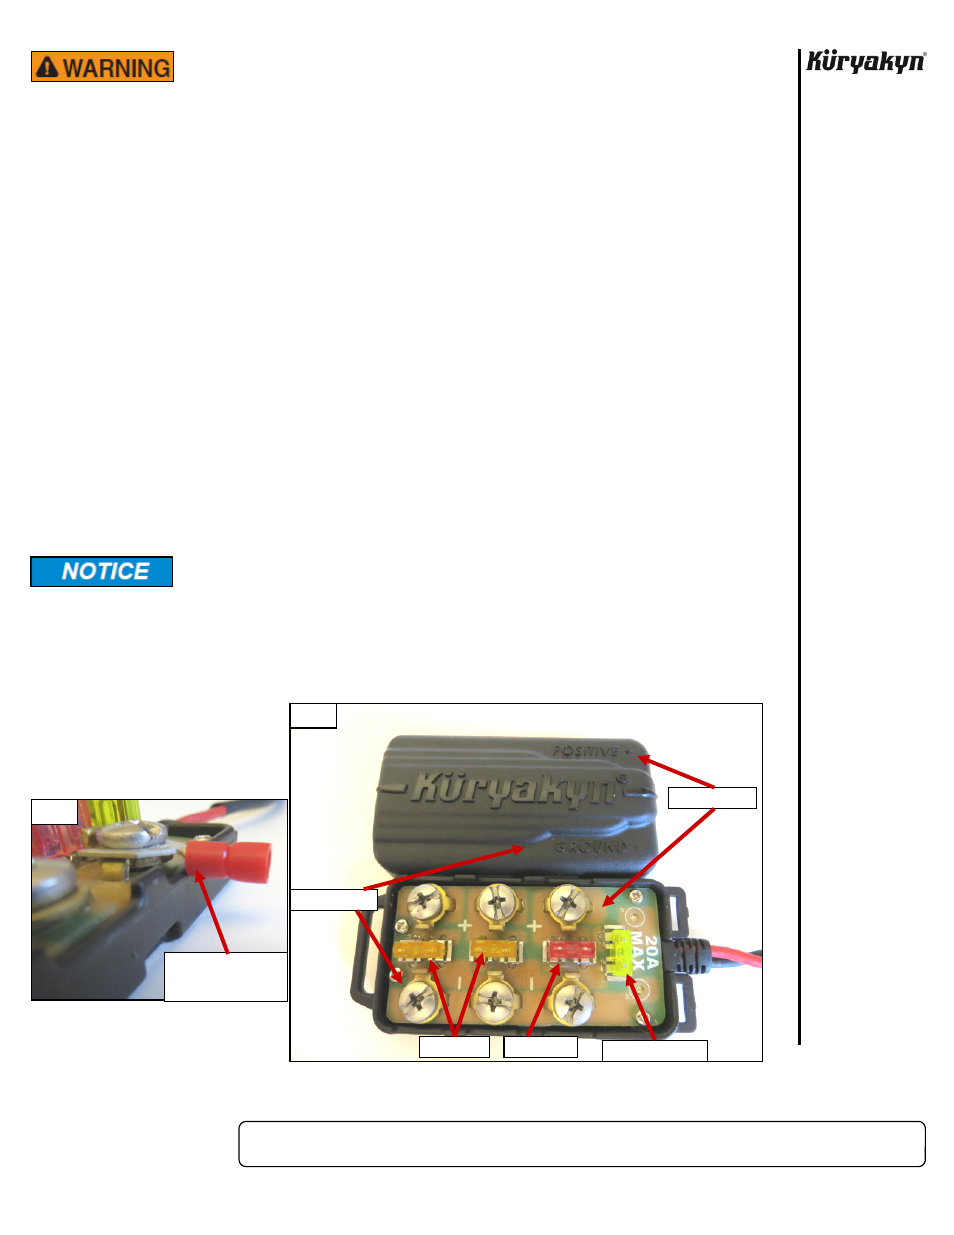
STEP 5
Using the lid as a reference (PIC 4), attach the positive wire forked terminal from the accessory to
the positive side of the Fused Terminal Block (also marked on the board with a (+) sign) by
loosening the screw at the chosen fuse, sliding the forked terminal under the head and then
tightening
the
screw
securely.
(For a proper lid fit, place the wire side of the forked
terminal towards the bottom of the Fused Terminal Block PIC 5). Repeat for the negative
wire forked terminal (also marked on the board with a (-) sign) Repeat for each accessory.
NOTE:
DO NOT exceed the maximum amperage for each fuse! PIC 4 DO NOT exceed 20 AMPS
total to the Fused Terminal Block! PIC 4
NOTE:
Double check the polarity of each accessory and the battery leads before connecting the
Fused Accessory Terminal Block to the battery!
STEP 6
Once you have connected all the desired accessories to the Fused Terminal Block, replace the lid.
Secure the Fused Terminal Block to the desired location. Secure all wiring out of harms way with
the
included
cable
ties.
Secure all wiring from the newly installed and/or from existing parts, away from
any moving parts, pinch points or extreme heat. Küryakyn WILL NOT issue a
warranty on any electrical component that fails due to pinched, crimped, broken,
abraded, melted or frayed wires.
STEP 7
Attach the ring terminal from the positive (RED) wire from the Fused Terminal Block to the
positive side of the battery. Attach the ring terminal from the negative (BLACK) wire from the
Fused Terminal Block to the negative side of the battery. Test all accessories.
Ride On!
FUSED TERMINAL BLOCK
INSTALLATION
PIC 5
PIC 4
POSITIVE SIDE
NEGATIVE SIDE
10 AMP MAX
5 AMP MAX
20 AMP TOTAL MAX
INSTALL FORKED
TERMINAL WIRE SIDE
DOWN