Ride on, Driving light and relay kit, Installation – Kuryakyn 2202 UNIVERSAL DRIVING LIGHT AND RELAY KIT User Manual
Page 3
PAGE
3
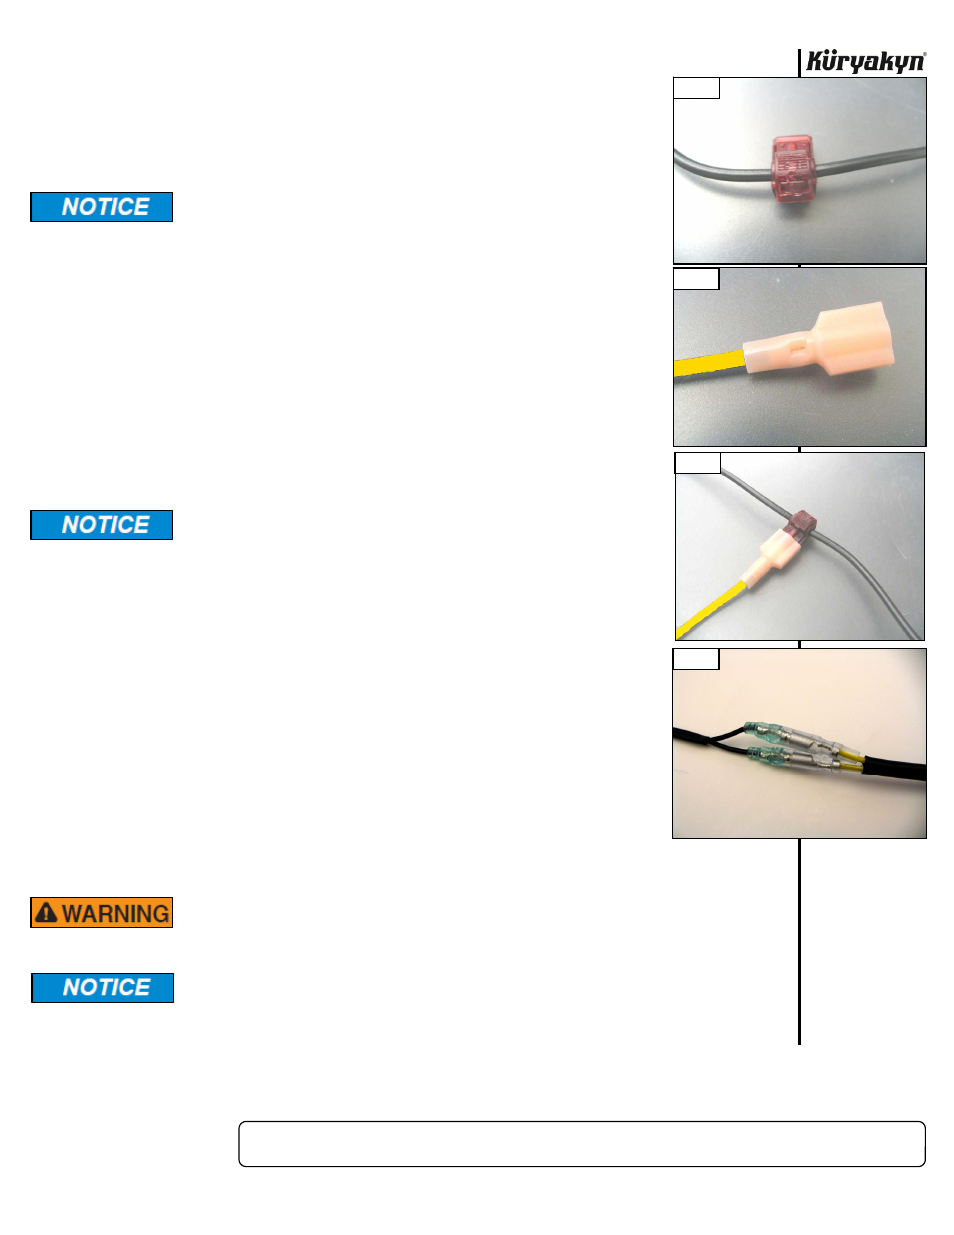
STEP 7
Place one of the included female T-Tap connectors over the “keyed” power wire located in Step 6,
and close it, ensuring that the tabs are engaged as shown in PIC 5
STEP 8
Insert the exposed end of the YELLOW wire in the handlebar switch harness
(PIC 4) into the included insulated male spade and crimp the end making sure that
the wire is secure. PIC 6
Küryakyn recommends the use of included dielectric grease on
electrical connections
STEP 9
Take the YELLOW power wire from the switch harness (PIC 4) and connect it to
the female T-Tap on the “keyed” power wire.
STEP 10
Find a location near the battery to place the relay. Attach the red wire with the
ring terminal and the positive battery wire from the bike to the positive side of the
battery. Connect the black wire with the ring terminal and the negative wire from
the bike to the negative side of the battery. PIC 4
STEP 11
Route the two groups of wires that are in the black sheathing to the front of the
bike ,keeping them away from pinch points or laying on the motor. Secure all
wiring out of harms way with the included cable ties.
Secure all wiring from the newly installed and/or from existing parts,
away from any moving parts, pinch points or extreme heat. Küryakyn
WILL NOT issue a warranty on any electrical component that fails
due to pinched, crimped, broken, abraded, melted or frayed wires.
STEP 12
Route wires from switch along bars to the relay. Connect the two wires from the
switch to the two yellow wires (in the black sheathing) that are coming from the
relay and the splice you made into the “keyed” power wire. Make sure the wires
are fully seated in the connectors and the insulating sleeve covers all the metal of
the connectors. PIC 8 Use the supplied cable ties to attach wires to bars and away
from
pinch
points.
STEP 13
Connect the white wires from the relay to the driving light power wire using the
supplied male insulated connectors and use the black wires from the relay for
ground wires to the lights if needed. If these ground wires are not needed, they
may be secured out of harms way.
STEP 14
Start the motorcycle and test all lights.
ENSURE PROPER LIGHT OPERATION BEFORE RIDING THE MOTORCYCLE.
VISIBILITY IS A MAJOR CONCERN FOR MOTORCYCLISTS. A LIGHTING
MALFUNCTION COULD RESULT IN DEATH OR SERIOUS INJURY.
It is the installer’s responsibility to ensure that all of the fasteners (including
pre-assembled) are tightened before operation of the motorcycle. Küryakyn will
not provide warranty coverage on products or components lost due to improper
installation or lack of maintenance. Periodic inspection and maintenance are
required on all fasteners.
Ride On!
DRIVING LIGHT AND RELAY KIT
INSTALLATION
PIC 5
PIC 7
PIC 6
PIC 8