Ride on, Run-brake light strip, Installation – Kuryakyn 5051 L.E.D. RUN-BRAKE STRIP for TRIKES User Manual
Page 4
PAGE
4
The adhesive will not bond correctly if applied at temperatures less than 50°F. Do
not attempt this installation in temperatures less than 50°F.
STEP 13
Once you are satisfied with the placement of the Run-Brake Light Strip, remove
the Strip from the motorcycle. Starting at the right side of the Strip, rub the
backing of the adhesive with your fingernail and start to peel the backing about
two inches back from the end of the Strip. Using the reference marks made in
Step 12, attach this end to the Trike body/motorcycle. Slowly work your way to
the left end of the Strip, rubbing and peeling the backing a little at a time,
following
your
reference
marks,
until the left end is attached to the
Trike/motorcycle. Press and rub firmly along the Strip for one minute. Full
bonding will occur in 24 hours.
Always install the Light Bar Harness upstream (before) any existing
multifunction control modules. Do not install the Run-Brake Strip Light
Harness between a module and the turn signals, as this will overload the
module. Overloading will damage the module and may create a fire
hazard!
Secure all wiring away from any moving parts, pinch points or extreme heat.
Küryakyn WILL NOT issue a warranty on any electrical component that fails due to
pinched, crimped, broken, abraded, melted or frayed wires.
Küryakyn recommends the use of dielectric grease on electrical connections.
STEP 14
Using a test light, or the wiring schematic for your motorcycle, locate the brake wire, the running
(tail) light wire and a good ground wire. Mark these for reference. Turn the bike “off” and
disconnect
the
battery.
Avoid potential electrical shock! Disconnect the battery before starting this
procedure.
STEP 15
Install a female T-Tap to each of these wires.
NOTE:
Black Wire = Ground White Wire = Power Red Wire= Brake
STEP 16
Cut the connector off of the wire harness from the Run-Brake Strip Light. Strip about 1/2” of the
insulation from the wires and install one of the supplied male spade connectors to the RED wire,
one
to
the
WHITE wire and one to the BLACK wire.
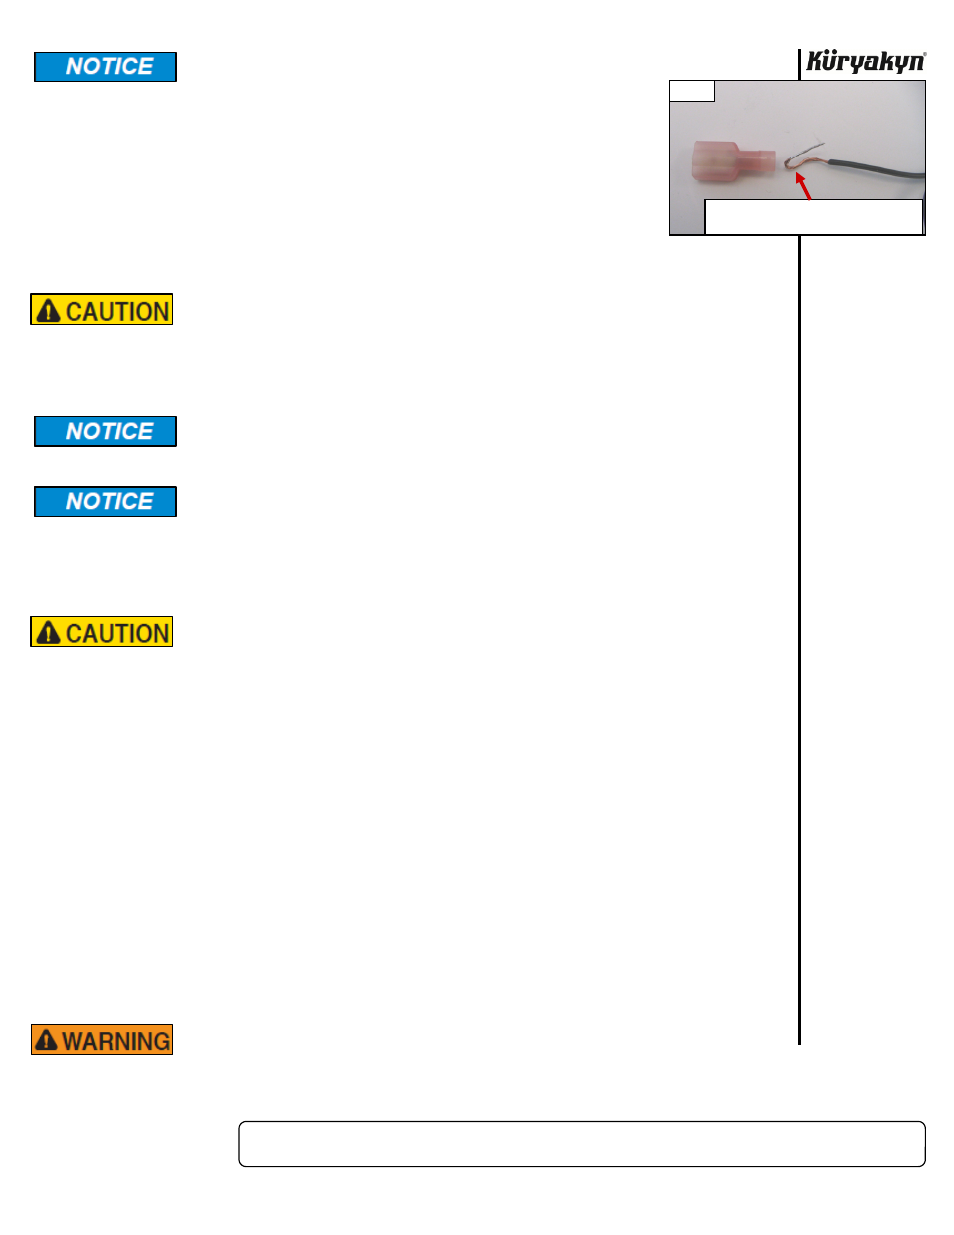
NOTE:
Because the wire lead is a small gauge, it is recommended to strip enough
insulation so you can double back the wire before you crimp on the male
spade. PIC 6
STEP 17
Plug the male spade on the BLACK wire to the female T-Tap on the ground wire. Plug the male
spade
on
the
RED wire into female t-Tap on the brake wire. Plug the male spade on the WHITE
wire to the female T-Tap on the running (tail) light wire.
STEP 18
Connect the battery, turn the key “on” and test the lights.
ENSURE PROPER LIGHT OPERATION BEFORE RIDING THE MOTORCYCLE.
VISIBILITY IS A MAJOR CONCERN FOR MOTORCYCLISTS. A LIGHT
MALFUNCTION COULD RESULT IN DEATH OR SERIOUS INJURY.
Ride On!
RUN-BRAKE LIGHT STRIP
INSTALLATION
PIC 6
DOUBLE BACK THE EXPOSED WIRE THEN
INSERT IN THE MALE SPADE AND CRIMP