Rear lighting kit for flhx/fltrx, Installation – Kuryakyn 5415 REAR LIGHTING KIT for FLHX/FLTRX User Manual
Page 3
PAGE
3
STEP 14
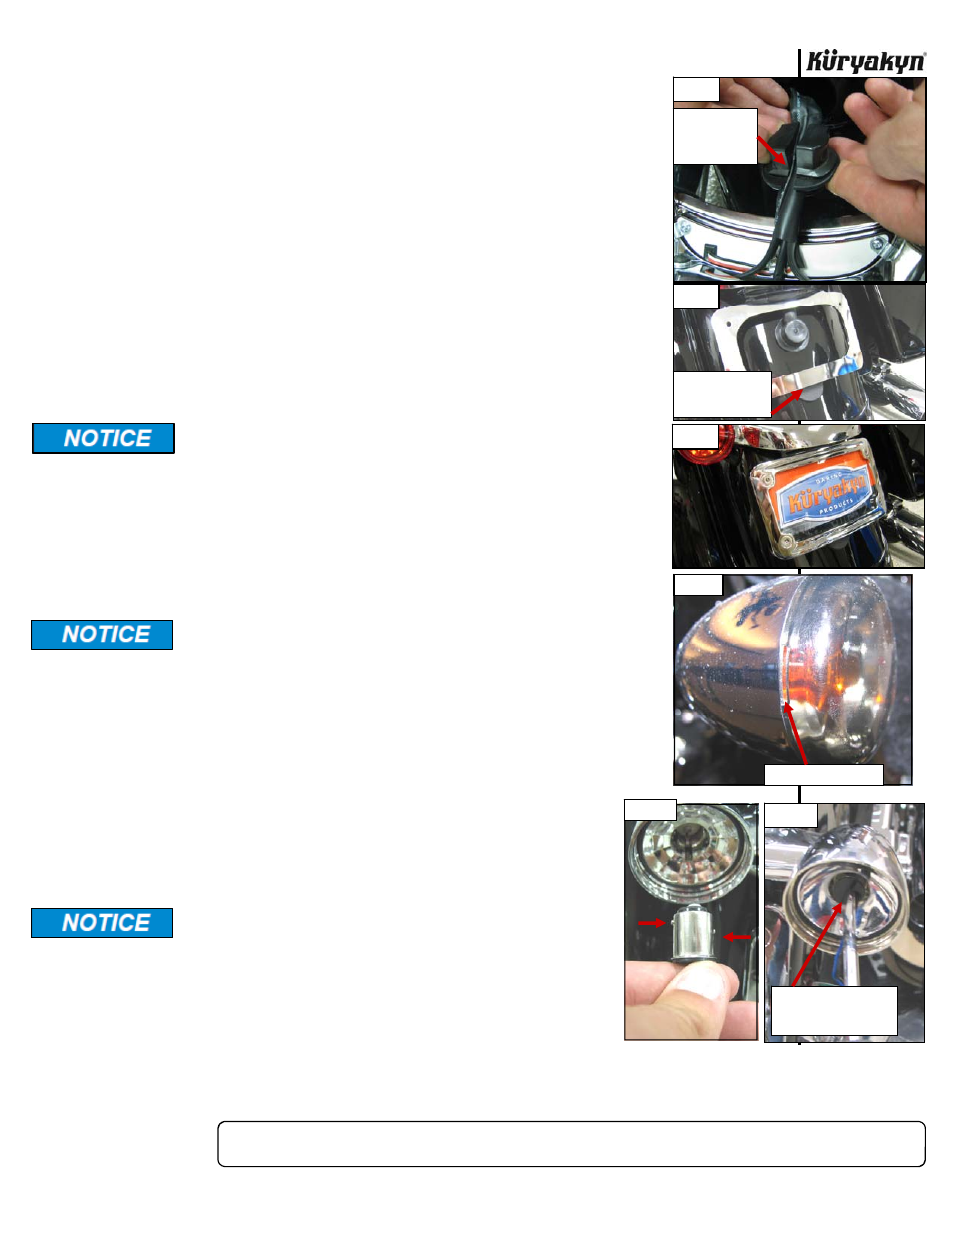
As shown in PIC 7, place the 1/2" Bumper Pads between the new Back Plate and
the rear fender. Clean with an ammonia based cleaner such as window cleaner and
dry the rear fender where the Bumper Pad will be installed. Peel the adhesive tape
backing from the Bumper Pads, stack one on top of the other and stick to the
fender over the plastic plug.
NOTE:
The bumper pads are provided to avoid excess vibration to the plate
mount. The bumper pads may fit tightly when stacked and put in place
behind the plate mount.
STEP 15
Once you have the Back Plate secured you can install the license plate by gently
molding your license plate to the same bend as the back plate. PIC 8 Install the
license plate frame over your plate by getting all four supplied fasteners
(1/4”-20 X 7/16” flat socket cap screws) started first, then tightening them. This
will work better than tightening up one at a time.
NOTE:
Due to the varying sizes of license plates, modification of the plate may
be necessary to make it fit. If the plate fits loosely in the frame, adhesive
foam strips can be installed between the Back Plate and the license plate
to
help
stop
vibration
and
avoid
damage to the new frame or license
plate.
It is the installer’s responsibility to ensure that all of the fasteners
(including pre-assembled) are tightened before operation of the
motorcycle. Küryakyn will not provide warranty coverage on
products or components lost due to improper installation or lack of
maintenance. Periodic inspection and maintenance are required on
all fasteners.
STEP 16
Remove the stock lens by grasping it firmly and pulling away from the chrome
housing while twisting. If the lens is difficult to remove, turn the lens until you
see a small “pry slot”. PIC 9 Insert a flat tip screwdriver in the slot and twist
gently until the lens pops out. Remove the bulb from the light socket by pushing it
inward gently and twisting it counter clockwise.
Küryakyn recommends the use of dielectric grease on electrical
connections.
STEP 17
Notice the position of the pins on the connector and install as shown in PIC 10.
Apply dielectric grease and push it in gently and turn clockwise. Using a
screwdriver in the slot on the connector may ease installation. PIC 11
STEP 18
Install the lens assembly by pushing it into the light housing until it snaps into
place.
STEP 19
Remove the left side saddlebag and side cover to gain room to route the
wire.
STEP 20
Route the wire from the signal filler panel along the OEM rear wire harness
that runs from the bottom of the fender up to the side cover. Use the pro-
vided cable ties to secure the wires together.
Secure all wiring from the newly installed and/or from
existing parts, away from any moving parts, pinch points or
extreme heat. Küryakyn WILL NOT issue a warranty on any
electrical component that fails due to pinched, crimped,
broken, abraded, melted or frayed wires.
STEP 21
Locate the 6-Pin connector wiring harness for the taillights. This is behind
the left (clutch side) side cover. PIC 12
REAR LIGHTING KIT for FLHX/FLTRX
INSTALLATION
-cont.-
PIC 11
USE A SCREWDRIVER
IN THE SLOT AND TURN
CLOCKWISE
PIC 10
PIC 9
SCREWDRIVER SLOT
PIC 8
PIC 7
PIC 6
PLACE NEW
HARNESS
ALONG OEM
HARNESS
ATTACH BUMPERS
BETWEEN FRAME
AND PLUG