Deluxe neck covers, Installation – Kuryakyn 7834 DELUXE NECK COVERS User Manual
Page 2
PAGE
2
STEP 2
Cut the zip ties that secure the clutch cable to the down tube.
STEP 3
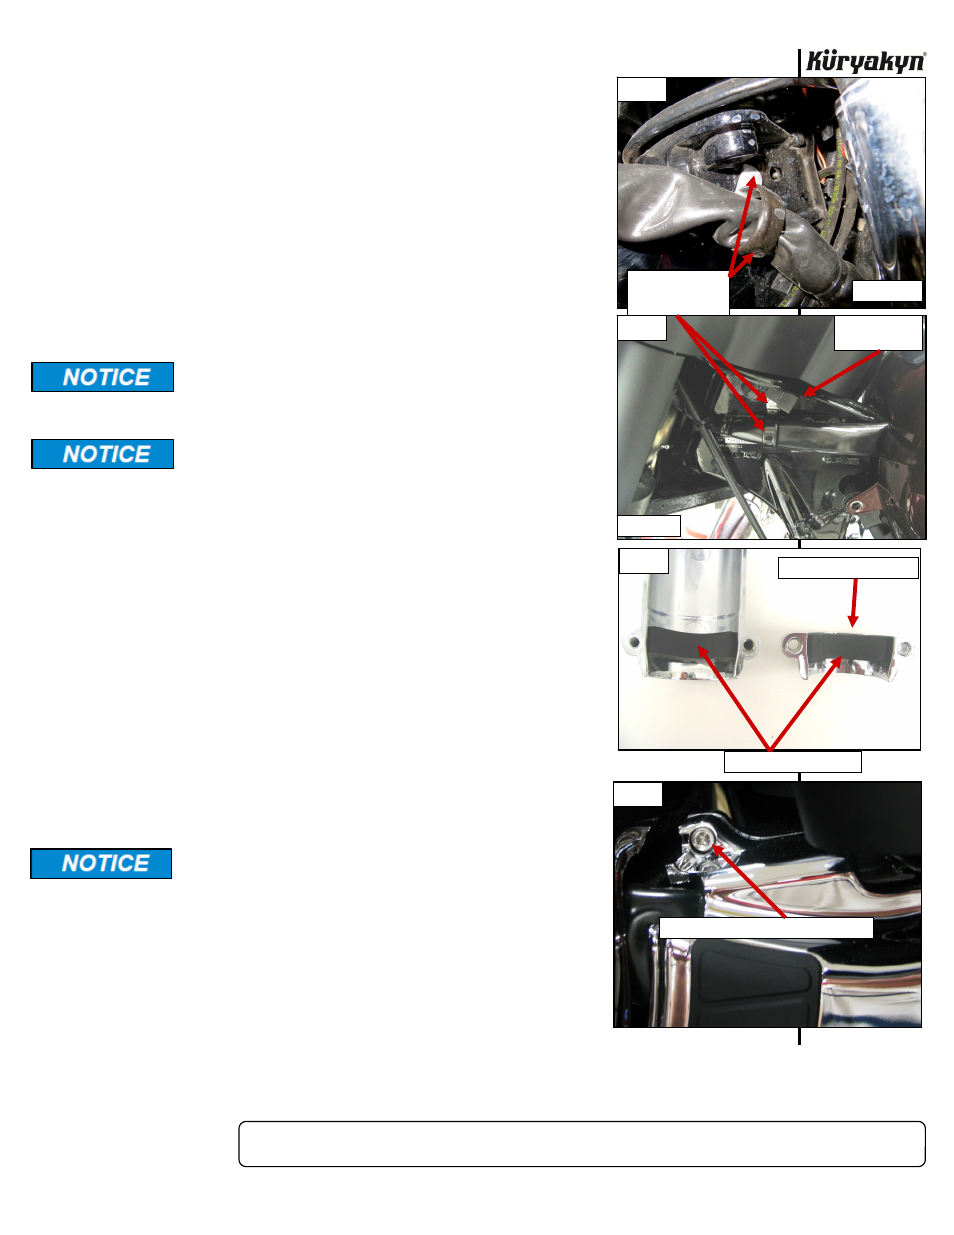
Remove the wire loom clamp, rubber tank bolt cover, and the gas tank
bolt from the right side (sitting on motorcycle) of the neck. PIC 1
STEP 4
Remove the wire loom clamp, rubber tank bolt cover, outside air temp
sensor (PIC 2) and gas tank bolt from the left side (sitting on motorcycle)
of the neck. PIC 2
NOTE:
Use one of the supplied cable ties to secure the outside air temp
sensor up under the fairing out of harms way.
STEP 5
Remove the reflectors from the down tubes, by moving them back and
forth (they are held in place with double-sided adhesive).
STEP 6
Snap the down tube covers into place; position them just below the weld
line on the down tube.
Ensure the area of installation is free of grease, oil, dirt or
other debris including wax/polish products and bugs to
ensure proper adhesion. Küryakyn WILL NOT issue a
warranty on any parts lost due to improper installation.
The adhesive will not bond correctly if applied at
temperatures less than 50°F. Do not attempt this installation
in temperatures less than 50°F.
STEP 7
Install the smaller foam pads from the hardware kit on the inside
of the clamp halves and the inside of the covers as shown in PIC. 3.
STEP 8
Place the left cover on the motorcycle, and start a 5/16”-18 x 1-1/4”
button socket cap screw and flat washer to secure the cover and the tank
to the frame. Leave finger tight for now.
STEP 9
Place the right cover on the motorcycle, and start a 5/16”-18 x 1-1/4”
button socket cap screw and flat washer to secure the cover and the tank
to the frame. Leave finger tight for now.
STEP 10
Start the #10-32 x 5/8” socket head cap screw that secures the top of
the neck covers together as shown in PIC 4.
STEP 11
Start two 8-32 x1/2” socket head cap screws, that secure the down tube
cover clamps to the cover, on the left and right side as shown in PIC 5.
Leave finger tight for now.
STEP 12
Ensure that the wires are in the recessed area of the neck covers.
Secure all wiring away from any moving parts, pinch points
or extreme heat. Küryakyn WILL NOT issue a warranty on
any electrical component that fails due to pinched, crimped,
broken, abraded, melted or frayed wires.
STEP 13
Tighten the 5/16”-18 x 1-1/4” screws that secure the covers and the
tank.
STEP 14
Tighten the #10-32 x 5/8” screw that secures the top halves of the
covers
together.
STEP 15
Tighten the screws from STEP 11 that secure the down tube cover
clamps
to
the
covers.
DELUXE
NECK
COVERS
INSTALLATION
-cont.-
PIC 2
PIC 1
REMOVE CLAMP
ON BOTH SIDES
OF NECK
PIC 4
#10-32 X 5/8” SOCKET HEAD CAP SCREW
OUTSIDE AIR
TEMP SENSOR
RIGHT SIDE
LEFT SIDE
PIC 3
PLACE FOAM PADS HERE
DOWN TUBE COVER CLAMP