Ride on, Neck covers for flhtcutg & flhxxx, Installation – Kuryakyn 7228 DELUXE NECK COVERS for FLHTCUTG & FLHXXX User Manual
Page 3
PAGE
3
STEP 10
Place the right cover on the motorcycle, and start a 5/16”-18 x 1-1/4” button socket cap screw
and flat washer to secure the cover and the tank to the frame. Leave finger tight for now.
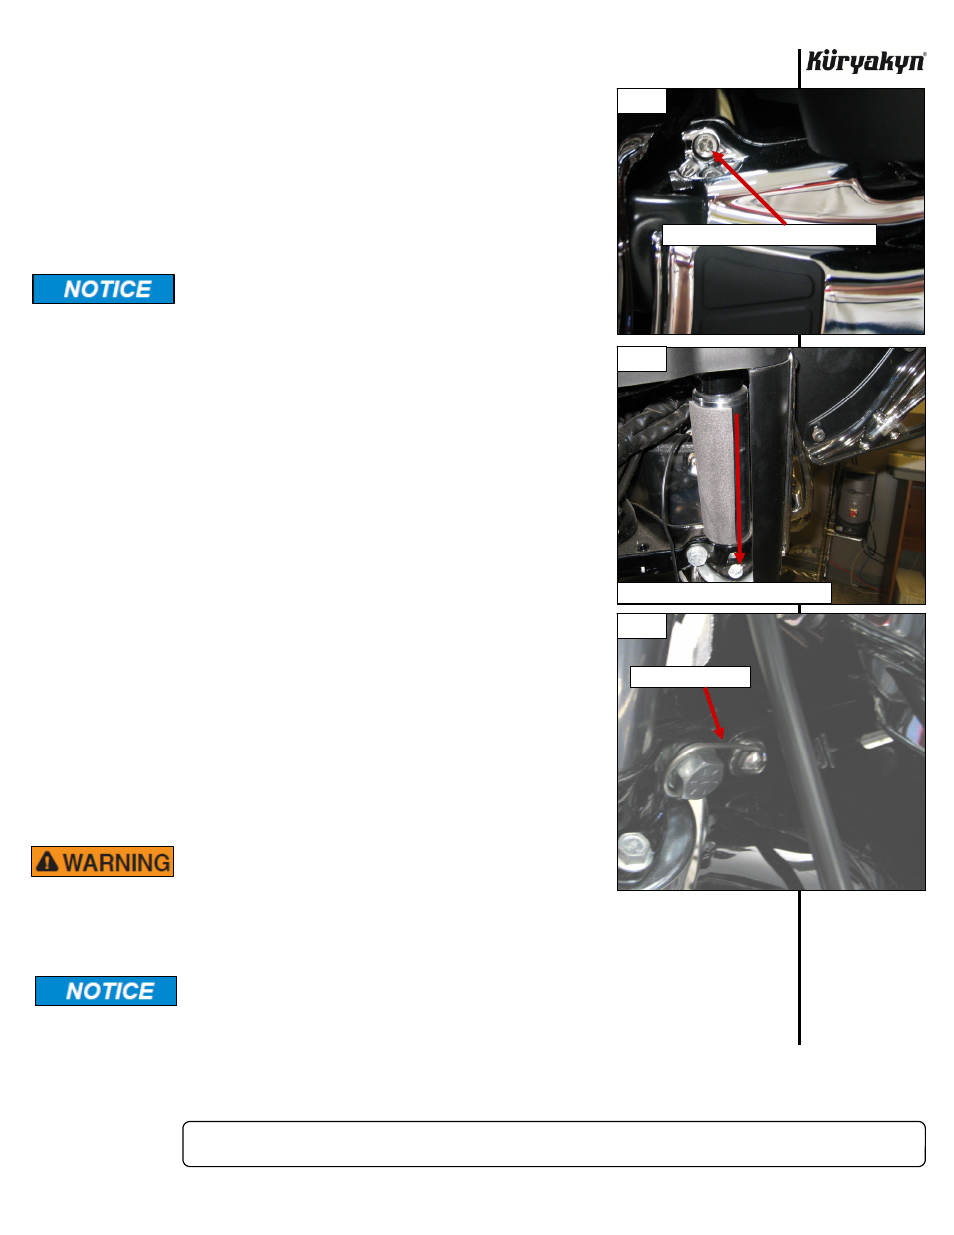
STEP 11
Start the #10-32 x 5/8” socket head cap screw that secures the top of
the neck covers together as shown in PIC 4.
STEP 12
Start the #8-32 x 1/2” socket head cap screw that secures the left down
tube cover clamp to the cover. Leave finger tight for now.
STEP 13
Start the #8-32 x 1/2” socket head cap screw that secures the right down
tube cover clamp to the cover. Leave finger tight for now.
STEP 14
Ensure that the wires are in the recessed area of the neck covers.
Secure all wiring away from any moving parts, pinch points
or extreme heat. Küryakyn WILL NOT issue a warranty on
any electrical component that fails due to pinched, crimped,
broken, abraded, melted or frayed wires.
STEP 15
Tighten the 5/16”-18 x 1-1/4” screws that secure the covers and the
tank.
STEP 16
Tighten the #10-32 x 5/8” screw that secures the top halves of the
covers
together
STEP 17
Tighten the screws from STEP 12 and STEP 13 that secure the down tube
cover clamps to the covers.
STEP 18
Secure the clutch cable to the down tube in the same location that the
cable tie that was removed in STEP 2 was located.
STEP 19
Test fit the adhesive pad to the inside of the forks where contact between
the neck covers and the forks may happen. As a general guideline, line
up the edge of the foam pad (PIC 5) with the head of the bolt on the fork.
STEP 20
Clean the mounting area thoroughly with the alcohol pad. Dry the area
completely with a clean cloth. Remove the adhesive backing from the
foam pad and place on the fork tubes. Hold in place for one minute, full
bonding strength will occur in 24 hours.
NOTE:
The provided hardware in PIC 6 is to prevent the clutch cable
from being damaged. There is an unused mounting location in the
lower triple tree where the new cable guide spring will mount.
Take the 1/4”-20 x 5/8” Button Head Cap Screw and place the
cable guide spring over the screw, then take the 1/4” flat washer
and place the screw through and tighten into the lower triple tree.
Be sure that the spring goes around the head of the existing bolt
in the lower triple tree to prevent damage.
ENSURE THAT THE CLUTCH CABLE, WIRING OR ANY
OTHER COMPONENT OF THE MOTORCYCLE IS NOT
PINCHED OR STRETCHED AT ANY POINT WHEN THE
HANDLEBARS ARE TURNED TO THEIR FULL STOP POSITION ON EITHER
SIDE. STRETCHED OR PINCHED COMPONENTS CAN CAUSE LOSS OF
CONTROL THAT COULD RESULT IN SERIOUS INJURY OR DEATH.
It is the installer’s responsibility to ensure that all of the fasteners (including
pre-assembled) are tightened before operation of the trike. Küryakyn will not
provide warranty coverage on products or components lost due to improper
installation or lack of maintenance. Periodic inspection and maintenance are
required on all fasteners.
Ride On!
NECK COVERS for FLHTCUTG & FLHXXX
INSTALLATION
PIC 4
PIC 6
PIC 5
#10-32 X 5/8” SOCKET HEAD CAP SCREW
LINE UP FOAM PAD WITH HEAD OF BOLT
CABLE GUIDE SPRING