I.R.I.S. 130 User Manual
Page 11
3.2. INITIAL POWER ON TEST
To ensure the camera operates correctly after installation, please power for an initial test following the steps below:
1) Connect the camera with correct power supply
2) Connect control cable, video cable
3) Power on the camera
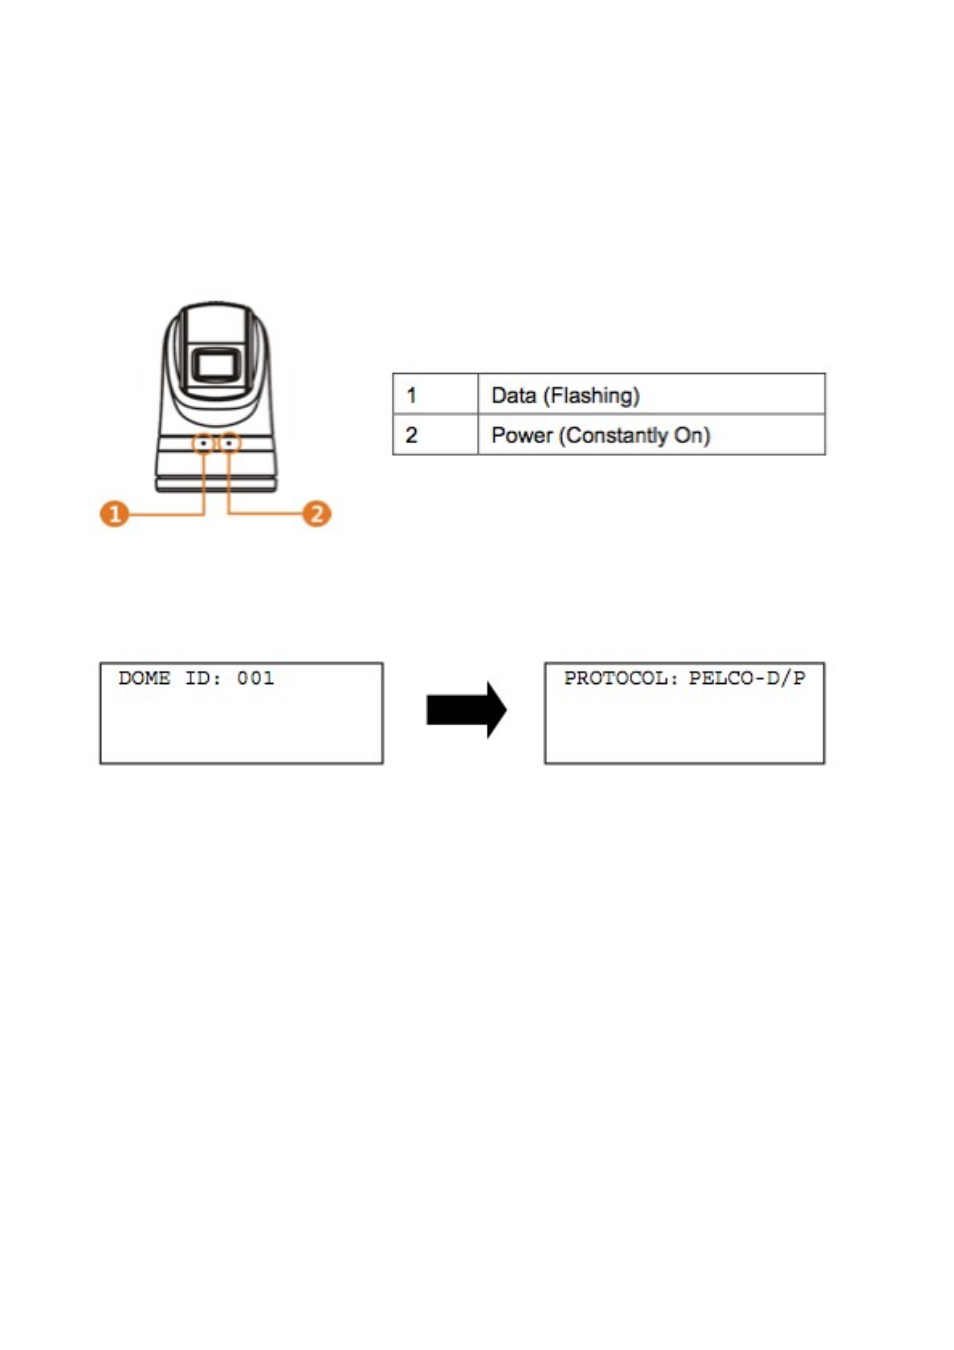
When the camera is powered on, the LED indicators at the front will display the following:
Fig.2: LED Indicators
The camera will run a calibration procedure on power up and show the following messages on screen in three times
sequentially:
Fig.3: On Screen Messages During Power-Up
3.3. SIGHTING THE CAMERA FOR INSTALLATION
There are a number of issues to consider when sighting the position of the camera:
1. Does the position achieve the desired fields and angles of view?
(Iris strongly advise that a survey is carried out prior to fixing the camera into place to ensure desired views are
achievable. If necessary, power the camera up before fixing into place in order to test the view).
2. Will the position support the weight, size and movement of the camera without obstructions?
3. Are there likely to be obstructions behind the panel that will prevent or hinder the successful installation of the
camera?
4. Are there likely to be obstacles that will hinder the cable run or prevent interconnection behind the panel?
5. Are there any devices in the desired vicinity that may effect the operation of the camera?