Paraflex2_inside, Step 1: mount post to clamp mount assembly, Step 2: attach mount to work surface – Humanscale ParaFlex 2 User Manual
Page 2: Step 3: addition of second row
Note: If security is required, tighten
Security Screw using Hex Key D.
A
C
B
Security Screw
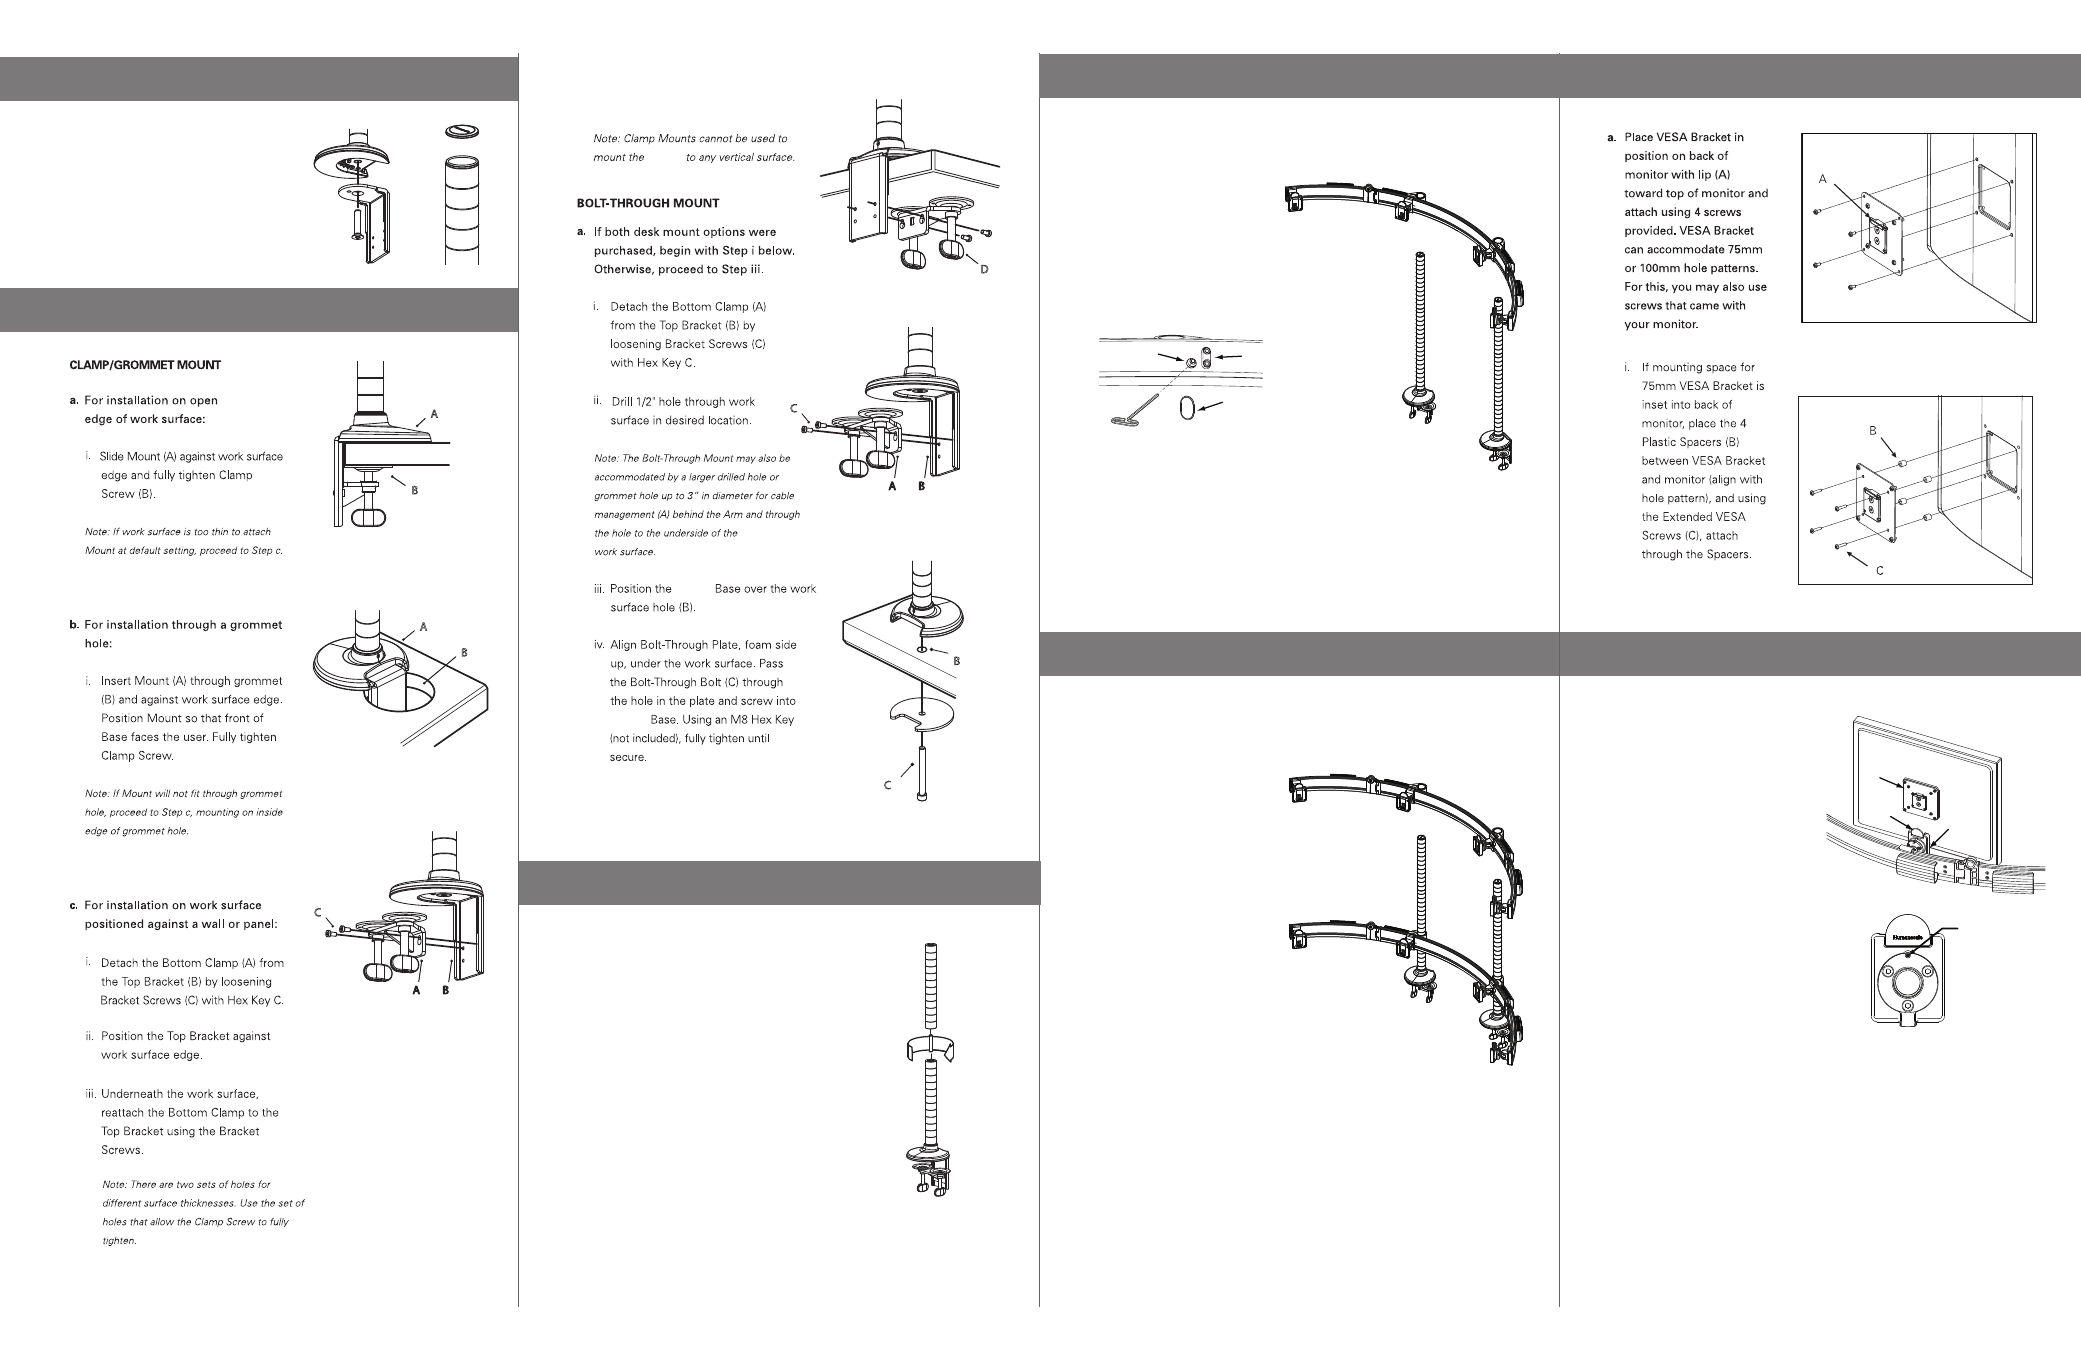
STEP 1: MOUNT POST TO CLAMP MOUNT ASSEMBLY
Note: Do not mount post to clamp if
installing a bolt-through mount.
a. Fully tighten screw to post.
b. Install Top Cap
STEP 2: ATTACH MOUNT TO WORK SURFACE
ii. Proceed to Step 3.
ii. Proceed to Step 3.
A
B
A
B
C
A
B
D
C
B
M/Flex
M/Flex
M/Flex
C
A
B
iv. Fully tighten Clamp Screw (D).
v. Proceed to Step 3.
v. Proceed to Step 3.
STEP 3: ADDITION OF SECOND ROW
a.
b.
c.
Remove Top Cap from originally
mounted post.
Attach 2nd Post to original Clamp
mounted post.
i. Posts must be fully seated
against each other.
ii. Place Top Cap on top of 2nd Post.
Repeat steps 1-3 for 2nd post
installation. Posts are placed 19.7”
(500mm) apart from center to center
of posts.
a.
b.
c.
Slide VESA Bracket (A) into Ball
Joint (B) until it clicks.
To remove, depress Quick-Release
Tab (C) and slide monitor up and
away from Paraflex 2.
Repeat steps for each monitor
required.
a. Repeat Step 4 with Second Row and
adjust to the required height.
a.
b.
Slide First Row Crossbar (D)
onto posts. Tighten all 6
Clamping Screws (E + F).
Snap in provided Caps (G) to
cover large clamp screw hold (F).
STEP 4 : ATTACH FIRST ROW CROSSBAR
STEP 5 : ATTACH SECOND ROW CROSSBAR
STEP 6: ATTACH VISA TO MONITOR
STEP 7: ATTACH MONITORS TO PARA/FLEX
G
F
E