Surround frame – Dreams Selkirk Bedstead User Manual
Page 3
parts check list 2’6” & 3’ frame
01 Headend
1
02 Footend
1
0 Head end extension legs
2
04 Side rails
2
05 End cross bar
2
06 Center cross bar
1
07 Center rail
0
08 Slats
14
fittings check list 2’6” & 3’ frame
11 Bolt (pre fitted in headend and footend)
8
12 Washer (pre fitted in headend and footend)
8
1 Threaded stud (62 mm)
4
14 Threaded stud (0 mm)
0
15 Nut
6
16 Flat Head Screw (25mm)
2
17 CS Screw (60 mm)
0
18 Allen Key
1
19 Spanner
1
parts check list universl frame
01 Headend
1
02 Footend
1
0 Head end extension legs
2
04 Side rails
2
05 End cross bar
2
06 Center cross bar
1
07 Center rail
1
08 Slats
0
09 Leg posts
2
fittings check list universal frame
11 Bolt (pre fitted in headend and footend)
8
12 Washer (pre fitted in headend and footend)
8
1 Threaded stud (50 mm)
4
14 Threaded stud (0 mm) not in 3’ bed
2
15 Nut
9
16 Flat Head Screw (25mm)
2
17 CS Screw (60 mm)
1
18 Allen Key
1
19 Spanner
1
20 Bolt (pre fitted in leg posts)
12
parts check list surround frame
01 Headend
1
02 Footend
1
0 Head end extension legs
2
04 Side rails
2
05 End cross bar
0
06 Center cross bar
0
07 Center rail
0
08 Slats
0
fittings check list surround frame
11 Bolt (pre fitted in headend and footend)
8
12 Washer (pre fitted in headend and footend)
8
1 Threaded stud (50 mm)
0
14 Threaded stud (0 mm) not in 3’ bed
0
15 Nut
0
16 Flat Head Screw (25mm)
0
17 CS Screw (60 mm)
0
18 Allen Key
1
19 Spanner
1
06
05
05
04
04
09
06
05
05
07
04
04
04
04
10
5
1
2
3
4
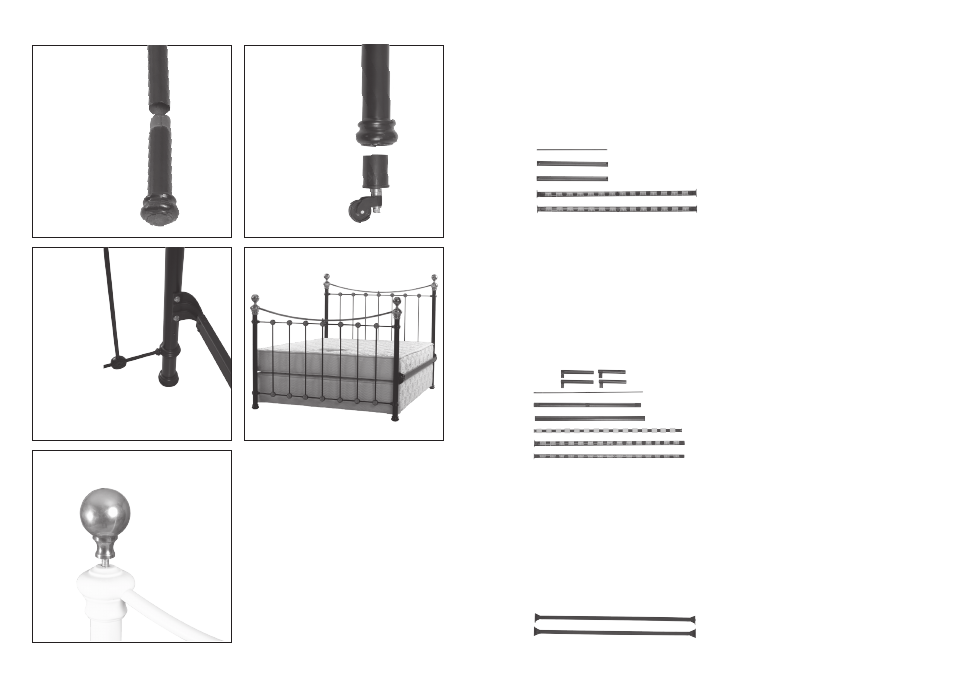
Screw knobs to top
of headend and
footend.
Fit the extension
legs to the ends of
the headend 01 as
shown
This stage is for
beds with castors.
Castors are optional
and do not have to
be fitted. Remove
plastic cap from
the end of the
legs. Insert the the
castors.
Surround Frame
This stage may
require two
people with
the bedstead
being
assembled
around your divan.. Remove
the screws and washers from the headend (01)
and footend (02) . Then, using these fittings,
attach the siderails to the headend and footend
at either of the two height positions.