Dascom 7010 Peeler Installation and User Guide User Manual
Page 4
© Copyright DASCOM Europe GmbH
v1.0
(12) Attach the front right cover removed at step 4 in its original position. (2 screws)
(13) Attach the operation panel removed at step 3 in its original position. (3 screws)
Note
B e sure to c o n n e c t t h e f l ex i b l e c a b l e t h at yo u d i s c o n n e c te d a s i t wa s
formerly connected. The blue side of the tip is upwards.
(14) Close the top cover.
(15) Connect the power cord and turn on the power switch on the printer.
Note
Removing the peeler unit
To remove the peeler unit from the printer, follow the installation steps in
reverse order. If the screws that fasten the peeler unit are removed, the unit
may fall from the pr inter, so hold the peeler unit with your hand while
loosening the fastening screws.
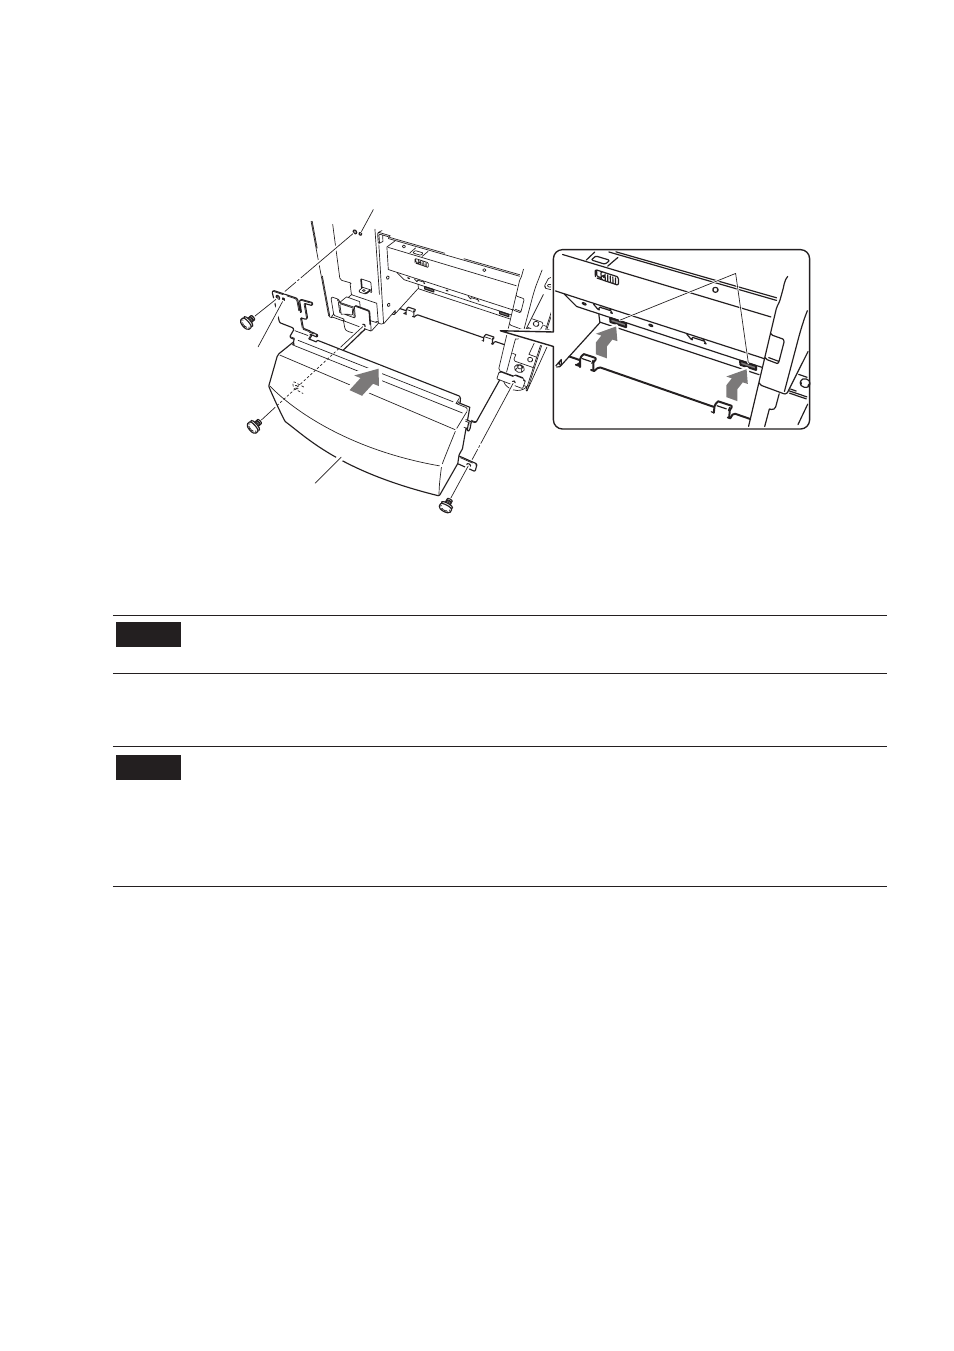
(11) Align the two tabs on the bottom of the 'front center cover' to the slits of the printer as
it is slid in to the printer. The bottom plate of the front cover needs to be held up from
below to ensure a good fit. Attach the front center cover from step 5 in its original
position. (3 screws, of which 1 is an accessory to the unit)
Alignment "pin"
Slit
Alignment hole
Front center cover