Service – Danuser SM40 Hammer User Manual
Page 17
17
Service
Never attempt repairs or adjustments while the equipment
is in operation.
Because of the weight
of some components,
and because some
components are difficult
to balance, two people are
required for servicing of
this equipment.
Personal protection
equipment including hard
hat, safety glasses, safety
shoes, gloves, and ear
plugs are recommended
during assembly,
installation, operation,
maintenance, service,
removal, or movement of
the attachment.
Make sure the hammer weight catch is visible through the viewing slots on the
back of the case.
Remove the retention pin from the top of the case. Insert a hook into the lifting
eye located on the top of the weight. Lift the weight out of the Hammer with a
hoist, forklift, or another vehicle. Set the weight on the ground.
Carefully lay down the Hammer on its front side.
Remove the top and bottom chain covers.
Remove the retaining ring fastened to the lower sprocket shaft assembly, and pull
out the shaft from the opposite side of the Hammer.
Remove the tensioning rods and shim(s). Slide chain slack to the top of the
Hammer.
Find the chain catch and two pins that secure it. Remove the clips that retain the
pins, and remove the pins.
Install new chains over the upper sprocket shaft assembly. Make sure open ends
of the chain are at equal links away from sprockets.
Reinstall the chain catch and pins through the open ends of the new chain. Install
clips on the pins.
Slide chain slack to the bottom of the Hammer, and insert the lower sprocket shaft
assembly into the chain.
Insert the lower sprocket shaft through the side of the Hammer and through the
tensioning rods and sprockets.
Install shim(s) and retaining ring on the end of the sprocket shaft.
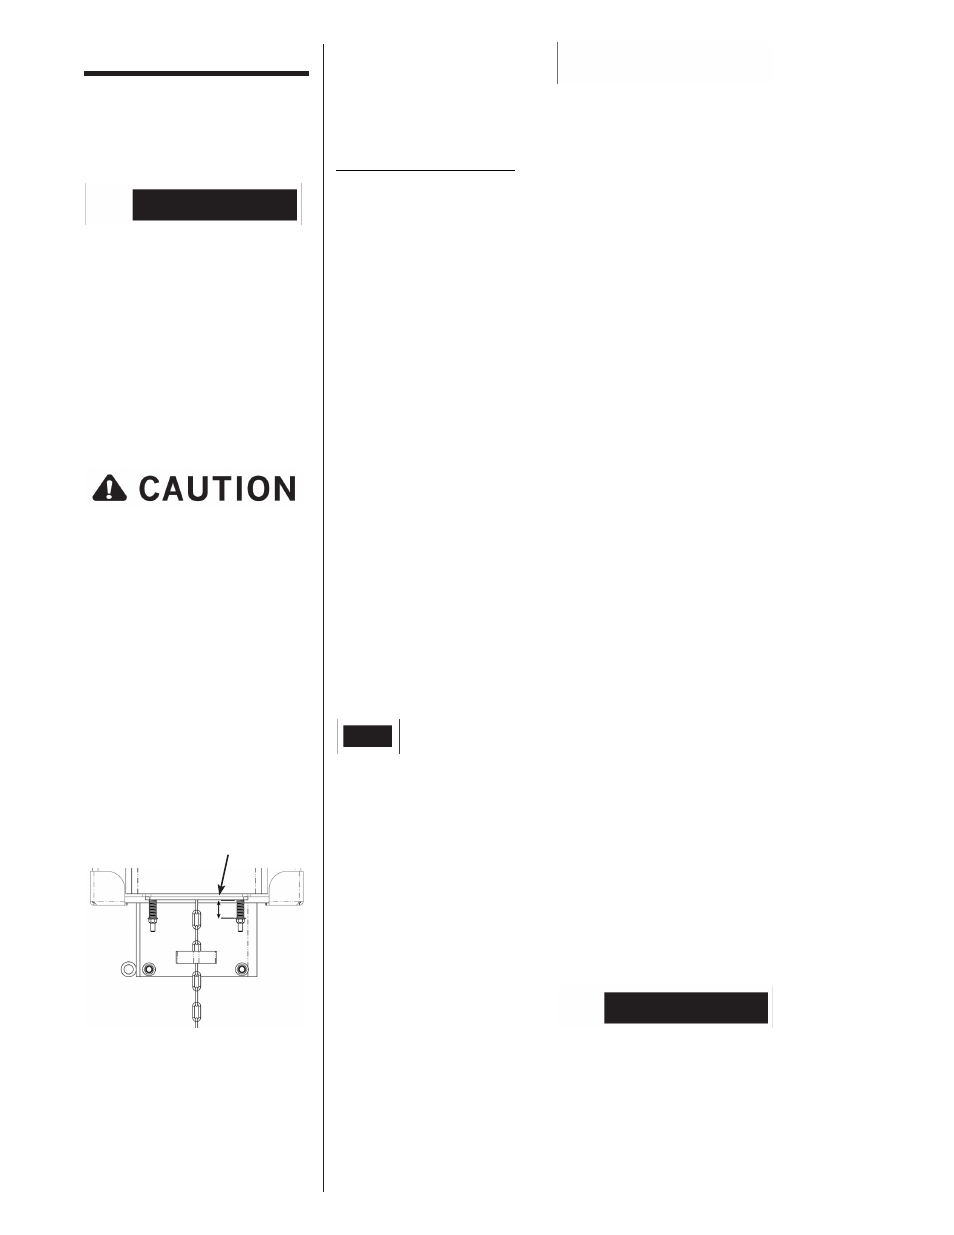
Install bottom chain guard and tensioning springs. Tighten tensioning nuts until
the springs are adequately preloaded but not entirely collapsed.
Install the top chain cover, stand Hammer upright, reinstall weight, and install the
retention pin.
STEP 1:
STEP 2:
STEP 3:
STEP 4:
STEP 5:
STEP 6:
STEP 7:
STEP 8:
STEP 9:
STEP 10:
STEP 11
STEP 12:
STEP 13:
STEP 14:
Shim(s) must be inserted between the tensioning rods and the lower sprocket shaft
assembly to maintain proper sprocket location.
Do not tilt or operate the Hammer without the retention pin
in place. The hammer weight could slide out of the Hammer
and cause serious injury or death.
Tighten tensioning nuts until
springs are adequately preloaded
1.5"
Replacing the Drive Chain