Chapter 2: hardware installation – chiliGREEN K8NHA Grand User Manual
Page 9
K
K
8
8
N
N
H
H
A
A
G
G
r
r
a
a
n
n
d
d
9
CHAPTER 2: HARDWARE INSTALLATION
2.1 C
ENTRAL
P
ROCESSING
U
NIT
(CPU)
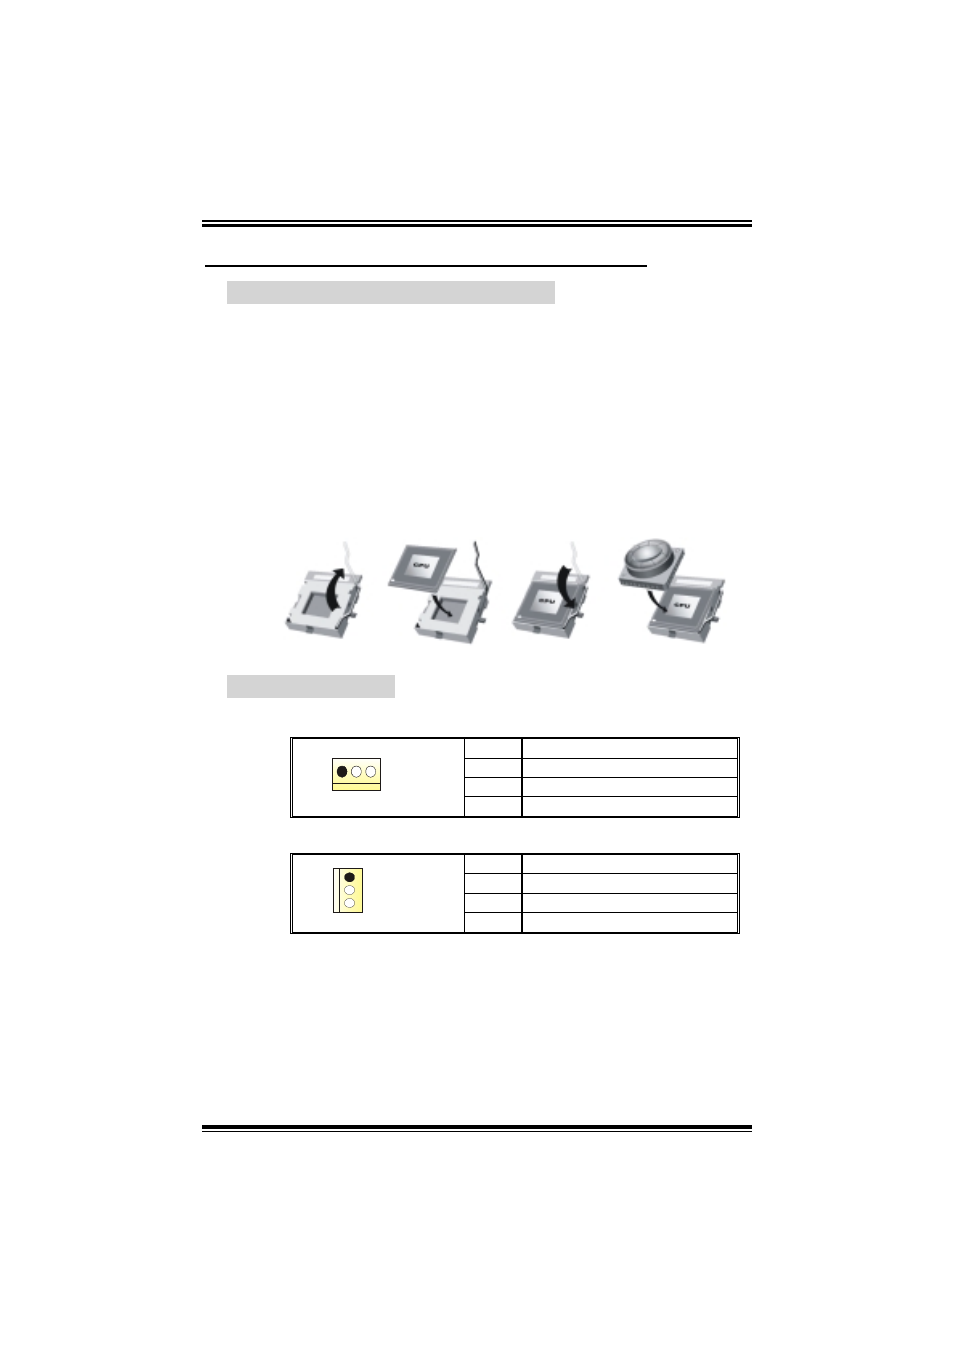
Step 1: Pull the lever sideways away from the socket and then raise
the lever up to a 90-degree angle.
Step 2: Look for the black cut edge on socket, and the white dot on
CPU should point fowards this black cut edge. The CPU will fit
only in the correct orientation.
Step 3: Hold the CPU down firmly, and then close the lever to complete
the installation.
Step 4: Put the CPU Fan on the CPU and buckle it. Connect the CPU
FAN power cable to the JCFAN1. This completes the
installation.
2.2 F
AN
H
EADERS
CPU FAN Header: JCFAN1
Pin
Assignment
1 Ground
2 +12V
1
JCFAN1
3
FAN RPM rate sense
System Fan Header: JSFAN1
Pin
Assignment
1 Ground
2 +12V
1
JSFAN1
3
FAN RPM rate sense
Note:
The JCFAN1 and JSFAN1support system cooling fan with Smart Fan
Control utility. It supports 3 pin head connector. When connecting with
wires onto connectors, please note that the red wire is the positive
and should be connected to pin#2, and the black wire is Ground and
should be connected to GND.