Bush Hog TD-1100 User Manual
Page 12
SECTION IV
MAINTENANCE
4-1 MAINTENANCE CHECK LIST
Perform scheduled maintenance as outlined below.
Lower implement to ground, turn off tractor, and set
parking brake before doing maintenance inspections
or work. All bolts should be torqued as indicated in
torque chart unless otherwise indicated.
BEFORE EACH USE.
1. Check tractor tire air pressure. Refer to tractor oper-
ator’s manual. Mower transport tire pressure should
be 22 psi; deck tire pressure should be 50 psi.
2. Check blades and spindles to be sure that no
foreign objects such as wire or steel strapping bands
are wrapped around them.
3. Check blade bolts for tightness. Tighten blade
bolts to 76 ft./lbs.
4. Inspect blades for wear. Replace if necessary
per paragraph 4-5. Use only genuine Bush Hog
replacement parts. If it is necessary to sharpen the
blades, remove the blades from the spindles before
sharpening. DO NOT sharpen blades while still
attached to mower.
5. Make certain all shields are in place and in
good condition. Repair or replace any missing or
damaged shields.
6. Inspect wheel(s) for wear, damage or foreign
objects. Repair or replace if necessary.
7. Perform BEFORE EACH USE lubrication per
paragraph 4-2.
8. During operation, listen for abnormal sounds
which might indicate loose parts, damaged bearings,
or other damage. Correct any deficiency before con-
tinuing operation.
AFTER EACH USE
1. Clean all debris from machine especially under-
side of deck, underneath belt shield and off safety
decals. Replace any missing or illegible decals.
2. Inspect cutter for worn or damaged compo-
nents. Repair or replace before next use. Any
replacement components installed during repair shall
include the components’ current safety decals speci-
fied by the manufacturer to be affixed to the compo-
nent.
3. Store cutter in a dry place.
40 HOURS
1. Check belt for proper tension. Refer to para-
graph 4-3.
WARNING
THE MOWER CAN FALL FROM HYDRAULIC
SYSTEM FAILURE. TO AVOID SERIOUS
INJURY OR DEATH, SECURELY SUPPORT
MOWER BEFORE WORKING UNDERNEATH.
4-2 LUBRICATION
(Figures 4-1A, B & C)
NOTE
The multi-purpose grease referenced in this section
is an NLGI Grade 2 type grease. Figure 4-2 shows
the necessary position for servicing wing drivelines.
BEFORE EACH USE
1. Driveline Universal Joints - Apply multi-purpose
grease with grease gun.
2. Driveline Guard - Apply 2-3 shots of multi-pur-
pose grease with grease gun to plastic fitting.
3. Wheels - Apply multi-purpose grease with
grease gun.
4. Caster Pivot - Apply multi-purpose grease with
grease gun.
5. Constant Velocity (CV) Joint - Position CV joint
as straight as possible to be sure grease will pene-
trate to ball joint. Lubricate the central body with a
minimum of 30 shots of grease every 8 hours.
Lubricate telescoping members with 10 shots every
8 hours and every 40 hours pull the two sections
apart, apply thin coat of multi-purpose grease to
outside of inner (male) section and reassemble.
20 HOURS
6. Deck Drivelines - Disconnect PTO driveline,
pull the two sections apart, apply thin coat of multi-
purpose grease to outside of inner (male) section.
Reassemble sections and install. Pull each section
to be sure driveline and shields are securely con-
nected. Make certain PTO shielding is in good condi-
tion.
40 HOURS
7. Gearboxes (5) - Add EP80W-90 gear oil, if nec-
essary, to bring oil level to check plug or dip stick
mark.
8. Wing Pivots - Apply 5 shots of multi-purpose
grease with grease gun.
9. Cylinder Rod Lugs - Apply 5 shots of multi-pur-
pose grease with grease gun.
10. Deck Pivots - Apply 5 shots of multi-purpose
grease with grease gun.
END OF SEASON
11. Transport Wheel Bearings - Pack transport
wheel bearings with grease at end of each mowing
season.
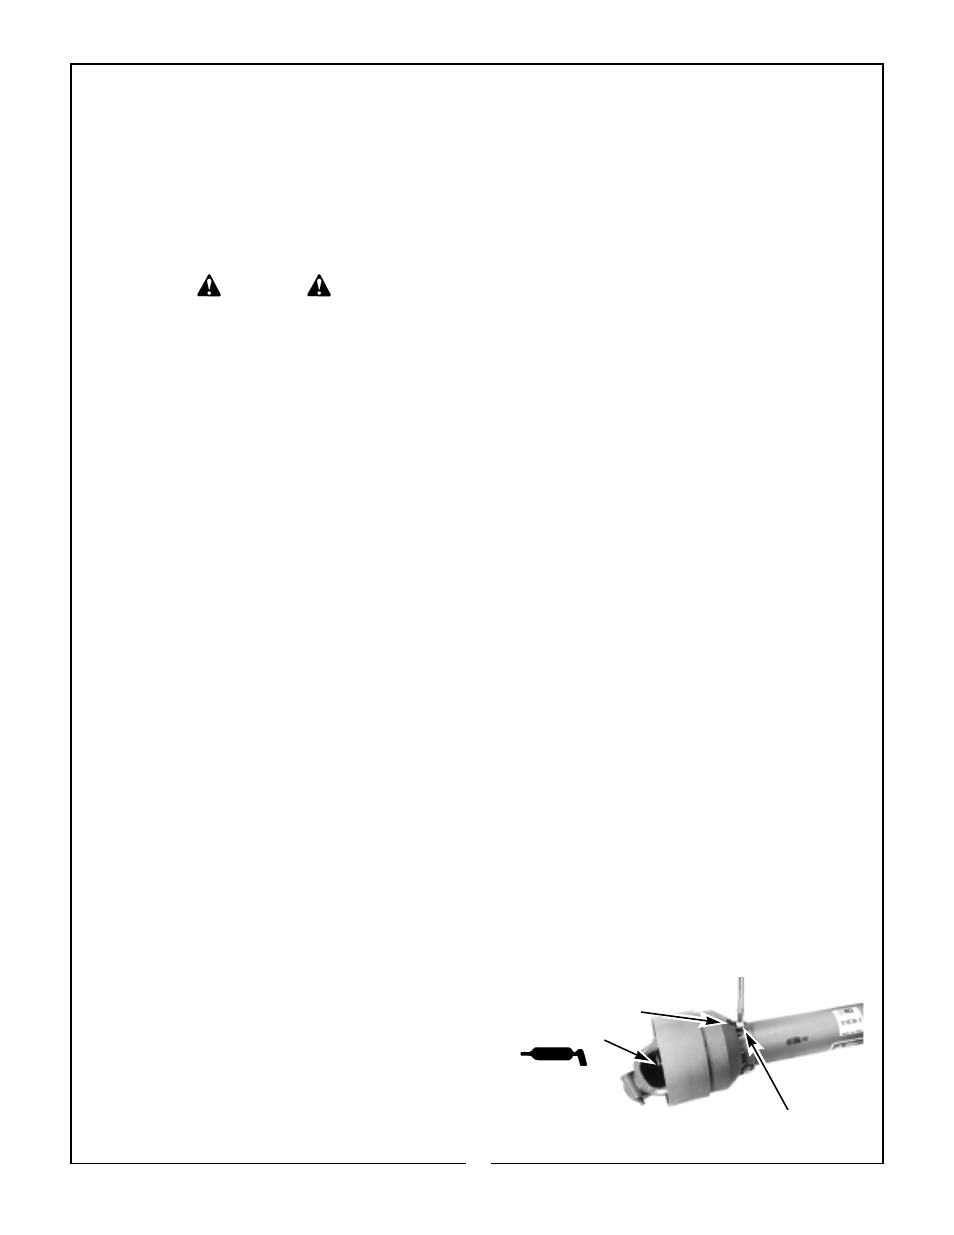
Figure 4-1A
(2) Before Each Use
(1) Before Each Use
To Remove Shield: Turn slotted head 90° with screwdriver,
remove turn screw and slide cover back.
10