Carter-Hoffmann ETDTT32 User Manual
Page 4
OPERATION
1. For best results, insert loaded trays in cart as quickly as possible.
Doors should be opened only when necessary in order to keep food
at proper temperature and prevent contamination of foods from out-
side sources.
2. A door-open catch for each door, is located on the side of the cart for
loading and unloading. The door will rotate 270° and lie flat on the
side of the cart.
3. Take care to avoid bumping carts into doors, walls and other obstruc-
tions.
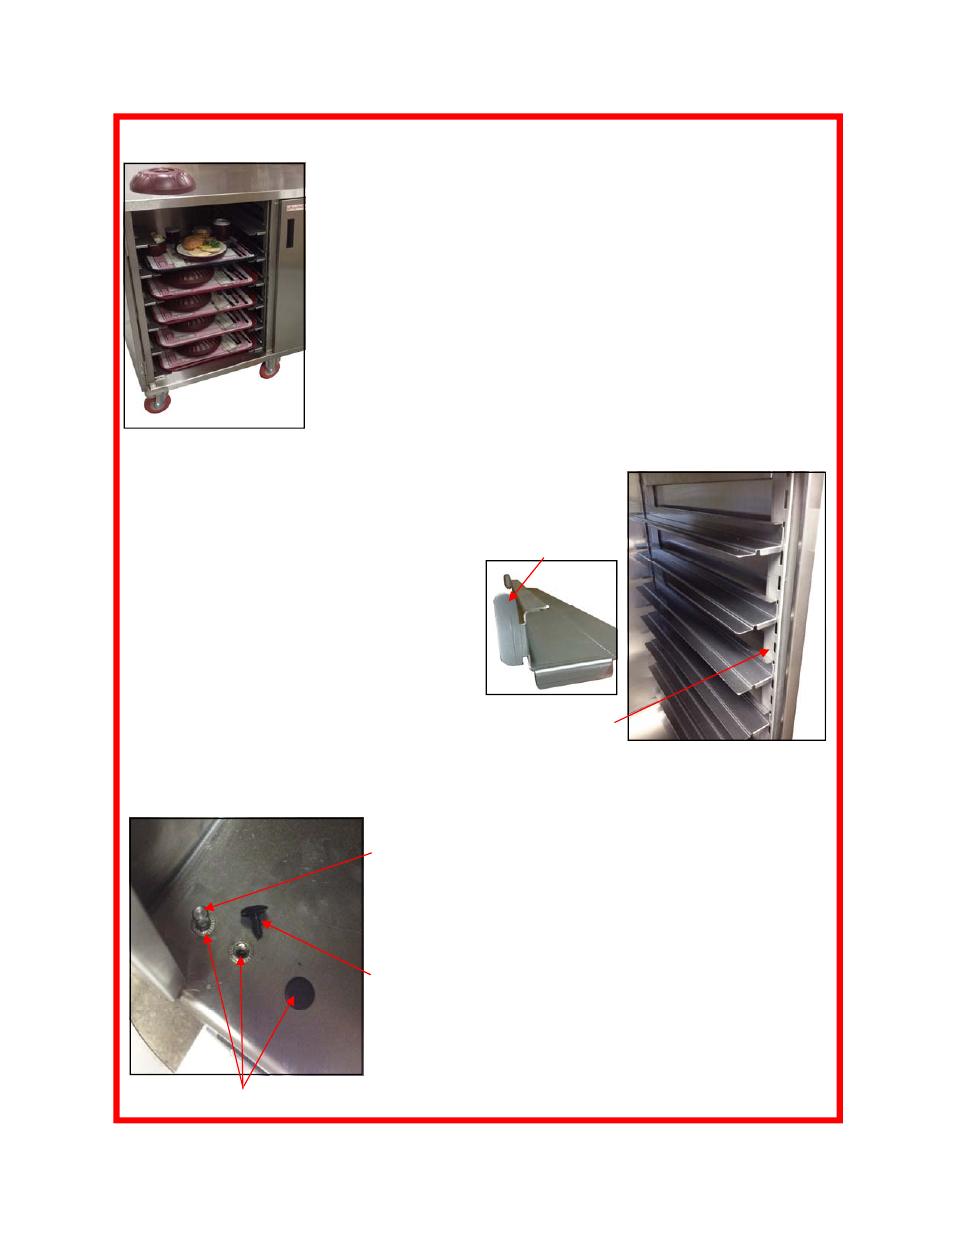
TRAY SLIDE ADJUSTMENT
These carts come equipped with adjustable tray slides to accommo-
date various tray heights. Tray slides are adjustable on 1.75” incre-
ments, with standard spacing at 5.25”.
1) To adjust the spacing lift slide up and rotate
90 up and out until the bottom tabs on the
slide clear the notches on the rack. The top
tabs will then slide easily out of notches as
well.
2) Insert back into the rack by inserting the top of
the tabs into the notches, then rotating the
slide back down until the bottom tabs go into
the notch as well.
Pan Slide Notch
Pan Slide Tab
4
CHANGING THE RACK POSITION
The tray racks are adjustable to accommodate
various tray dimensions, by relocating the pin
positions at the top and bottom of the cart.
There are three pin positions for each rack.
1) Remove the racks from the cart
2) Determine the width required for your tray
3) Using a screwdriver, pry off the black plastic
plugs (4) over the holes (4) for the spacing
you need.
4) Using a wrench, unscrew the pins and move
them to the desired positions and screw into
the new positions.
5) Replace the plastic plug into the now vacant
unused holes.
Pin positions—left side
Rack pin
Plastic plug
Three pin positions