Settings – Bos IDYLLE SC 2014 User manual User Manual
Page 4
3. Route the disc brake hose (for hydraulic disc brakes) or brake cable housing (for mechanical disc brakes)
from the caliper to the inside of the lower leg and through the supplied disc brake hose guide.
4. Tighten the disc brake hose guide screw (M3 x 12) with a 2.5 mm-hex key wrench, and torque it to 1N.m.
5. Test the brakes for proper operation on level ground before hitting the trails.
The disc brake caliper mounting bolts must have 10 mm of thread engagement with the fork.
In any case, the disc brake caliper mounting bolt tightening torque level must never exceed 10N.m.
2.1. AIR SPRING
The sag measurement is the amount that your fork, rear shock, or both will compress when you are positioned for
riding on your bike, with all your riding apparel and gear. Adjusting air pressure until you achieve your target sag will
help you to determine the appropriate amount of air pressure for your fork or shock, or both.
To achieve the best performance from your BOS suspension product, the proper measuring and setting of sag is
vitally important. As a starting point, set sag for your fork or rear shock according to the following instructions:
Recreational use
weight(kg/lbs)
55/120
60/132
65/143
70/154
75/165
80/176
85/187
95/210 105/231 110/242
pressure (psi)
175
180
185
190
195
200
205
210
215
220
Racing use
weight(kg/lbs)
55/120
60/132
65/143
70/154
75/165
80/176
85/187
95/210 105/231 110/242
pression (psi)
180
185
190
195
200
205
210
215
220
225
The Idylle SC have an o-ring on the fork upper tube in order to measure the SAG position. You can experiment and
vary your sag percentage to better suit your riding style and overall feel.
2.2. HYDRAULIC ADJUSTMENTS
IDYLLE SC comes with 2 hydraulics adjustments: compression and rebound
2. SETTINGS
IMPORTANT
Minimum air pressure: 175 psi
Maximum air pressure: 225 psi
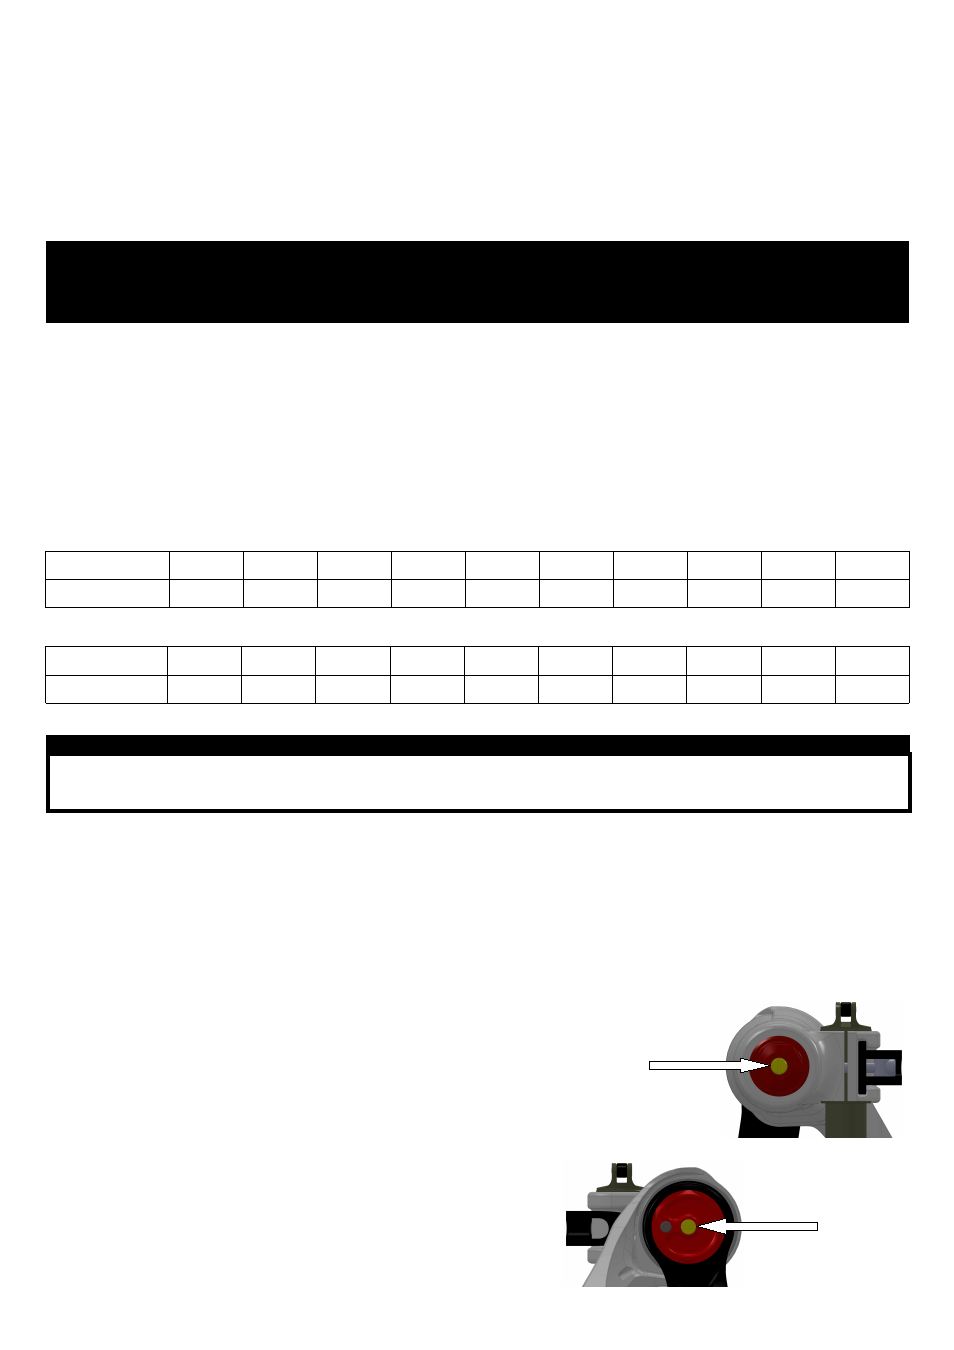
(1)
(2)
The compression adjustment seats at the bottom of the right hand
leg (flat head screw) (1)
The rebound adjustment is on the top of the right hand stanchion
(the non-disc side) (2)
Always start from fully tighten position, then tighten down counting
the clicks to adjust your settings.
Tighten (anticlockwise) = close / harden
Undo (clockwise) = open / soften