BELLA 13566 Theater Popcorn Maker User Manual
Page 7
5
PARTS AND ACCESSORIES
BEFORE USING FOR THE FIRST TIME
1. Carefully unpack the Theatre Popcorn Maker and remove all packaging materials.
2. Place the main unit on a clean, flat, working surface.
CAUTION: After preheating, the stainless steel kettle gets hot. Use caution
when adding oil and popcorn to the hot stainless steel kettle.
CAUTION: Always wait until all popping ceases before opening the front door.
3. Clean the floor and the inside of the main unit with a moist, non-abrasive sponge or cloth.
Wipe with a clean cloth and dry thoroughly.
4. Flip both of the kettle lids up and wipe the inside. Open the front door.
5. Attach the kettle to the motor. With the embossed CAUTION (replace with triangle
symbol) facing forward and the motor cord receptacle facing the back, tilt the kettle
towards you and slide both side arms of the kettle straight back into the brackets. It may
be necessary to grasp the bracket and fit it to the track on the side arm. When the side
arms are correctly seated into the brackets, flip the kettle up and the geared top of the
rotating rod will fit into the front. Inspect the top gear and then both brackets to ensure
the kettle side arms and rotating rod are properly locked into position.
CAUTION: Do not remove the kettle while it is in use.
Do not touch any hot surface until the kettle is fully cooled.
6. Attach the power cord into the kettle’s motor receptacle located at the bottom rear
of the kettle unit.
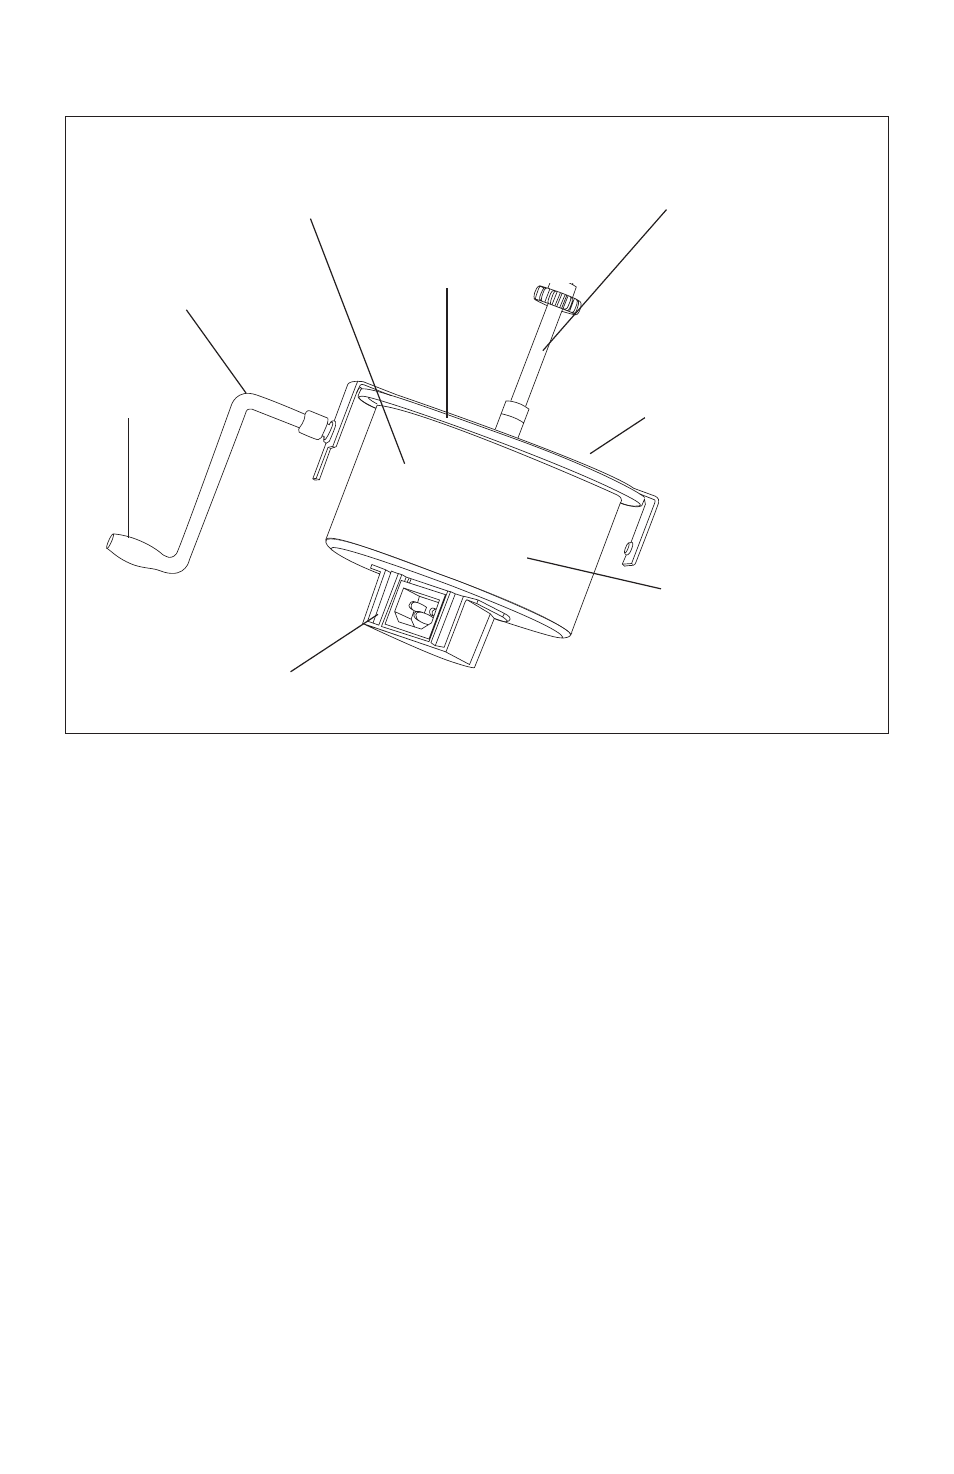
7. Attach the crank, fit the threaded stem of the crankshaft through the hole in the side
of the main unit/popcorn chamber. (See Figure 1) Turn the crank counter-clockwise
to attach. Hold the kettle with the other hand and tighten until the crank is securely
attached to the stainless steel kettle.
8. The Theatre Popcorn Maker is now ready for use.
Figure 2
6. Detachable
Power-Supply Cord
(Attaches to Kettle’s
Motor Receptacle)
(Inside)
1. Removable Stainless Steel
Kettle with Stir (Stir not shown)
2. Rotating Rod
with Gear
7. Heating element
receptacle
3. Side Arm
4. Kettle Lid Handle
(Not Shown)
5. Crank
8. Kettle Lids