Bedrug bedliner installation instructions – Bedrug BED LINERS: BedRug User Manual
Page 5
BedRug Bedliner Installation Instructions
Procedure
BRINST Rev. Level: 15 12/4/2009 Page 5 of 6
(b) Remove the equipment until the BedRug installation is
complete, then reinstall the equipment on top of the
BedRug.
Do not cut through any seams or sewn lines.
TIP: It is easiest to locate fastener holes with an awl
after BedRug is positioned for best fit.
Be sure to re-torque tie down fasteners to the OEM
specifications.
8.
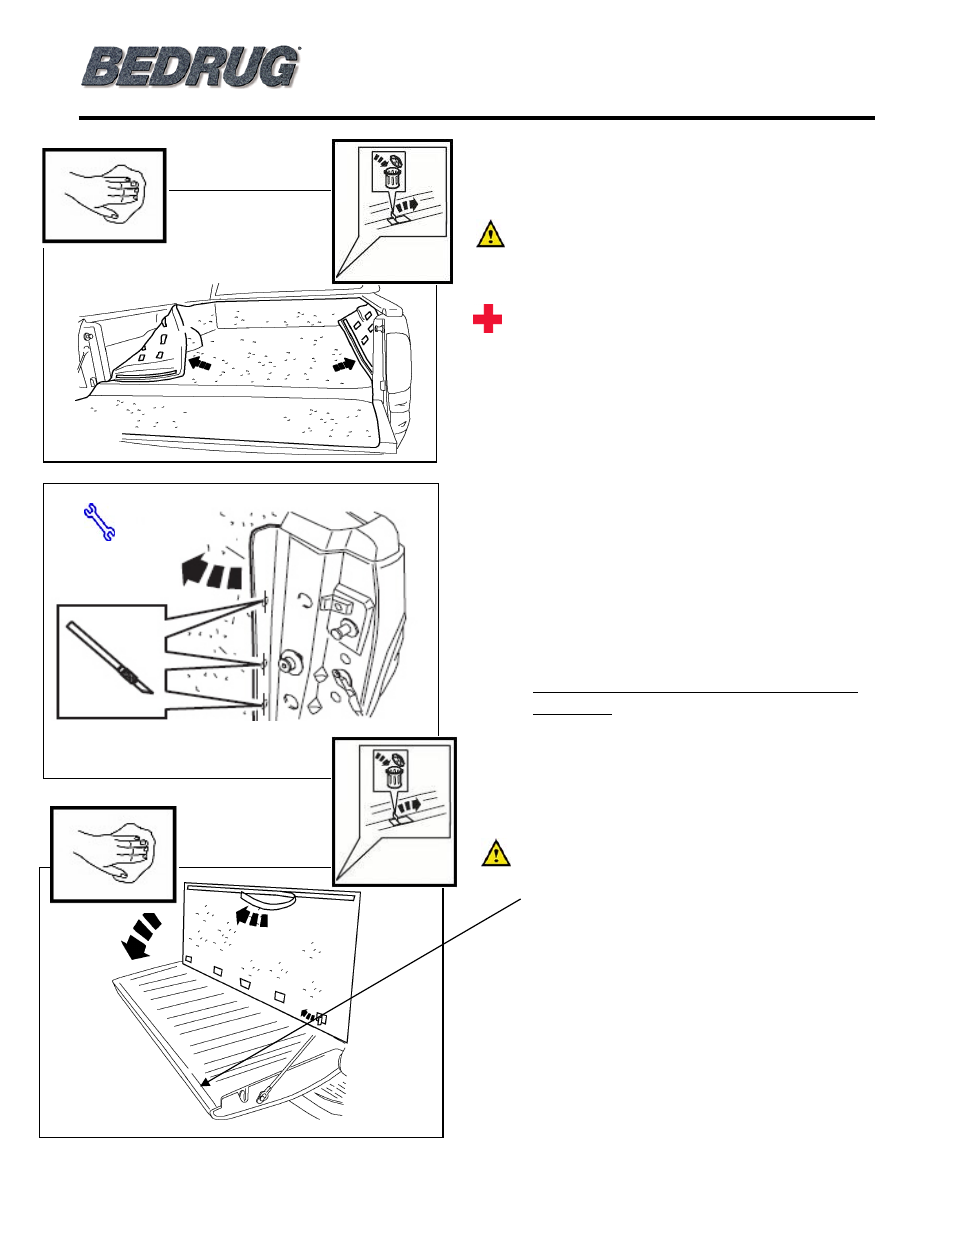
Installing BedRug sidewalls and tailgate.
(a) Rear vertical edge of BedRug should be positioned to
match D-pillar surface. Start at front and working
rearward begin removing film from fasteners bottom
to top and from front to back. Firmly press the
BedRug sidewall for 15 seconds to ensure adhesive
attachment. Repeat for other side. (Fig 8-1)
NOTE: If using the BedRug in conjunction
with a bed extender, cut the slits (located on
back of part) of the D-pillar area to allow
access to attachment holes. (Fig 8-2)
(b) Rotate the BedRug up to access tailgate fasteners.
(c) Clean attachment areas thoroughly with alcohol and
allow to dry.
(d) Apply adhesive promoter to plastic cap. (if applicable)
(e) Remove the film and align the edge of the BedRug
tailgate section to the top edge of the tailgate.
(Fig 8-3)
Do not adhere the hook fastener to the factory plastic
tailgate cap unless a 4298 adhesive promoter pack
is included in the hardware kit. Most models are
designed to adhere to sheet metal just below plastic
tailgate cap.
(f) Roll the BedRug tailgate back in place.
(g) Firmly press the BedRug tailgate for 15 seconds to
ensure adhesive attachment.
(h) After installation is complete, tuck BedRug material
between the tailgate and truck bed.
Fig. 8-1
Fig. 8-3
Utility Knife
Fig. 8-2