Caution, Operating instructions – BASELINE Motorcycle Ready Addendum User Manual
Page 3
BaseLine
• 3
Operating Instructions
The unit must be properly operated and properly main-
tained to help avoid accidents that could damage the
unit and injure the operator or bystanders. This section
of the Operating Instructions manual review basic oper-
ations and use of controls. These instructions should be
reviewed with all employees before they are allowed to
work with the machine. Keep these instructions near
the machine for easy reference.
Tire Bead Loosening and Demounting
CAUTION
This machine may operate differently from
machines you have previously operated.
Practice with a regular steel wheel and tire
combination to familiarize yourself with the
machine’s operation and function.
Remember to remove all weights from both sides
of the wheel. Weights left on back side of wheel may
cause the wheel to be clamped unlevel. This may result
in the combination mount/demount tool contacting the
rim causing scratches. On alloy wheels, always rotate
the wheel one turn after setting the tool to insure proper
wheel chucking.
NOTE: Always review nicks and scratches with own-
ers of expensive wheel and tire combinations prior to
servicing.
IMPORTANT: Review the performance wheel section
of this manual prior to servicing performance tire/wheel
combinations.
1.
Deflate tire completely by removing the valve core
from the valve stem (Figure 1).
Figure 1 - Remove Valve Core to Deflate Tire
NOTE: Loosening the beads on a fully inflated tire
is unsafe and causes excess movement and friction
against the bumper pads and excessive wear on pivots.
Deflate the tire completely to prolong the life of your
machine.
ATV NOTE: It may be necessary on ATV wheels to
leave 3-6 PSI in some of these wheels to facilitate bead
loosening. Even after loosening one bead; it may be
necessary to reinflate to 5 PSI to loosen the opposite
bead.
NOTE: Always loosen the bead on the narrow side of
the wheel’s drop center first (motorcycle wheels may
not have a narrow or long side, and some ATV wheels
may bolt together). See Figure 4 for more information
on the drop center.
REMEMBER: The clamps on the table top may extend
beyond the table top itself. To avoid damaging the
clamps, move them to their full inward position before
positioning a tire for bead loosening.
NOTE: Use extra care in positioning the bead loosener
shoe on larger wheels/tires, and on alloy wheels. Make
sure the shoe rests next to but not on the rim, and not
on the tire sidewall.
2.
Pull the bead loosener shoe away from the machine
and roll wheel into position. The valve stem should be in
the 3 o’clock position. Position the bead loosener shoe
against the tire next to, but not on, the rim. Depress the
bead loosener foot pedal to actuate the shoe and loosen
the bead. It may be necessary to loosen the bead in
multiple locations around the tire (Figure 2).
Figure 2 - Position Tire and Bead Loosener Shoe
3.
Turn wheel around and repeat loosening procedure
on the other side of the wheel. This should be the long
side of the drop center.
TIP: It will be easier to clamp the wheel to the table
top if the lower bead is loosened last.
4.
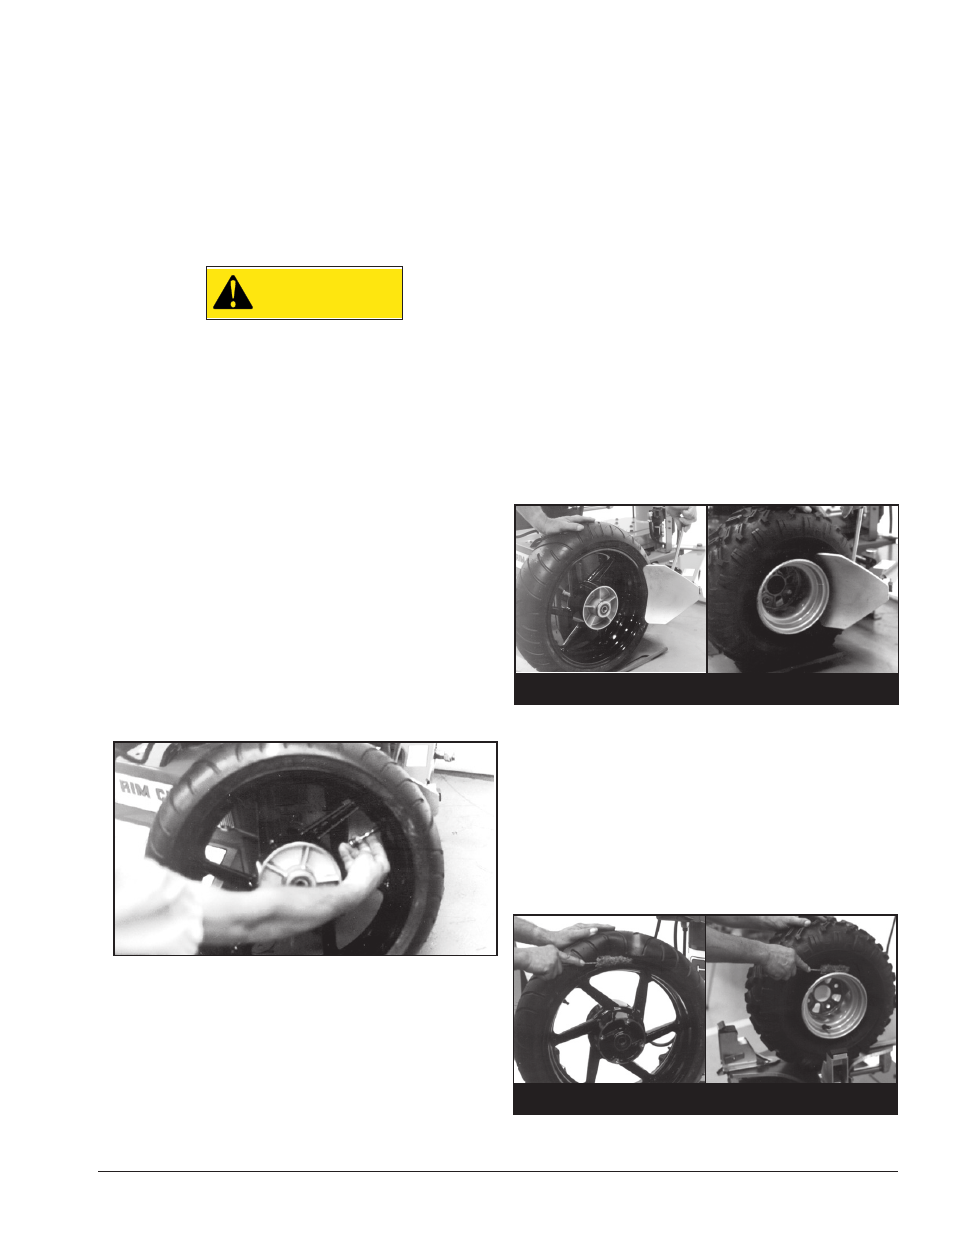
Apply tire manufacturer’s approved rubber lubricant
liberally to entire circumference of both tire beads after
loosening.
Figure 3 - Apply Rubber Lubricant to Tire Beads
Motorcycle
Motorcycle
ATV
ATV
Motorcycle
Motorcycle
ATV
ATV