Barranca Diamond HP14 Slab Saw User Manual
Page 11
11
HP14
SETUP
Check the four motor mounting nuts, ensure they are tight and the motor is se-
cure. The v-belt is adjusted and tensioned at the factory. However if the motor
mounts become loose during shipping, be sure to readjust the v-belt such that
no more than ½" of belt deflection occurs when the belt is depressed by finger-
tip pressure at the middle of the belt (Photo 1). Refer to page 15 for instructions.
MOUNTING THE BLADE
The HP14 Slab Saw is supplied with a 301 Supreme notched or 303 Profes-
sional continuous rim lapidary diamond blade. Attach the blade securely to the
1" arbor with 2 steel flanges one on either side of the blade (Photo 2). A left
hand thread bolt secures the flanges and blade to the arbor shaft. Turn bolt
head clockwise to loosen, counter-clockwise to tighten. When installing the
blade do not over tighten the arbor bolt.
SAW LUBRICANT
The 301 Supreme notched rim or 303 Professional continuous lapidary diamond blade is manufactured to cut
in either a petroleum, mineral, or synthetic oil. Water or water based coolants never should be used in the HP14
saw tank under any circumstances as the steel arbor shaft, cast iron vise and carriage/jaw can severely rust in
addition to poor sawing performance, frequent blade dulling, short blade life as well.
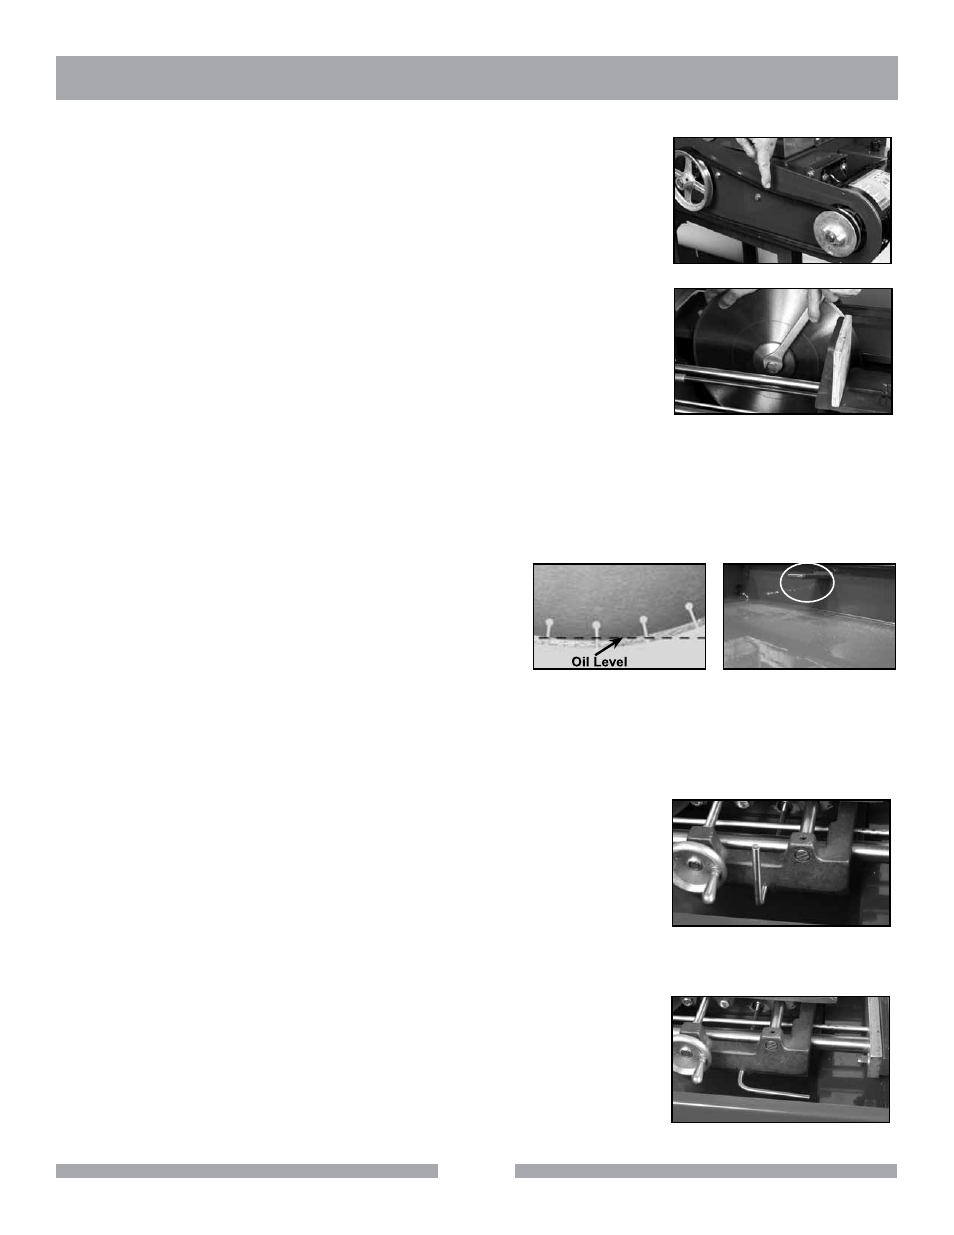
Fill the tank reservoir with approximately 2.2 gallons of pe-
troleum or synthetic lubricant, to cover the top of the oil level
indicator (Photo 3A). The bottom edge of the diamond blade
(kerf) should be immersed to a depth of 1/4" to 3/8" (Photo
3). Do not overfill the oil reservoir, as excess fluid will result
in unnecessary splashing and spraying of fluid while sawing.
This may cause damage to the arbor and motor due to drag
friction of excess fluid in the tank. Always place the saw hood
in the down position (closed) to keep cutting lubricant fluid from
being sprayed excessively outside the saw area.
START UP
Connect the power cord from the rear motor to a 120 volt 60 Hz 15 amp power
source. If an extension cord is used, ensure that it is matched to the power
extension cord specifications from Table 1 on page 8.
A power up test should be performed. Because of the threads on the bronze
clutch block, it may be necessary to disengage the clutch by tapping or shaking
the 3/8-24 stainless steel threaded rod by hand to assist in clutch disengage-
ment (Photo 4). This start up test can be performed with or without saw lubricant
(oil) in the oil reservoir. Once the rock vise is placed in the far back position,
lock the engagement lever in the 9 or 3 o’clock position (Photo 5). Now close
the hood and push in the ON/OFF button to the ON position to start the main
motor and power feed.
Due to the slow speed (6 RPM) rotation of the power feed motor, the rock vise
will travel slowly at an approximate rate of 3/16 of an inch per minute toward the
blade. If both the power feed/vise is moving toward the blade and the blade is
turning, this indicates the saw is functioning properly.
Photo 1
Photo 2
Photo 3
Photo 4
Photo 5
Photo 3A
Oil Lever Indicator