Lifetime, Warranty – Aquascape Waterfall Spillway (77000) User Manual
Page 2
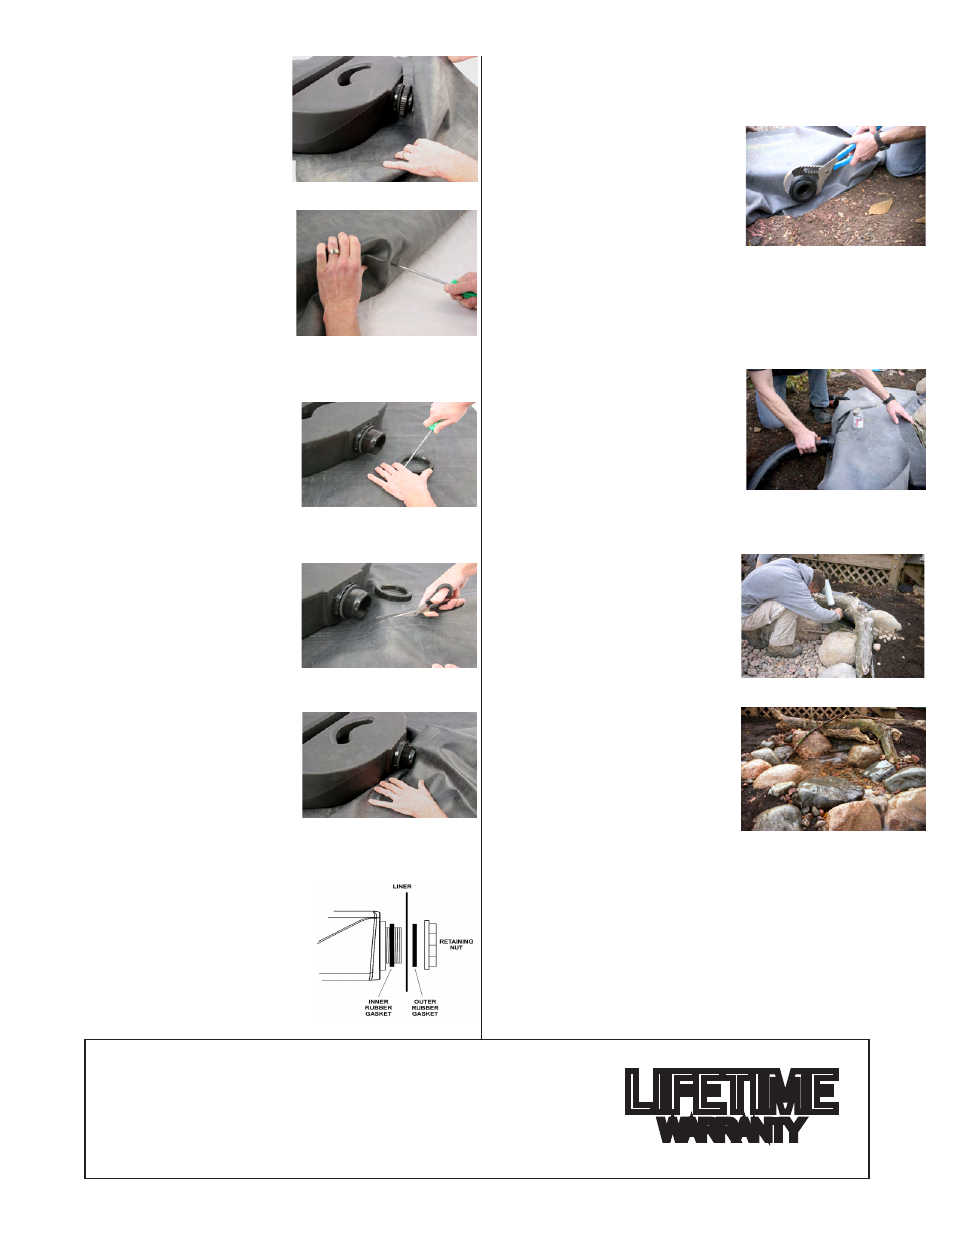
Step 7. Remove the outer rubber
gasket from the Waterfall Spill-
way fitting. Insert the hole in the
liner over the Waterfall Spillway
fitting. The liner should fit snug
around base of the Waterfall
Spillway fitting.
Step 8. Place the second
rubber gasket onto the fit-
ting. Note: The liner should be
located between both rubber
gaskets.
Step 6. Remove the retaining
nut and trim a hole in the liner
approximately 1/8 inch inside
of the score mark.
Step 9. Place retaining nut on
Waterfall Spillway and hand
tighten. The fitting is reverse
threaded, please refer to the ar-
row located on the retaining nut
for proper direction. Use a pair
channel locks to further tighten
down the retaining nut an ad-
ditional ¼ to ½ turn past hand
tight being careful to not over
tighten retaining nut, which
could possibly crack the plastic
fittings.
Step 10. Install the included
pipe fitting into the back of the
Waterfall Spillway. Use Teflon
tape or silicone sealant (not
included) on the threads of the
fitting, in order to provide a wa-
ter tight seal. Be careful to not
over tighten pipe fitting, which
could possibly crack the plastic
fittings. The filter is now ready
for the pipe to be installed.
Step 11. The joints around
the face of the Waterfall Spill-
way and surrounding waterfall
stones can now be filled with
Aquascape Black Waterfall
Foam. The waterfall can be
operated once the foam is dry.
Step 5. Unfold the liner back
off the Waterfall Spillway and
remove the retaining nut from the
Waterfall Spillway fitting. Center
the retaining nut over the punc-
ture hole in the liner. Use a pen,
marker, or sharp tool, such as an
awl or screwdriver to trace a line
around the inside of the nut
Step 3. Fold liner over top of
Waterfall Spillway. It is recom-
mended to provide some slack
in the liner in case the position
of the Waterfall Spillway needs
minor adjustment during instal-
lation.
Step 4. Using a screw driver
or awl, puncture a small hole
in the liner through the center
of the Waterfall Spillway fitting.
This will be your reference
point for the location of the
liner connection.
Step 12. Disguising the Wa-
terfall Spillway using boulders,
logs, gravel, soil, or other cre-
ative landscape material.
Step 13. With the waterfall
running, go around and trim off
any excess liner always leaving
several inches above the water
level/water splash as a precau-
tion. The remaining liner edges
can be covered with gravel or
other suitable landscape mate-
rial.
Aquascape warrants the Waterfall Spillway that it will be free of manufacturing defect for the
lifetime of the product if properly installed and maintained. If upon Aquascape’s inspection,
the Waterfall Spillway shows evidence of a manufacturing defect, Aquascape’s liability are
limited, at Aquascape’s option, to the repair of the defect, or the replacement of the defec-
tive product. There are no warranties either expressed or implied, including the implied
warranties of merchantability and fitness for a particular purpose, which extend beyond the
warranties contained in this document. Aquascape shall not be liable for any incidental,
consequential or other damages arising under any theory of law whatsoever.
LIFETIME
WARRANTY