Quick start – Allen&Heath XONE 464 User Manual
Page 10
10
XONE:464 User Guide
Quick Start
We recommend that you read through all sections of this User Guide before starting.
However, we provide these notes so that you can plug up and experiment with sounds
from your
XONE:464 immediately if you prefer to read the full guide later. Please note
that you should first read and understand the
Important Safety Instructions printed at
the beginning of this guide. This simple procedure requires a microphone, CD player and
headphones. Alternatively you can connect a pair of turntables and start mixing right
away. Please read the rest of this guide before connecting to your amplifier and speaker
systems.
Set all controls to their starting condition. Set all
FADERS, GAIN, AUX, EXT IN, VCF, RESONANCE,
PHONES and MONITOR controls minimum. Set all PAN
and EQ controls to their detented centre position. Set all
switches to their up position.
Plug in a microphone. Plug a microphone into CH1
XLR input using a high grade balanced mic cable. We
recommend you use a professional standard low
impedance balanced dynamic microphone, such as used
for live performance vocals. Do not use inferior high
impedance or unbalanced microphones as these can
degrade the sound.
Plug in a CD player. This provides a good stereo audio
source as a starting point. Plug into CH5 Input B. Do not
use Input A as this is intended for turntables with
magnetic cartridges requiring RIAA equalisation.
Plug in the headphones. You can plug into either the
top panel or the rear panel socket. Two pairs can be
plugged in at the same time. Use the best headphones
you can afford for your application. We recommend the
professional grade closed-ear type of 30 to 600ohms
impedance, and with ¼” TRS jack plug. Avoid using the
popular mini jack to ¼” adapters as these can quickly
prove unreliable.
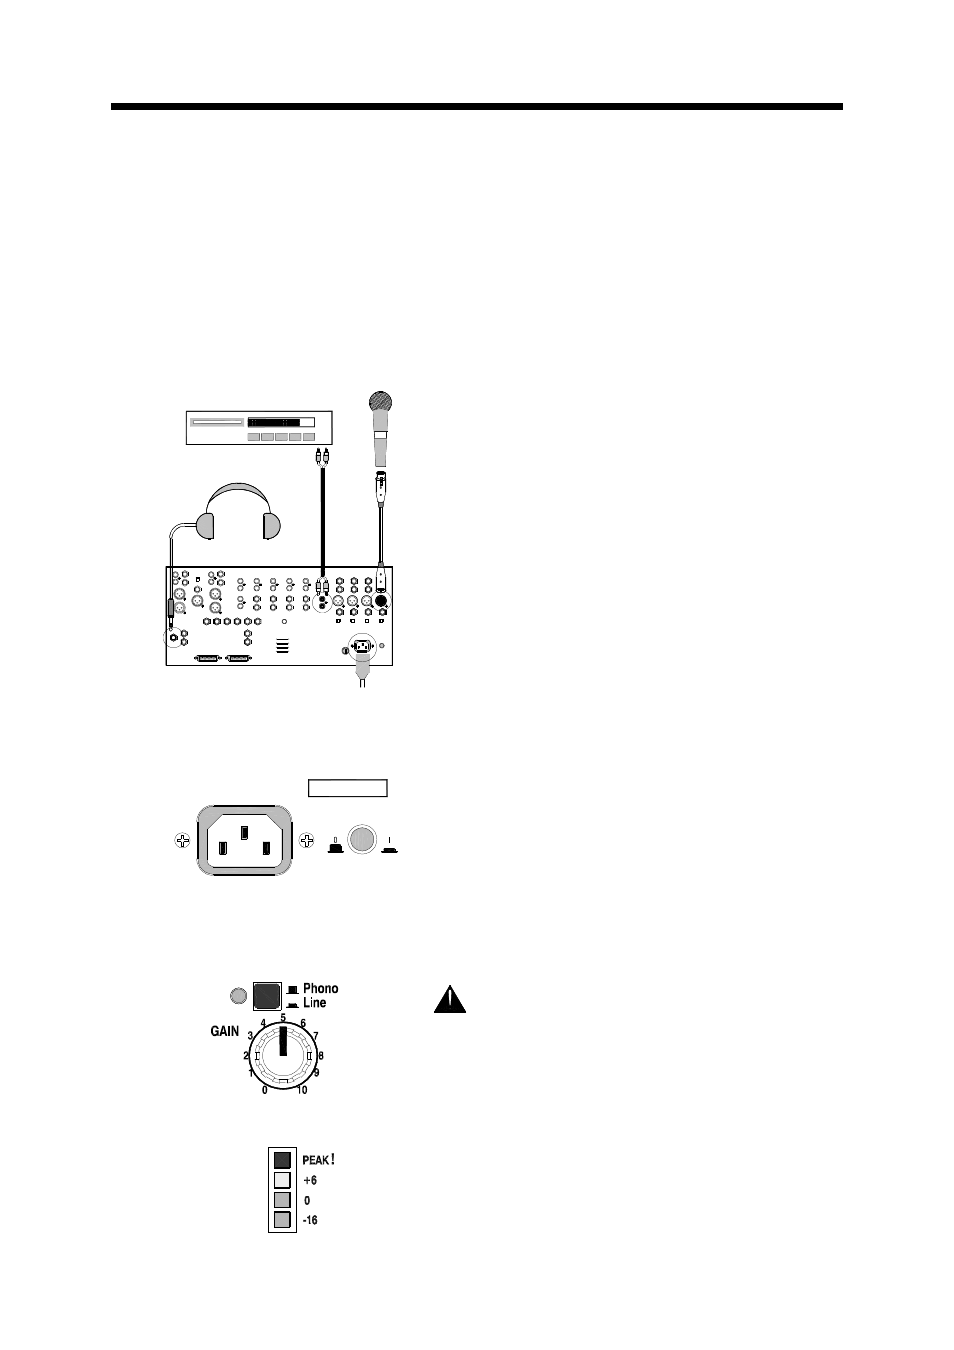
Connect AC mains power. Check first that the correct
mains lead with sealed plug suitable for your local supply
has been provided with your console. Plug into the IEC
AC MAINS IN socket and switch mains on.
Switch the console on. Press the rear panel ON/OFF
switch. Check that the green POWER ON led at the top
of the panel lights. You may notice that the console
meters flash briefly. This is normal during power up.
Always switch connected amplifiers on last
and off first to avoid power on/off thumps.
Select the stereo source. Start with the CH5 CD
source. Press the PHONO/LINE switch to select Input B.
The led should glow red when you select Input B, green
for Input A.
Adjust the channel gain. Start the CD player. Adjust
CH5 GAIN control until the average music level lights the
green 0 led with loudest peaks lighting the yellow +6 led.
Reduce GAIN if the red PEAK! Led lights. If no signal is
present check that the music source is playing and the
correct input is selected.
AC MAINS
CD PLAYER
MIC
HEADPHONES
IN B
47-63Hz ~ 30W MAX
100 - 240V
SUPPLY VOLTAGE RANGE:
AC MAINS IN ~
OFF
ON
~