Warning – Echo 73454 Owners Manual v.3 User Manual
Page 28
4 INCH CHIPPER
26
SERVICE & MAINTENANCE
4.2 SharPening chiPPer bladeS
Warning
Before inspecting or servicing any part of the machine,
shut off power source, disconnect spark plugs, and
make sure all moving parts have come to a complete
stop. the chipping blades are sharp! use care when
working on machine to avoid injury.
the chipper blades will eventually become dull, making
chipping difficult. It is recommended that the chipper blades
are sharpened every 5-15 hours of chipper operation. to
remove the chipping blades for sharpening:
1. Remove the retaining bolt that holds the access cover
(see Figure 4.1) to the main frame assembly.
2. tilt access cover over to allow rotor access. Rotate
the rotor so that the bolts holding a chipping blade are
most accessible.
3. Remove the two 5/16" bolts holding the chipper blade.
Repeat for all four blades. the four chipping blades
have two edges per blade and can be reversed one
time each before sharpening. If both sides have not
been used, remove and reverse the chipping blades.
Reinstall chipping blades and proceed with chipping.
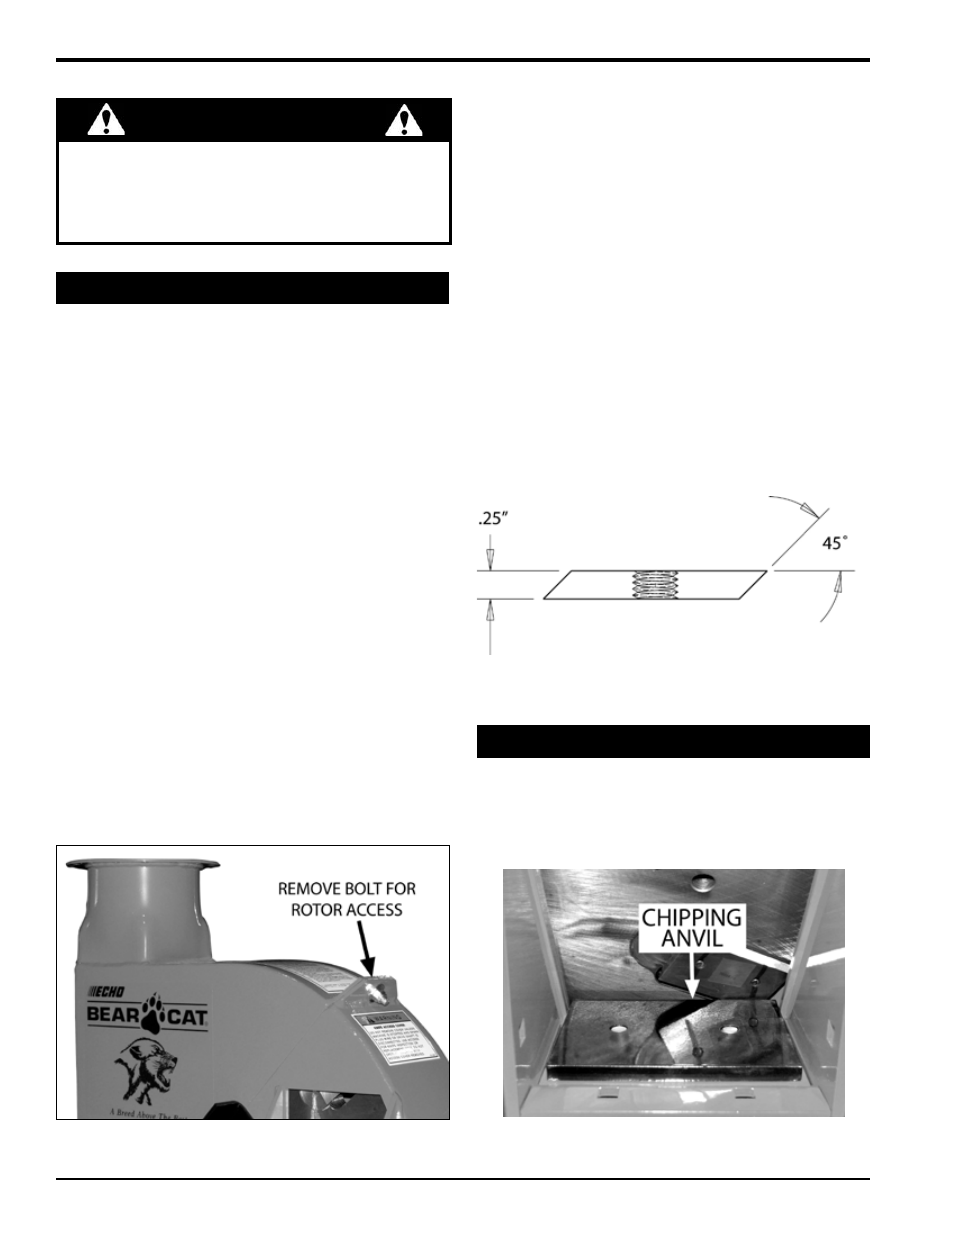
to grind the angled edge of the chipping blade to 45
degrees (see Figure 4.2): grind the blades on a slow-
speed wet grinder if possible, or have them sharpened by
a professional. If you use a bench grinder, be careful when
grinding so that the blade material does not get too hot
and change color–this will remove the blade's special heat
treated properties. use short grinding times and cool with
water. try to remove an equal amount from each blade to
maintain balance. Replace the chipping blades and tighten
bolts to 25 ft-lbs. Close cover and replace bolt.
4.3 SeTTing blade clearance
the four-edged chipping anvil located directly behind the
chipper chute (Figure 4.3) should clear the chipping blades
by 1/16 inch to 3/16 inch. The chipping anvil is adjustable
and reversible.
Figure 4.2, Sharpening the chipper blades
chiPPing blade SharPening TiPS
poor chipping performance is usually a result of dull chip-
ping blades. If your chipper's performance has decreased,
check for the following symptoms:
• Severe vibration when feeding material into the chip-
per.
•
Small diameter branches do not self-feed.
•
Chips discharge unevenly or have stringy tails–espe-
cially when chipping green branches.
Before you sharpen the chipping blades, check for
permanent damage. Replace the blade if:
•
the blade is cracked (especially around the bolt holes)
or the edges are too deeply chipped to be ground
smooth.
•
the base of the cutting edge is worn or has been re-
sharpened so that it is too close to the rotor chipping
slot.
Figure 4.1, Rotor access cover
Figure 4.3, Chipping anvil location