2 discharge cap assembly, 3 battery installation (model ch45342), 4 chute assembly – Echo CH45342 Owners Manual v.2 User Manual
Page 11: English
4.5 INCH CHIPPER
7
ENGLISH
ASSEMBLY
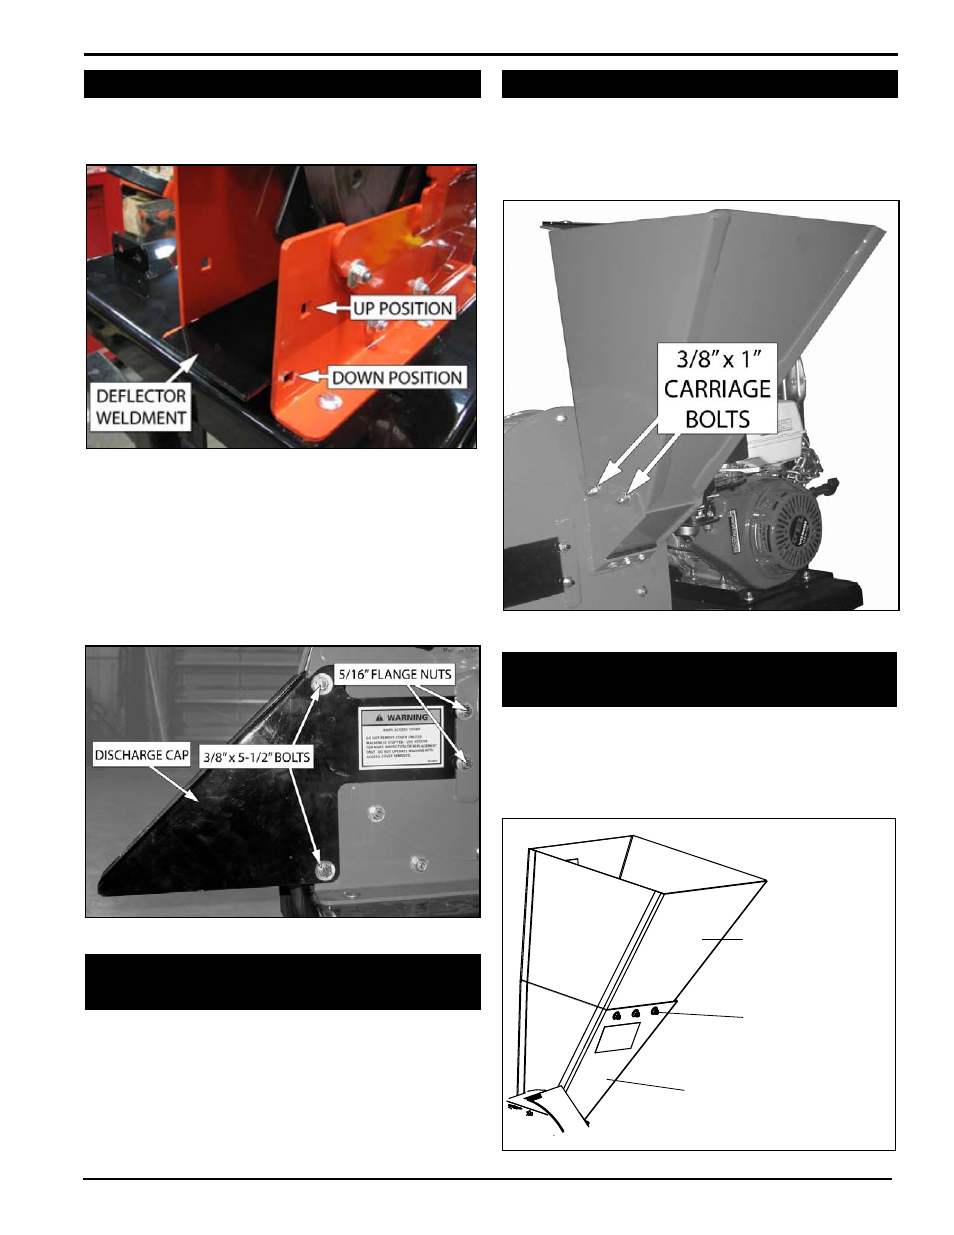
Move the chipper deflector weldment located inside the
1.
chipper housing to the down position (figure 2.4).
Slide the discharge cap onto the chipper housing,
2.
ensuring that the weldment bolts fit in the notches on
the disk cover (figure 2.5). Install two 5/16" serrated
flange nuts on the weldment bolts.
Insert two 3/8" x 5-1/2" bolts into the bolt holes on the
3.
chipper housing and tighten using 3/8" washers and
3/8" nylock nuts.
Figure 2.5, Discharge cap
Figure 2.4, Chipper deflector weldment
2.2 dISCHaRGE Cap aSSEmbLY
attach the chipper chute to the chipper housing using four
3/8" x 1" carriage bolts, washers and locknuts (figure
2.6). use two bolts on each side. Install with nuts on the
outside.
Figure 2.6, Chipper chute
2.4 CHuTE aSSEmbLY
Figure 2.7, Chipper chute extension
CHIPPER CHUTE
EXTENSION
3/8” x 1”
CARRIAGE
BOLTS
CHIPPER
CHUTE
attach the chipper chute extension to the chipper chute
using six 3/8" x 1" carriage bolts, 3/8" washers and 3/8"
nuts (figure 2.7). use three bolts on each side.
2.5 aTTaCH CHIppER CHuTE
ExTENSIoN (EuRopEaN pTo modELS)
2.3 baTTERY INSTaLLaTIoN
(modEL CH45342)
you will need to purchase a battery. Choose a battery that meets or exceeds
the engine manufacturer’s specifications. Consult your engine owner’s manual or
authorized dealer for specification details.
to install the battery:
open the battery box and insert battery into the battery box.
1.
Attach the positive (red) battery cable from the engine to the positive (+) battery
2.
terminal.
Attach the negative (black) battery cable from the engine to the negative (-)
3.
battery terminal.
Secure the cover on the battery box with the strap.