Assembly, 1 attach chute and support, Warning – Echo CH5540H Owners Manual v.4 User Manual
Page 9: English
5
5 INCH CHIPPER
ENGLISH
Section
2
ASSEMBLY
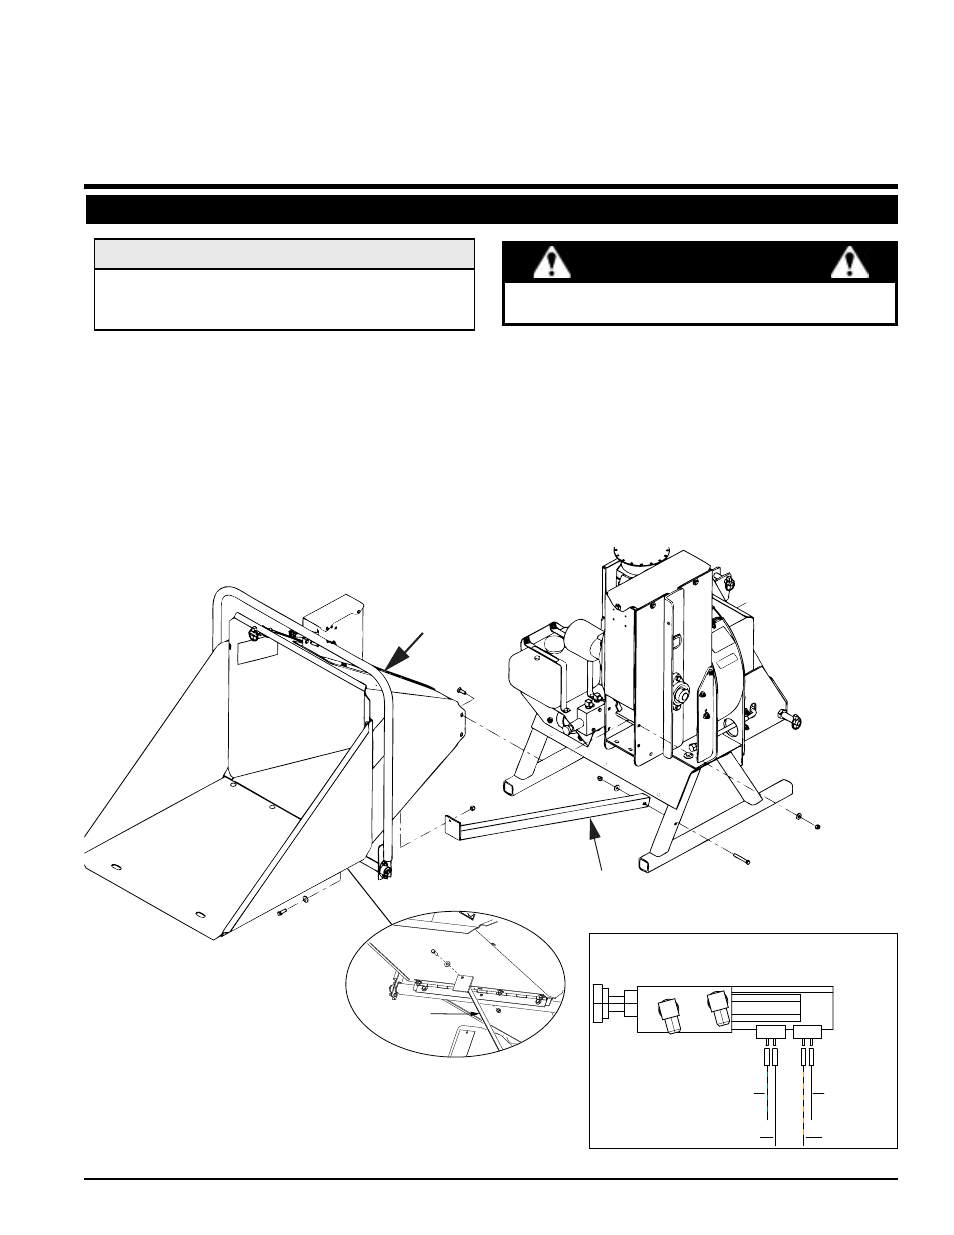
1. Mount the feed chute to the chipper housing using six 3/8 x 1-1/4" carriage bolts, 3/8" washers, and 3/8" nylock nuts (see
Figure 2.1). (Do not tighten until after step 3.)
2. Secure the chute support to the chipper leg stand with one 3/8 x 2-3/4" bolt, one 3/8" washer, and one 3/8" nylock nut as
shown in Fig. 2.1.
3. Secure the other end of the chute support by removing the middle bolt holding the feed chute to the hinge (shown in Fig
2.1 insert). Put the support bracket end between the washer and the hinge, and then retighten the bolt and nut.
4. Connect the four wires coming from the feed chute to the connectors located on the hydraulic control valve as shown
in Figure 2.2. The extra wire with a ring terminal end is only used if adding a LOFA auto feed controller option.
2.1 ATTACH CHUTE AND SUPPORT
FEED
CHUTE
SUPPORT
BRACKET
FEED
CHUTE
CHUTE
SUPPORT
Figure 2.1 Attach the discharge tube deflector
Figure 2.2
WARNING
If any bolts or nuts are dropped in the machine, be
sure to remove them before starting the machine.
NOTE
If forward and reverse feed positions are reversed when
you power up the machine, you may have plugged the
connectors into the wrong plug.
BLACK
ORG/BLK
BLACK
GRN/BLK
12646 VALVE,
HYDRAULIC CONTROL