Warning – Echo CH6614 Owners Manual v.1 User Manual
Page 22
6 INCH CHIPPER
20
SERVICE & MAINTENANCE
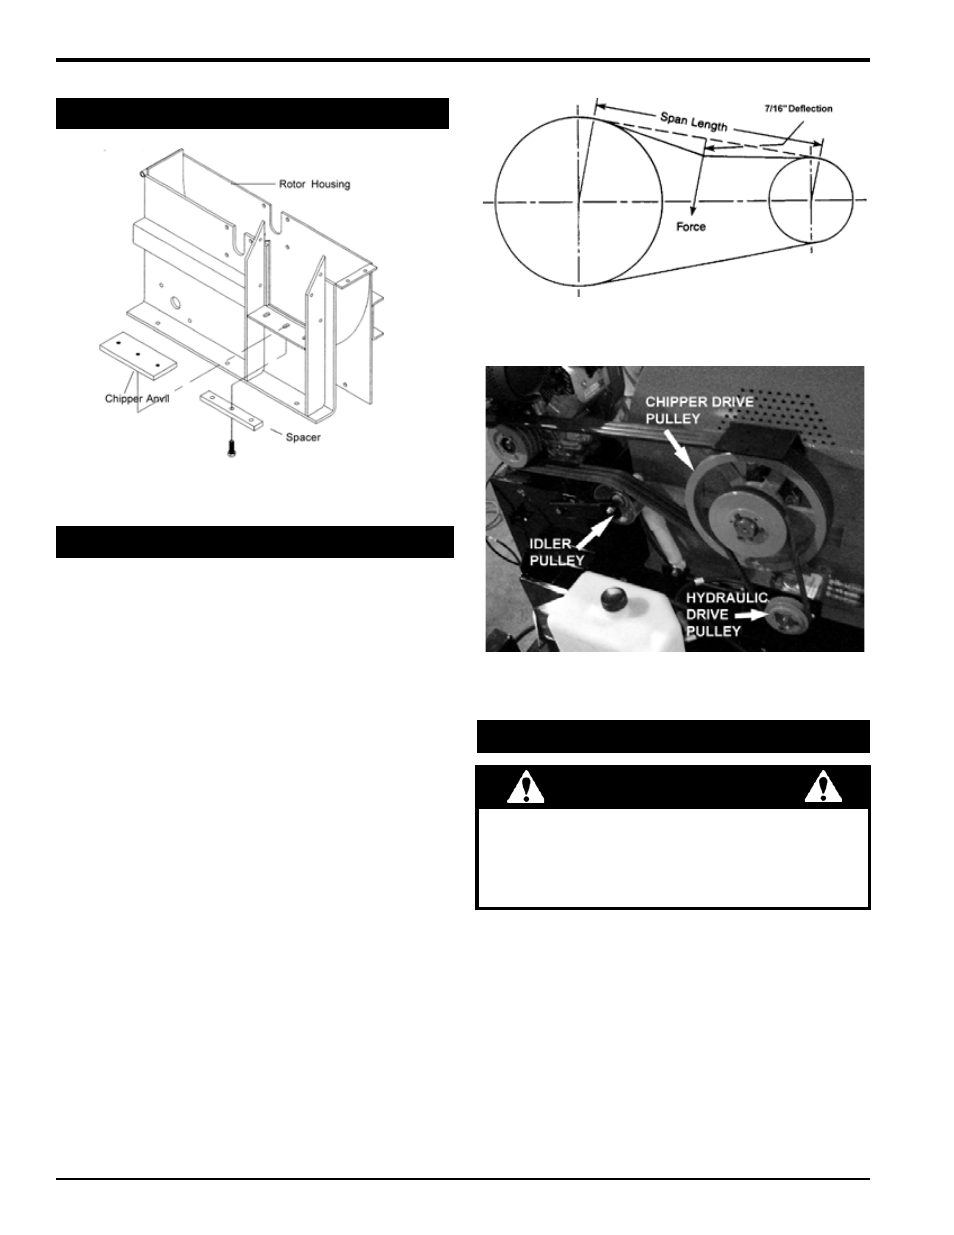
Figure 6.3, Chipping anvil bolts
6.4 adJusTing/rePlacing drive belT
6.5 clearing Plugged roTor
1. Stop engine and disconnect spark plugs.
2. Remove rotor access cover.
3. Clean the debris out of the chipping rotor. Turn the
rotor by hand to be sure it is free to rotate.
4. Close rotor access cover and replace bolts.
5. Depress belt engagement pedal, start engine, and
resume operation.
Warning
If the machine becomes plugged, shut off engine,
disconnect spark plugs, and allow the machine to
come to a complete stop before cleaning debris. Do
not operate the machine without proper guards and
screens in place.
Check the condition of the drive belt annually or after every
25 hours of operating, whichever comes first. If the belt is
cracked, frayed, or worn, replace it. To replace or adjust
drive belt, proceed as follows:
Shut off engine and disconnect spark plugs.
Remove belt guard.
Remove the hydraulic pump belt by loosening the bolts
on the hydraulic pump (for hydraulic feed units only).
Take the tension off the drive belt by depressing the
belt engagement pedal, loosening the engine bolts,
and sliding the engine back. Then, remove the drive
belt from pulleys.
Install the new belt on pulleys. Slide engine back into
place and tighten bolts to proper torque.
Check pulley alignment with a straight edge and adjust
if needed.
Check belt tension and adjust if needed. The belt de-
flection at the center of the belt should be 7/16" when
a 20 lb. load is placed against the belt (see Figure
6.4.1).
Replace hydraulic pump and hydraulic pump belt.
Replace belt guard.
Depress belt engagement pedal, start engine, engage
drive belt, and test unit. Readjust pulleys and belt ten-
sion if needed.
1.
2.
3.
4.
5.
6.
7.
8.
9.
10.
Figure 6.4.1, Belt tension
Figure 6.4.2, Chipper pulley system
6.3 seTTing blade clearance (conT.)