Installation, Port switching – IOGear GHSW8242 Quick Start User Manual
Page 4
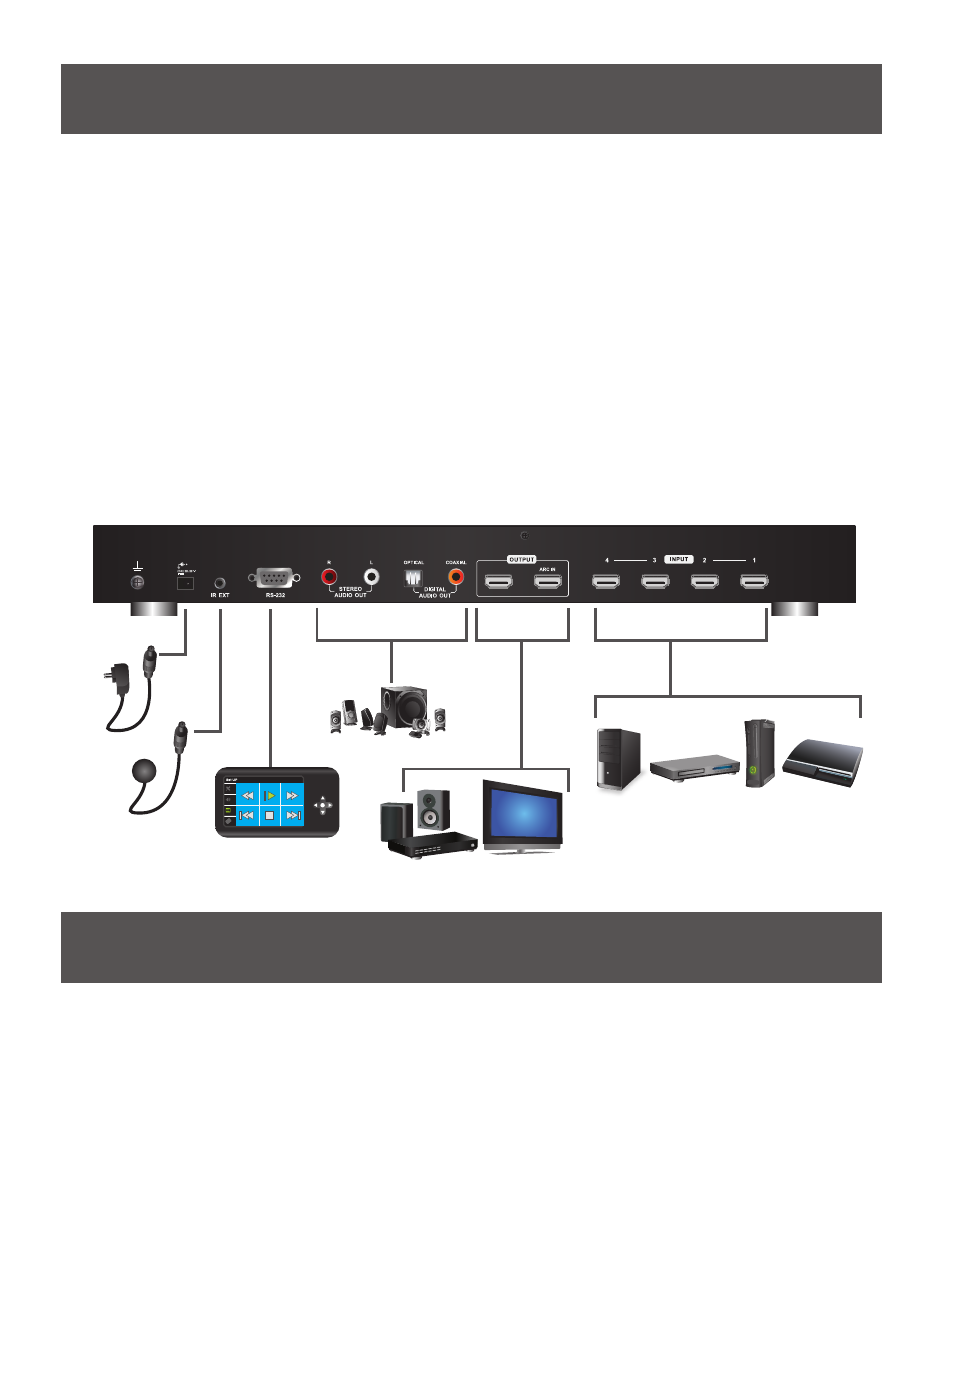
Installation
Note: Make sure your source devices and display are powered off before you start.
Step 1
Use an HDMI cable to connect the HDMI input port
on the video display device to the HDMI output port
on the rear of the GHSW8242.
Step 2
Use HDMI cables to connect the HDMI output ports
on the source device(s) to the HDMI input ports on
the GHSW8242.
Step 3
Plug the provided power adapter into an appropriate
AC power source; plug the power adapter cable into
the Power Jack on the GHSW8242.
Via front panel pushbutton
To select a source device, press the pushbutton that corresponds to the port to which it is connected.
Via IR remote control
To select a source device with the remote control, press the number button that corresponds to the port to
which it is connected.
Via RS-232 hardware or software device
The GHSW8242’s built-in bi-directional RS-232 serial interface allows system control through a high-end
controller, PC, and/or home automation / home theater software package.
OSD Setting
On-Screen Display (OSD) for system configuration settings and information display
Note:
The OSD function is disabled while 3D content is being displayed. Switch to 2D content or a different
input port to enable the OSD.
Step 4
Connect your audio devices (such as speakers or
AVRs) to the Stereo Audio Ports or Digital Audio Ports.
Step 5 (optional)
To edit the GHSW8242 system settings through the
RS-232 port, connect the hardware / software
controller here.
Final Step
This completes the basic installation of the
GHSW8242. You may now power on the display and
source devices.
RS-232 Controller
Port Switching
2
3
4