Cylinder disassembly, Cylinder disassembly -18 – JLG 19BD Service Manual User Manual
Page 40
SECTION 2 - SERVICE PROCEDURES
2-18
– JLG Lift –
3121154
Cylinder Disassembly
1. Before disassembling the cylinder, clean away all
dirt and foreign substances from openings, particu-
larly the head area.
NOTE: Always protect the chrome surface of the cylinder
rod during assembly and disassembly. Any damage
to this surface will require replacement of the rod.
2. Extend the rod until the piston bottoms out against
the cylinder head.
3. Compress the head retraining ring enough to allow
the the cylinder head to be removed.
4. Carefully slide the head/rod/piston assembly out of
the cylinder tube. A gentle tap on the head assembly
may be required to remove the head from the cylin-
der tube.
5. Place the head/rod/piston assembly on a surface
that will not damage the chrome.
6. Remove the piston locknut and separate the piston
from the rod.
7. Slide the head off the rod from the piston end.
NOTE: When removing the old seals use only blunt tools, be
sure there are no sharp edges that may damage the
seal grooves during removal. Scratching the groove
may cause by-pass.
8. Remove and discard all old seals.
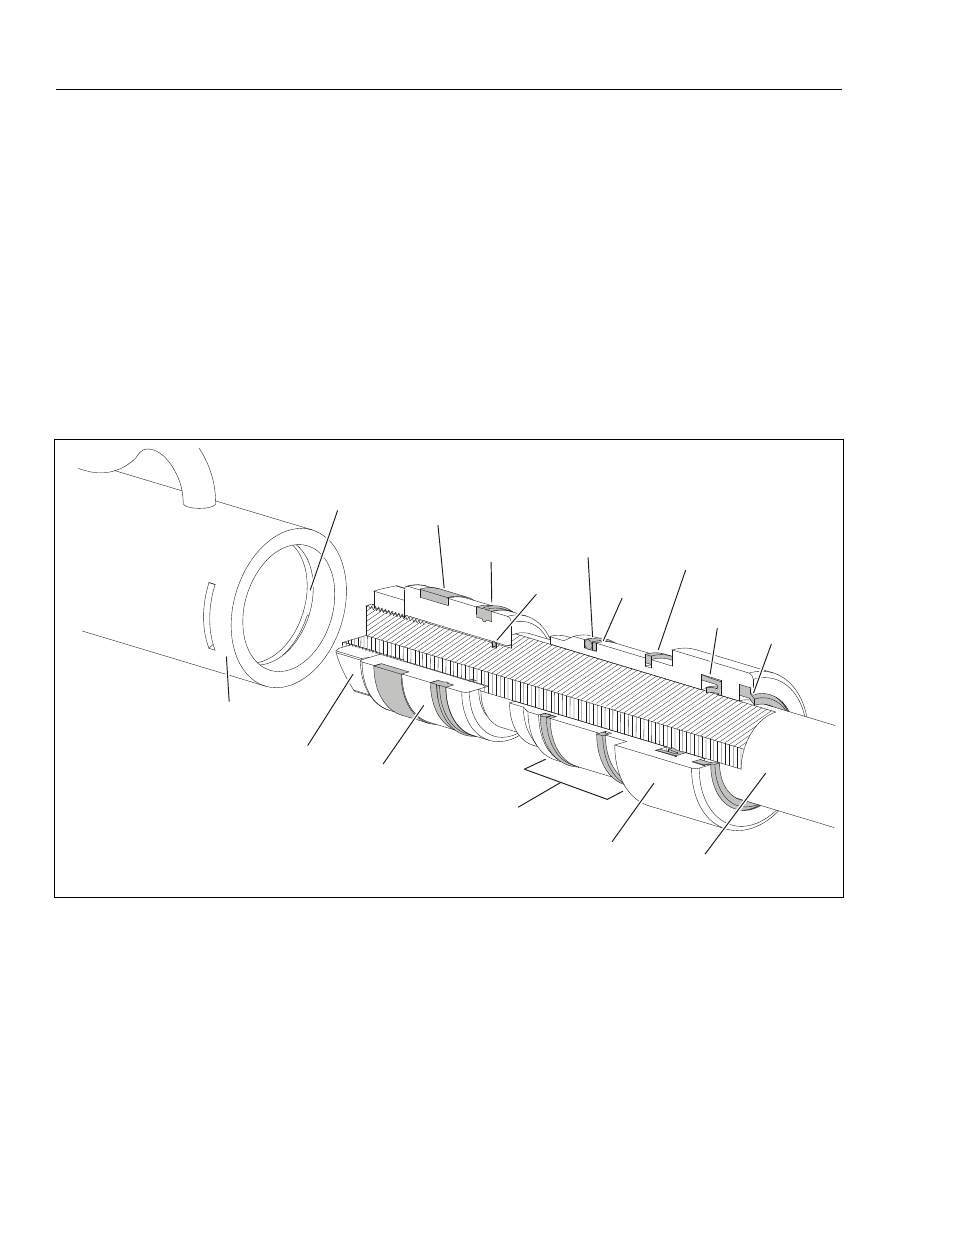
Figure 2-3. Lift Cylinder Internal Component Assembly Cross-Section.
PISTON
LOCKNUT
(Torque
175-200 Ft. Lb.)
WEAR
RING
PISTON
SEAL
O-RING
O-RING
BACKUP
RING
CYLINDER
HEAD
RETAINING
RING
RETAINING RING
GROOVE
ROD
SEAL
ROD
WIPER
CYLINDER
HEAD
WHEN ASSEMBLING
CYLINDER
APPLY ANTI-SEIZE
COMPOUND
AROUND THE HEAD
IN THIS AREA ONLY
CYLINDER
TUBE
ASSEMBLY
CYLINDER
ROD