Tools required for assembly/disassembly, Disassembly – JLG E300 Service Manual User Manual
Page 75
SECTION 3 - CHASSIS & TURNTABLE
3120772
– JLG Lift –
3-41
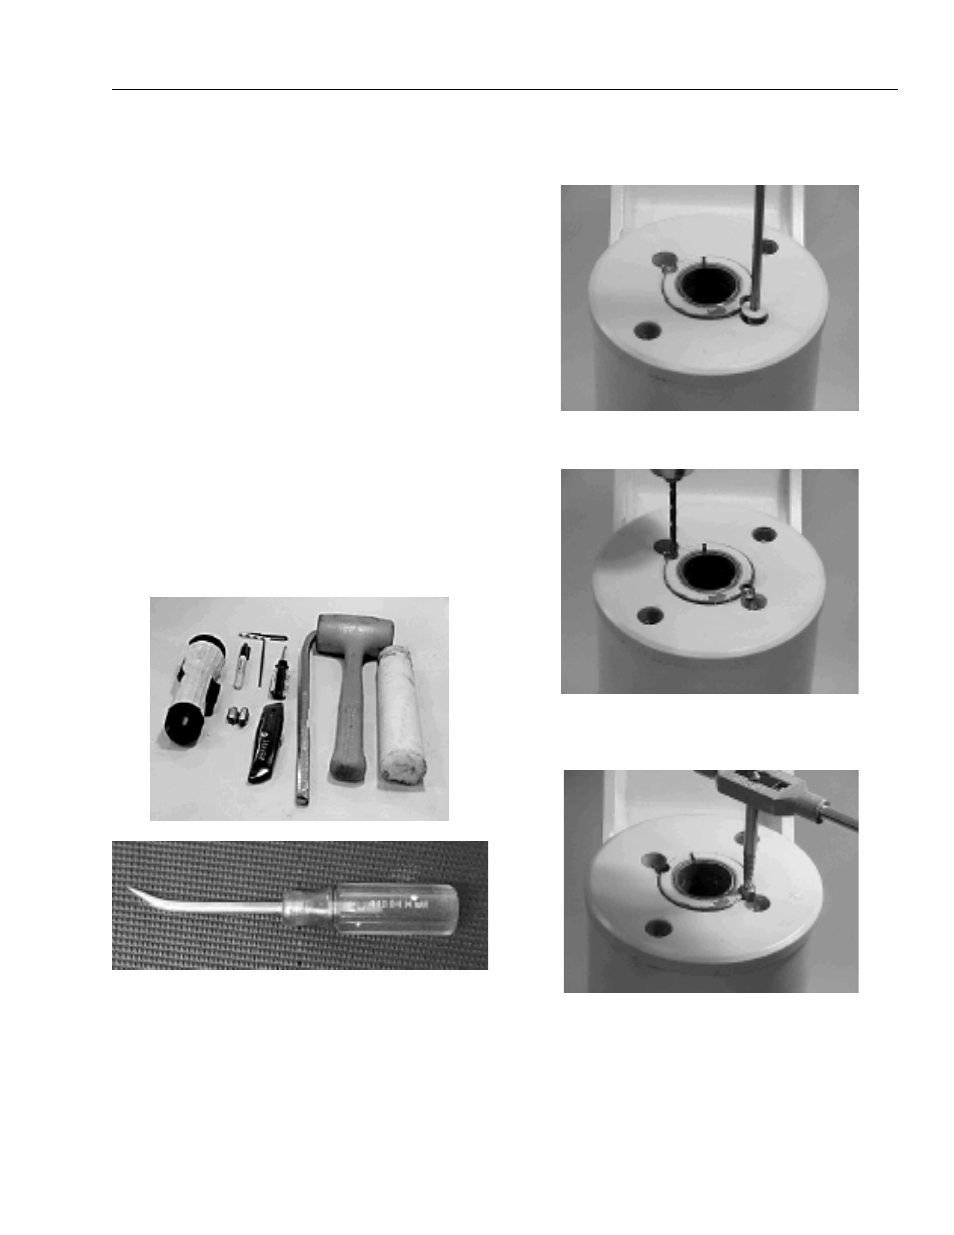
Tools Required for Assembly/Disassembly
Upon assembly and disassembly of the actuator there
are basic tools required. The tools and their intended
functions are as follows:
1.
Flashlight- helps examine timing marks, component
failure and overall condition.
2.
Felt Marker- match mark the timing marks and out-
line troubled areas.
3.
Allen wrench- removal of port plugs and setscrews.
4.
Box knife- removal of seals.
5.
Seal tool- assembly and disassembly of seals and
wear guides.
6.
Pry bar- removal of end cap and manual rotation of
shaft.
7.
Rubber mallet- removal and installation of shaft and
piston sleeve assembly.
8.
Nylon drift- installation of piston sleeve.
9.
End cap dowel pins- removal and installation of end
cap (sold with Helac seal kit).
The seal tool is merely a customized standard flat head
screwdriver. To make this tool you will need to heat the
flat end with a torch. Secure the heated end of the
screwdriver in a vice and physically bend the heated
end to a slight radius. Once the radius is achieved
round off all sharp edges of the heated end by using a
grinder. There may be some slight modifications for
your own personal preference.
Disassembly
1.
Remove the cap screws (113) over end cap lock
pins (109).
2.
Using a 1/8” (3.18mm) drill bit, drill a hole in the cen-
ter of each lock pin to a depth of approximately 3/
16” (4.76mm).
3.
Remove the lock pins using an “Easy Out” (a size
#2 is shown). If the pin will not come out with the
“Easy Out”, use 5/16” drill bit to a depth of 1/2”
(12.7mm)todrill out the entire pin.