Rotisserie installation – Broilmaster SBB2804-1 User Manual
Page 13
SBB00104-3-0309
Page 13
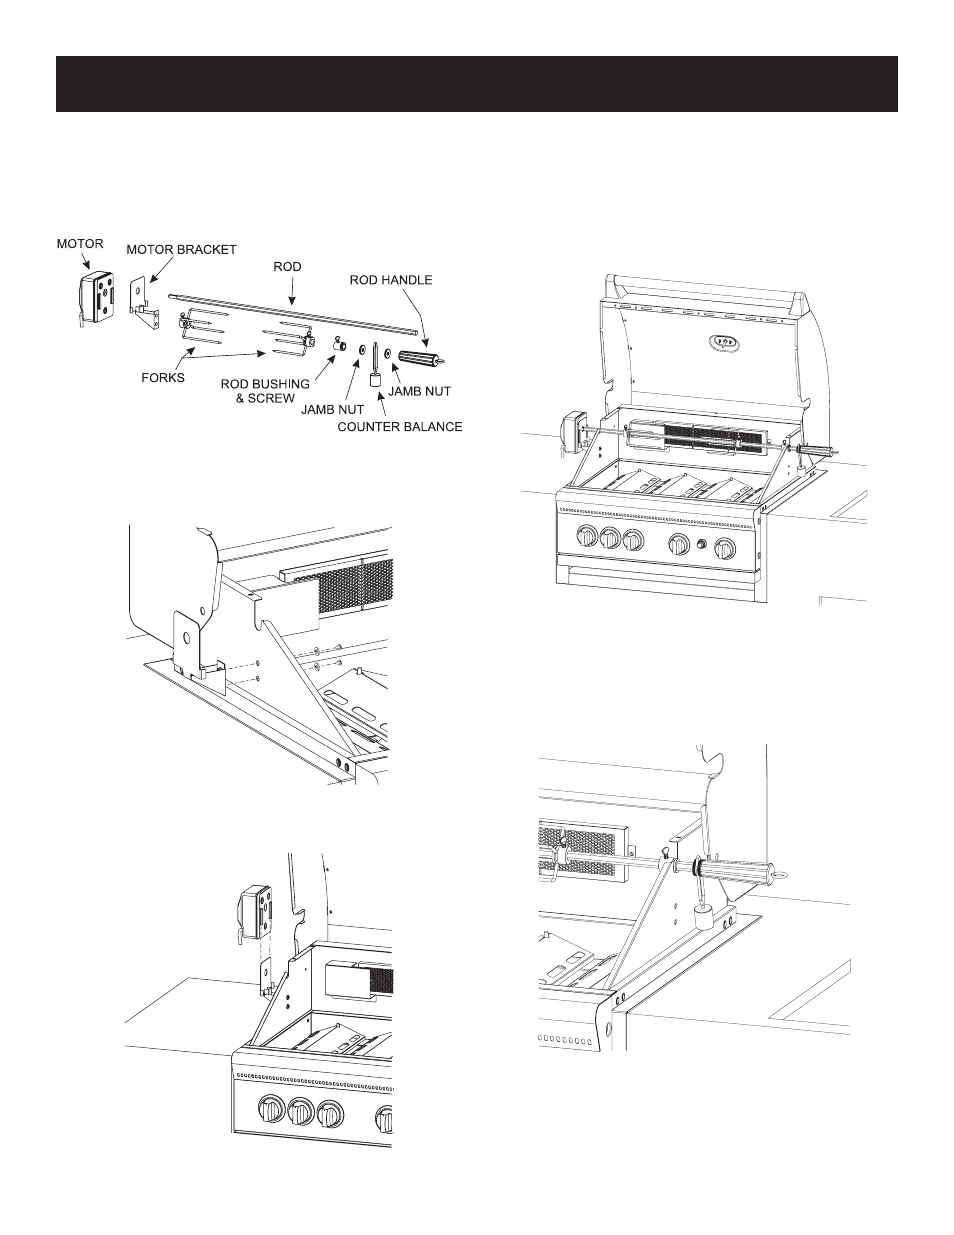
ROTISSERIE INSTALLATION
The Infrared burner (Rotisserie burner) is for rotisserie cooking
only. Warning: Never use the main burners while using the
Infrared Back Burner, as this could result in igniting the drip-
pings, or overheating your grill. Remove warming rack and
cooking grids.
10. Remove all components from the carton. See Figure 9.
11. Attach the motor bracket to the left side of the grill with two
(2) lock washers, and 1/4” screws. See Figure 10.
12. Slide motor into position on motor bracket. See Figure 11.
13. Slide a rotisserie fork onto each end of the spit. See Figure
12.
14. Adjust spacing between rotisserie forks to accommodate your
food. Tighten the thumbscrews to secure the holding forks.
15. Slide the bushing onto threaded end of spit. Insert spit into
slot of motor on left side of grill and place bushing into slot
on right side of grill. Tighten thumbscrew on bushing.
See Figure 12.
16. Screw jamb nut to the threaded side of spit. Slide counterbal-
ance onto threaded end of spit. The counterbalance will remain
to the outside of the grill. Screw second jamb nut into the spit
to hold counterbalance in place. See Figure 13.
17. Attach handle onto spit. See Figure 13.
Figure 9
Figure 10
Figure 11
Figure 12
Figure 13