Installation of cooktop into the kitchen bench, Clearances – Bosch PCH 615 DAU User Manual
Page 7
7
A range hood fitted above the top must be installed
according to the installation instructions for the range
hood. A minimum distance of 650 mm is required for
a range hood and 750 mm for an exhaust fan.
If the distance measured from the periphery of the
nearest burner to any vertical surface is less than 200
mm, the surface shall be protected in accordance with
clauses 5.12.1 & 5.12.1.2 of AS 5601/AG 601.
Leave a space at least 100mm between any drawer,
partition or oven that is installed underneath the
cooktop.
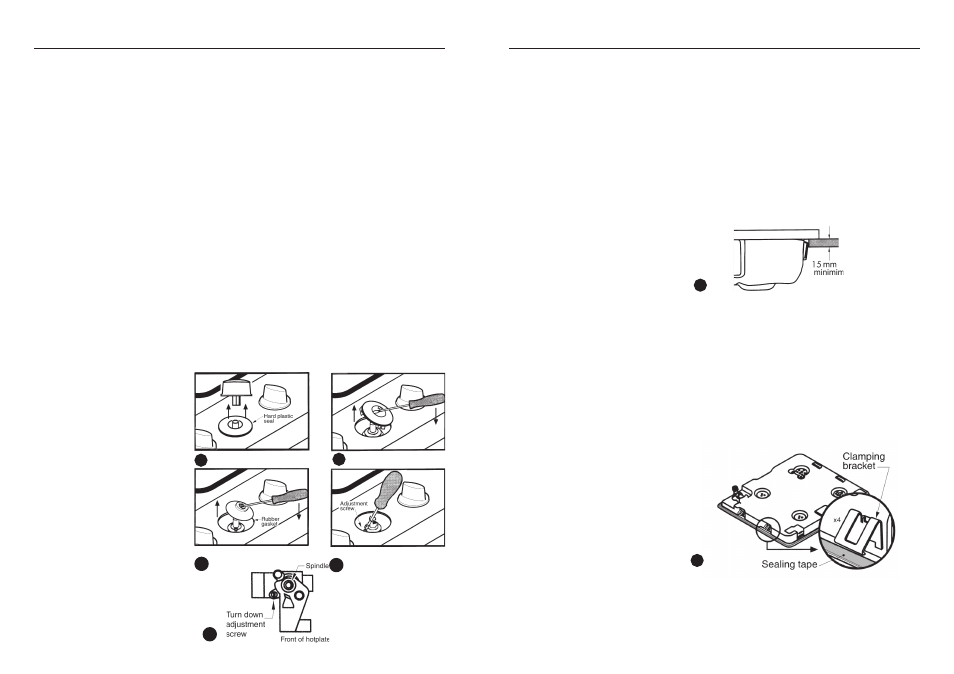
Minimum thickness of benchtop is 15mm. See Fig. 2.
Installation procedure:
1. For cutout dimensions and clearances refer Fig 1.
2 The hotplate is factory fitted with sealing tape
around the lower edge of the hob and two pres-
sure clamps front and rear. The seal keeps the en-
tire work surface watertight and prevents spillage
from leaking into cupboards underneath. Please
ensure that the sealing tape is not disturbed during
the installation process. Refer Fig. 3.
3 Place hotplate on top of the bench cut-out and press
down firmly on all edges at the same time to en-
sure that the hob is resting on its entire perimeter.
NOTE: If it is necessary to dismount the hob, press
upwards only from underneath.
10
Minimum flame adjustment
1 Turn the control knob to minimum.
2 Remove the control knob from the valve spindle.
Refer Fig. 8.
3 Using a screwdriver carefully pry off the hard plas-
tic seal. Refer Fig. 9.
4 Using a small screwdriver carefully remove the soft
rubber seal. Refer Fig. 10.
5 The adjustment screw is positioned at the rear lower
section of the valve. Refer Fig. 11 & 12.
6 To adjust the minimum flame for N.G. replace the
control knob onto the spindle, light the gas and
turn the control knob to the small flame position.
Screw the adjustment screw anti-clockwise to es-
tablish a minimum stable flame position. The flame
should remain alight and not burn back to the in-
jector when the valve is turned quickly from ‘Full
On’ to the “Minimum flame” position and back a
few times.
To adjust the minimum flame position for LP Gas
the screw must be fully tightened down clockwise.
7 Remove the control knob, replace the seals in re-
verse order and refit the control knob.
Installation of cooktop
into the kitchen bench
2
3
Clearances
8
9
10
11
12