Powerbrush parts identification, Figure 2. figure 3. figure 4 – Beam Electrolux Alliance Q User Manual
Page 5
5
ASSEMBLY & OPERATING INSTRUCTIONS FOR THE POWERBRUSH
When using the powerbrush, the basic precautions outlined under “IMPORTANT SAFETY
INSTRUCTIONS” should always be followed.
1. Push the wand into the powerbrush socket until it locks in place. The wand
socket is designed with a positive stop. Therefore, the wand will not jam
in the wand socket. Insert hose end into the powerbrush wand on the
assembled powerbrush until is locks in place. (figure 3)
2. Make sure the hose handle button is OFF. Note: The handle is in the OFF
position when the indicator in the ( ) button is OFF.
3. Insert the hose into the wall inlet valve (faceplate), and plug the cord into the
electrical outlet. (figure 4)
4. Lower the wand from the upright position.
5. To turn the central vacuum ON, press the ( ) button.
6. To turn on the powerbrush, press the powerbrush button ( ) to
turn it on.
7. To turn off the powerbrush, press the symbol Powerbrush ( )
button. The indicator in the icon will turn off.
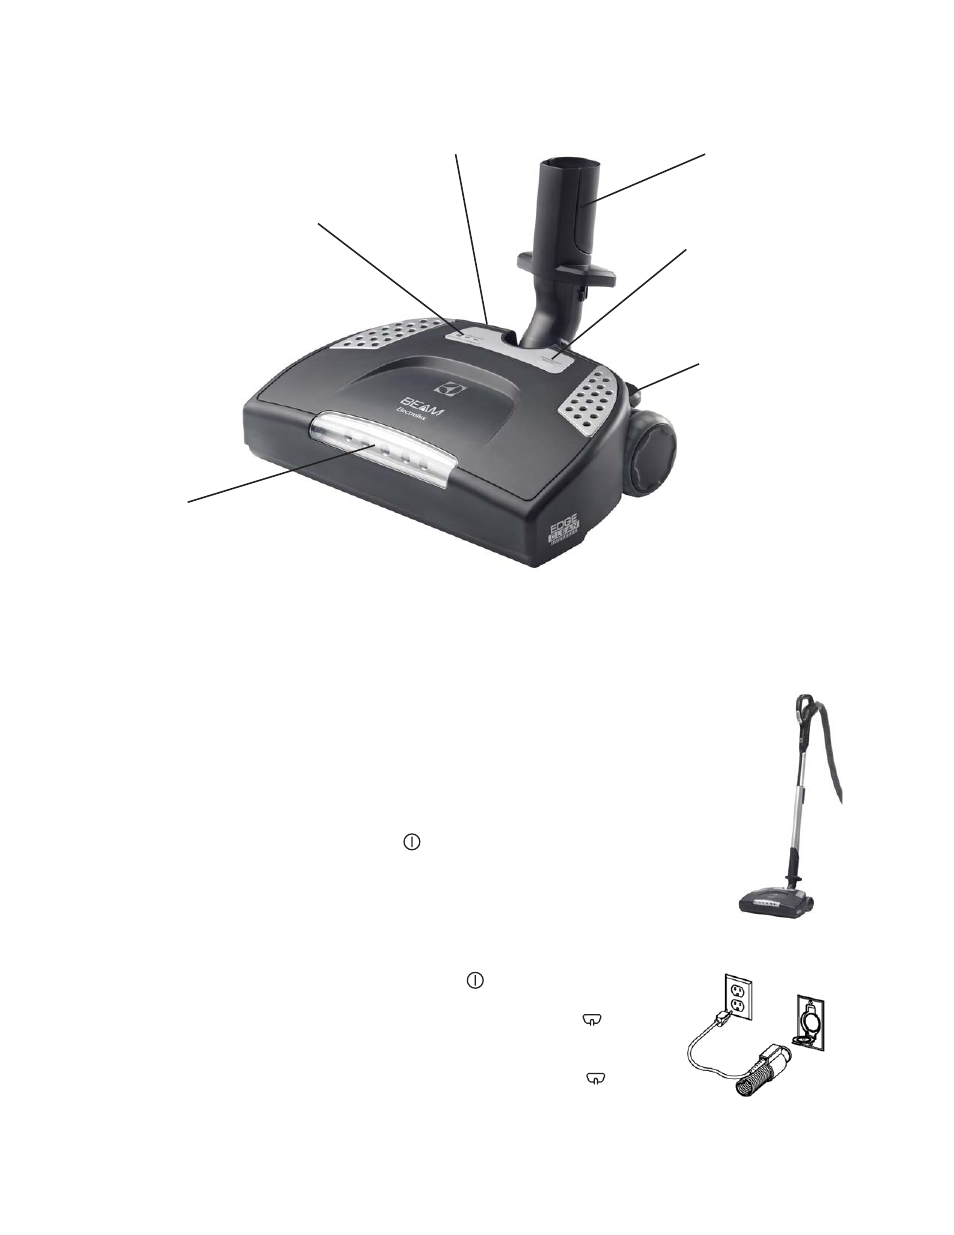
POWERBRUSH PARTS IDENTIFICATION
Quick Release Neck
Circuit Breaker Indicator
(glows red in color for
a stalled or jammed
condition)
Handle Release Pedal
Height Adjustment Pedal
Height Adjustment LED Indicator
LED Lights
Figure 2.
Figure 3.
Figure 4.
Power Button
(Phoenix & 2G)
Phoenix :: CUI1 & 2G
Left Scroll
Right Scroll
Enter
Attention Needed
Status OK
Status OK
Power Level Button
(2G)
2G-to-Unit Connection
Time
Error Code
Power Nozzle Button
(2G)
Power ON/Power Level
(2G)
Performance Level
Bucket Level
Motor Running
Screensaver
Call for Service