Step 5 – Road Armor 2005-2011 Toyota Tacoma Rear Bumper User Manual
Page 2
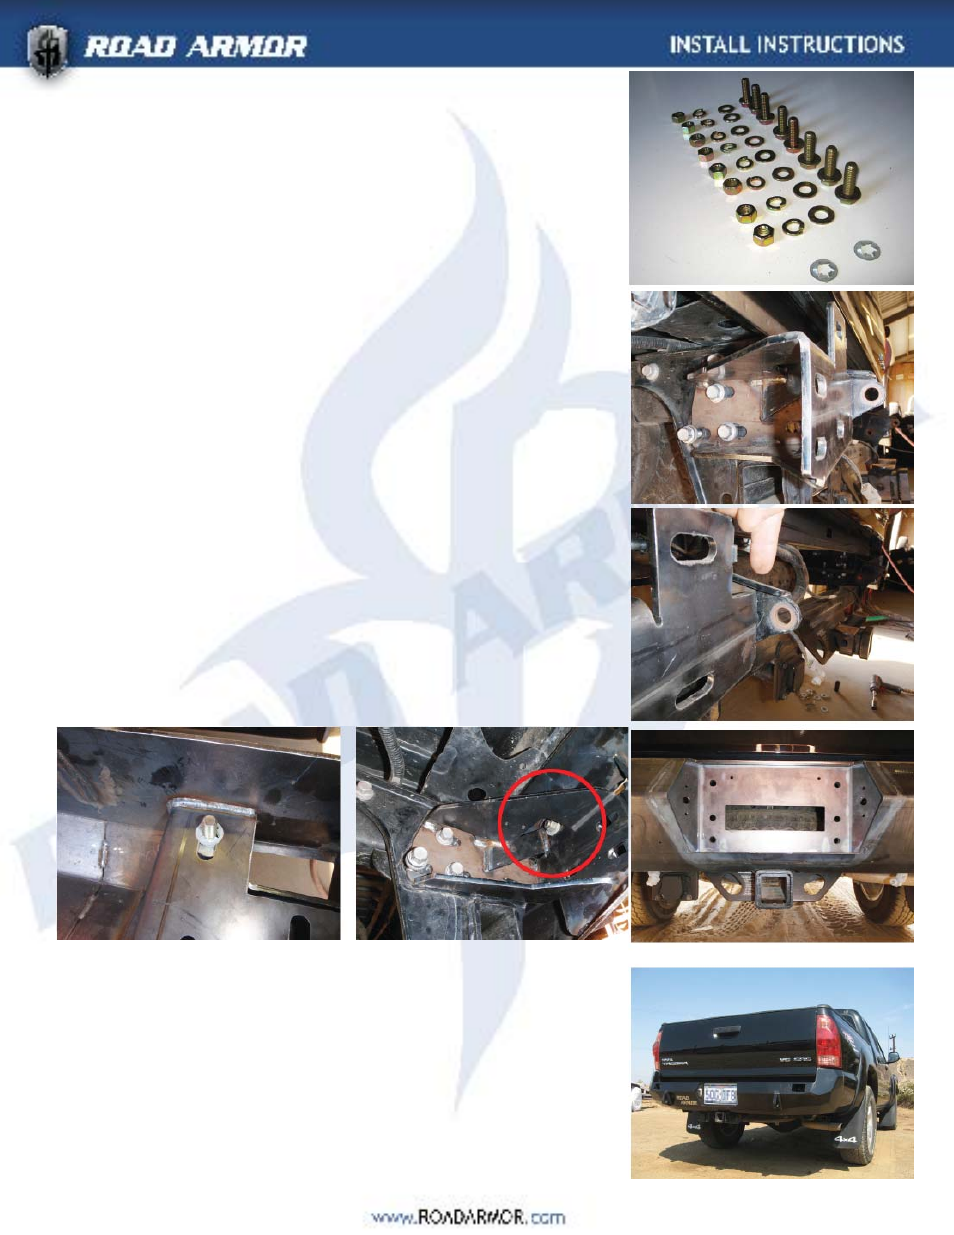
STEP 1 :
Make sure you have all necesary tools and hardware.
Hardward Kit Includes : ( all Grade 8 )
(8) ½” x 1.5” Tabbed bolts coarse thread Grade 8
Bolts (Manufactured Part)
(2) ½” x 1.5” coarse thread Grade 8 Bolts
(12) ½” Washers
(10) ½” Lock Washers
(10) ½” Coarse Thread Nuts
(4) 1.25” 3/8 SOCKET CAP WINCH BOLTS (Stainless)
(4) 1.25” 7/16 ALLEN HEAD WINCH BOLTS (Stainless)
(4) ALLEN HEAD BOLT & NUT (for logo)
(1) Small Road Armor Logo
STEP 2:
• Park on level surface and Disconnect Positive Battery Ter-
minal.
• Disconnect Reverse Lights and License Plate Lights.
STEP 3:
• Loosely Install brackets to frame using existing bolts.
• Optionally... You can cut off the excess frame extending
beyond the bracket. This isn’t necessary but will make life
easier for you when the time comes to bolt everything in.
STEP 4:
• Install one bolt in Road Armor bumper per side using re-
tainer clips as pictured below.
• Use a small socket to help push the retainer clips all the
way onto the bolt.
STEP 5:
• Carefully put bumper on and thread nut onto top bolts.
• Use your best judgement to align and center bumper.
• When you’re happy with the way it looks... and we
know you’ll be happy... tighten that baby down and
enjoy the view.
• And don’t forget to celebrate with a cold one.