Step 4 – Road Armor 2008-2011 Ford Super Duty Rear Bumper User Manual
Page 3
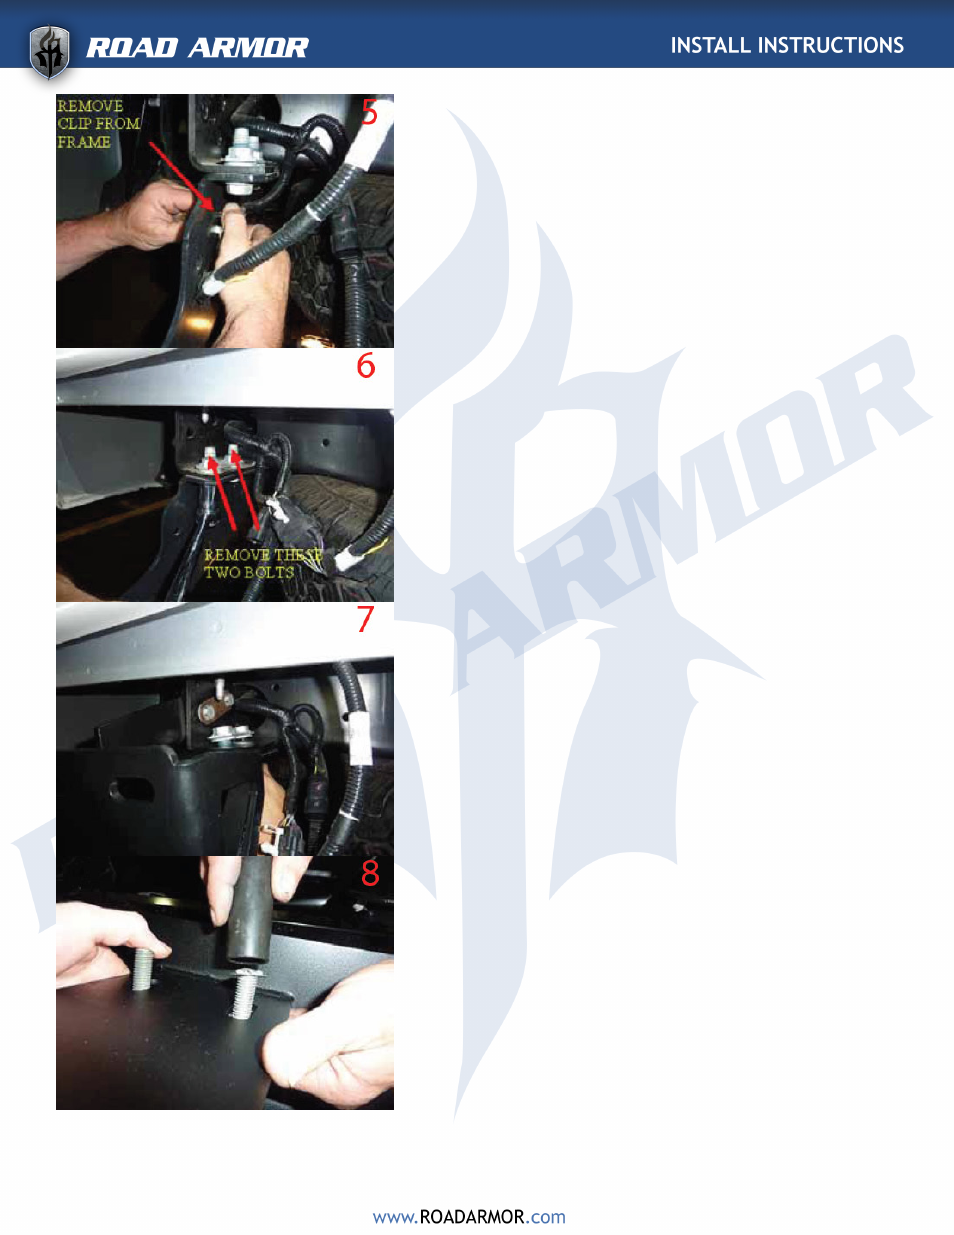
• Using 24mm socket remove bolts from nuts
plates which mount hitch assembly to frame.
This will not completely remove hitch from
truck. Only remove the set of bolts and nut
plates toward the rear of the truck.
Picture 6
Repeat this step for the other side of the truck.
STEP 4:
• Install the first Road Armor frame bracket using
stock hardware. Refer to picture to determine
how the bracket mounts onto the frame. Hand
tighten all bolts to allow for adjustment once
bumper is on truck.
Picture 7
Repeat this step for the other side of the truck
• Insert the first bolt plate into the one of the slots on
the bumper weld in brackets. Once bolt plate is in-
serted into lower slots push one ½” push on retainer
to hold bolt plate onto bumper.
Picture 8-9
Repeat this step for the three other bolt plates re
quired for bumper assembly.
• It’s time to install your road armor bumper. Using
either a lift or a couple buddies, move the bumper
into place. The bolt plates that are already placed into
the bumper will line up with the slots in the frame
bracket. If needed use a tape measure to align the
bolt plates with proper spacing to make mounting
the bumper easier.
• Lift the bumper and slide the bolt plates into the
slots in the frame brackets. Once bolt plates slide into
to frame bracket slots insert one ½” flat washer, ½”
lock washer, and one ½” nut on each bolt in each bolt
plate. Hand tighten all hardware.
Picture 10
Repeat this step for the other side of the bumper.
Hand tighten all hardware and prepare for final
adjustment.
• Make final adjustment to bumper and tighten all
hardware. Once bumper is fully adjusted attach stain-
less steel road armor logo to bumper with supplied
hardware
Enjoy your new Road Armor bumper