Apple Mac Pro (8-core) User Manual
Page 39
Chapter 3
Working Inside Your Computer
39
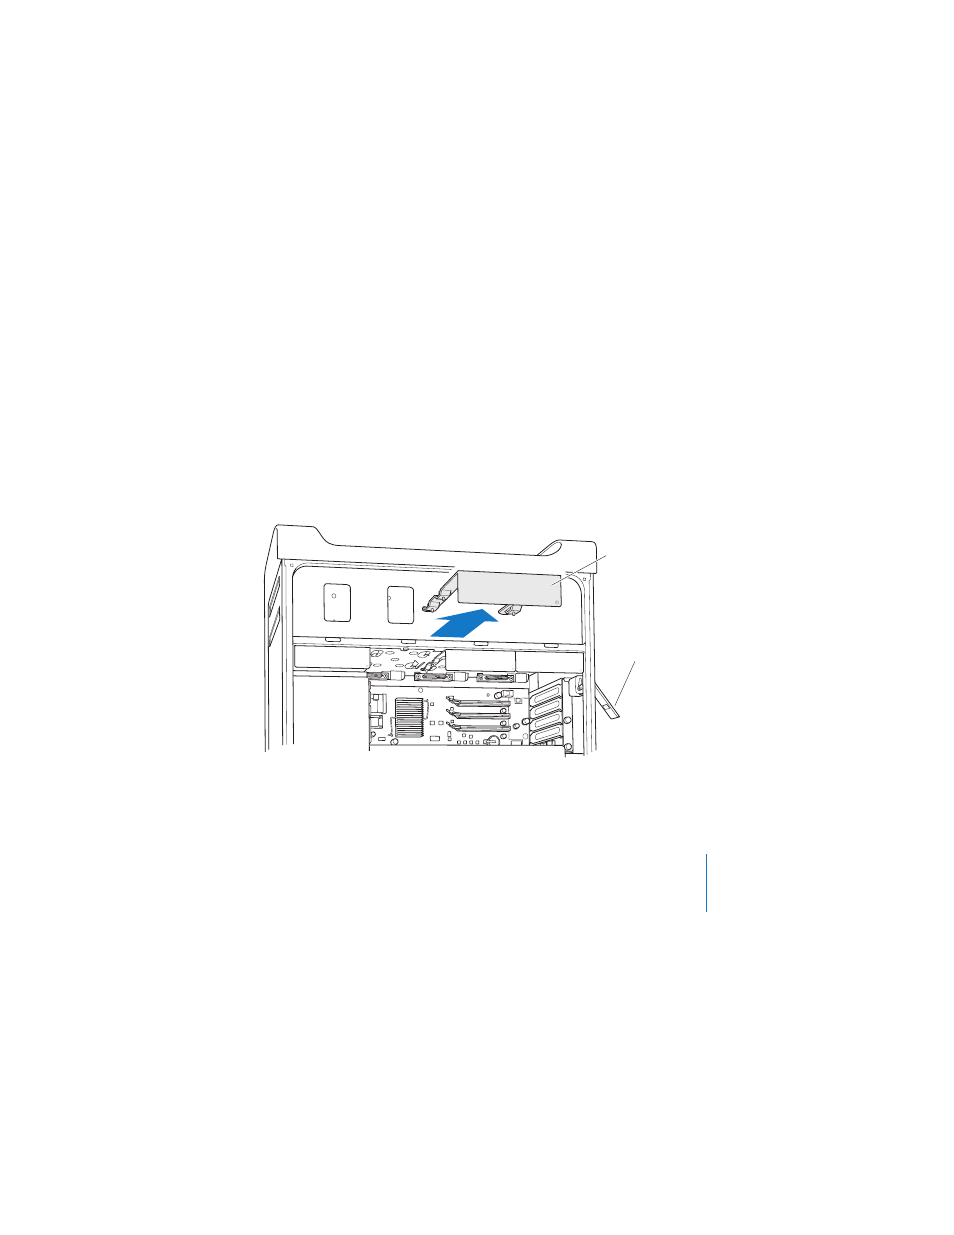
To install a hard disk drive:
1
Open your Mac Pro and remove the side panel following the instructions that
begin on page 28.
2
Lift the latch to unlock the hard drive carriers.
Important:
When the latch is down, the carriers are locked in the drive bays
and can’t be removed.
3
Pull the hard drive carrier out of the drive bay.
Pull out the hard
drive carrier.
Lift the latch to
unlock the carriers.
See also other documents in the category Apple Computers:
- iMac G5 (2005) (96 pages)
- iMac G5 (96 pages)
- iMac (6 pages)
- iMac (76 pages)
- Mac Pro Computer (92 pages)
- Mac Pro (88 pages)
- Mac mini (96 pages)
- Mac mini (original) (106 pages)
- eMac (10 pages)
- eMac (80 pages)
- Power Mac G5 (Late 2005) (33 pages)
- Power Mac G5 (Early 2005) (120 pages)
- iMac G3 (38 pages)
- Intel-based iMac (Mid 2007) (76 pages)
- iMac G5 (iSight) (96 pages)
- Mac mini (Early 2006) (96 pages)
- Power Mac G5 (112 pages)
- Power Mac G5 (36 pages)
- Mac mini (Intel-based; Mid 2007) (72 pages)
- PowerPC G5 (15 pages)
- Macintosh Performa 578 (161 pages)
- Xserve G5 (94 pages)
- Xserve G5 (96 pages)
- Xserve (Hard Drive Replacement) (3 pages)
- Workgroup Server 8550 (121 pages)
- Workgroup Server 8550 (163 pages)
- iMac computer (120 pages)
- LC 560 (2 pages)
- Mac G4 (Video Card Replacement) (6 pages)
- Mac 6500/275 (232 pages)
- Mac Performa 5300 CD series (Tech informatiom) (8 pages)
- Power Macintosh 6500 Series (260 pages)
- eMac (Stand Installation) (13 pages)
- Remote Desktop (203 pages)
- Remote Desktop (16 pages)
- Remote Desktop (116 pages)
- MAC PRO (Hard Drive Replacement) (5 pages)
- iMac G5, 20-inch (314 pages)
- iMac G5, 20-inch (22 pages)
- Power Macintosh 7100/66AV (132 pages)
- Xserve Late 2006/Early 2008 (PCI Expansion Card Replacement) (6 pages)
- Xserve (Blower Replacement) (5 pages)
- Xserve RAID (Locking Switch Replacement) (6 pages)
- Macintosh Performa 640 Series (DOS Compatible) (196 pages)
- Mac 9600 (237 pages)