Endwall to roof flashing installation – Mueller U-Panel User Manual
Page 22
22
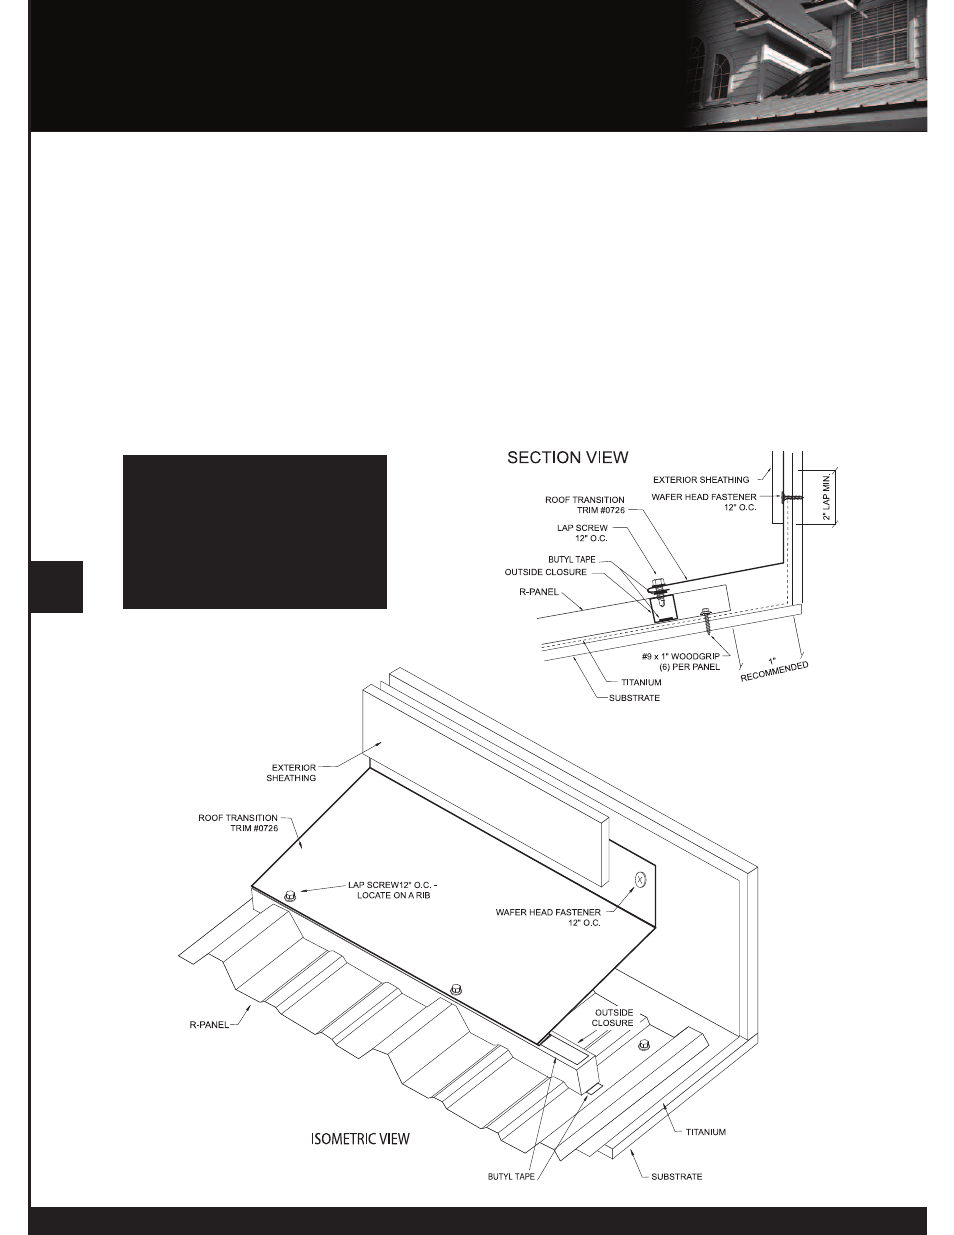
ENDWALL TO ROOF FLASHING INSTALLATION
Details are subject to change without prior notice.
1. Insert the endwall flashing (#0726) behind the existing wall counter-flashing and attach to the wall using
appropriate fasteners. Make sure the receiver hem of the endwall flashing is resting on the top of the roof sheet rib.
If required, cap the ends of the trim by cutting and folding a tab. Remove the hems before making the folds.
2. If there is no counter-flashing, install counter-flashing using appropriate fasteners.
3. Install the outside closure on top of the roof panel. Make sure the closure is in line with the lower flange
of the endwall trim.
4. Install the endwall trim by attaching with lap screws @ 12” O.C. Locate the screws at the high ribs to
prevent dimpling of the endwall trim due to over-tightening.
5. All end laps should be at least 4”. Remove 4” of the hem on the overlapping piece and secure to the
overlapped piece with caulk and stitch screws.
NOTE: Alternate trim profiles are acceptable using the screw pattern shown.
NOTE: To comply with Texas
Windstorm Certification Testing,
#12x11 SDT Type A screws must
be used in place of the #9
Woodgrip screws.